Leveling the lawn mower deck – DR Power 42 Lawn Mower Deck User Manual
Page 12
12
DR
®
42" LAWN MOWER DECK
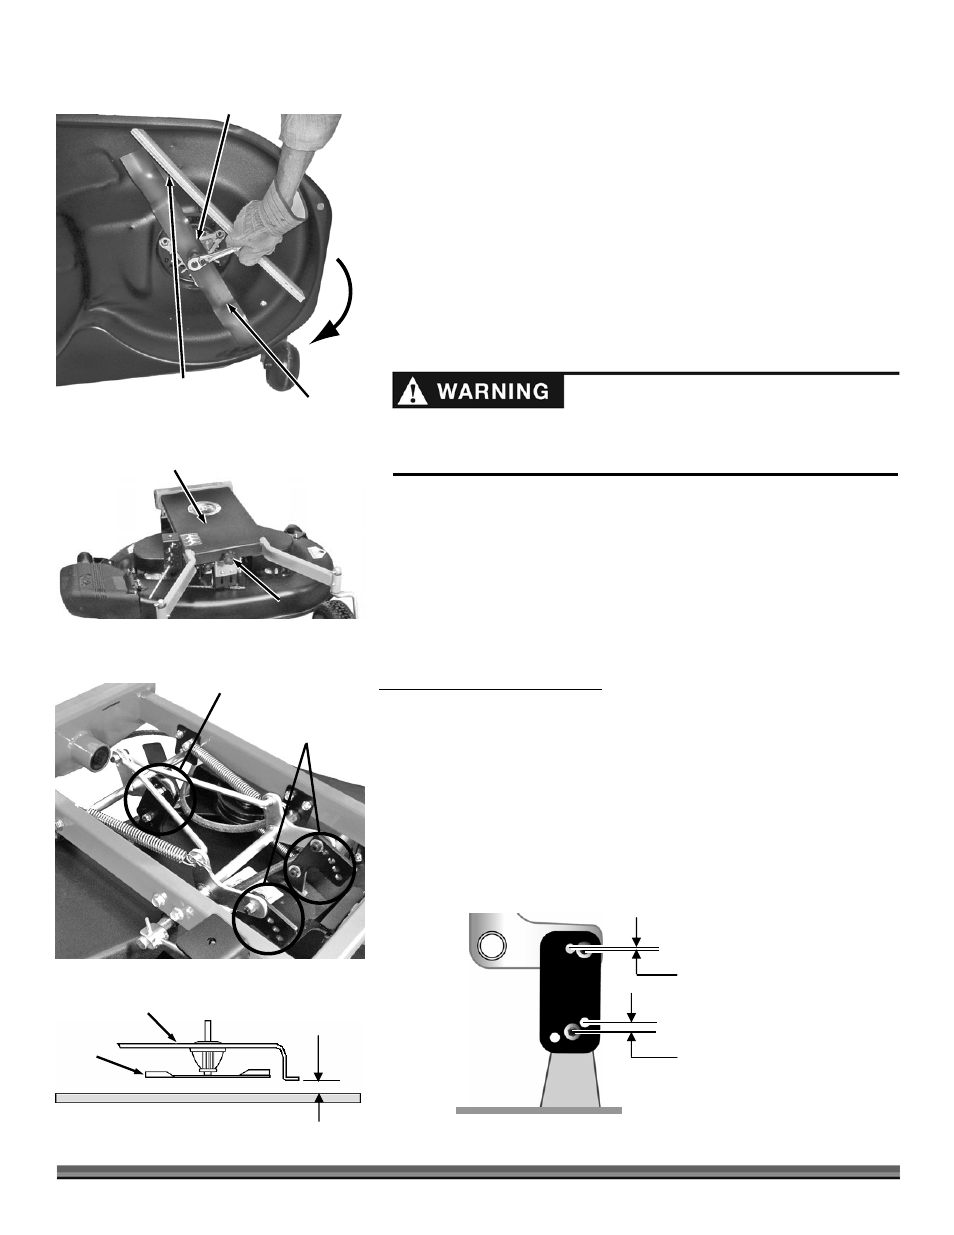
Deck
Rear
Adjustment
Brackets
1/16"
Adjustment
1/4"
Adjustment
Figure 19
6. Mount the new Blade (with the center flange towards the ground), Blade
Washer, Lock Washer, and Blade Bolt, in that order (
Figure 15
).
7. Block the blade with the wood piece and tighten securely (Torque 30-40 ft-
lbs.).
NOTE: Be sure that you have the Blade seated completely over the small ridge in
the spindle hub before tightening the Bolt.
8. Repeat Step 6 for the other Blade.
Leveling the Lawn Mower Deck
The DR 42" LAWN MOWER DECK settings made at the factory are suitable for
most purposes, however, leveling adjustments from side to side and front to
rear can be made if desired by following the instructions below.
NOTE: All references to left and right are from the Operator's position.
Tools needed:
•
1/2" Wrench
•
3/16" Allen Wrench
1. Move the machine to a level area.
2. Unscrew the Knob and remove the Main Belt Cover (Figure 16) and locate
the Adjustment Brackets (Figure 17).
Leveling the Deck Front to Rear
NOTE: Adjusting the Deck so the rear is 1/4" higher than the front will provide the
best cut.
1. Measure the distance from the ground to the bottom of the Deck Edge
Flange at the front and rear of the Deck (Figure 18).
2. Using a 3/16" Allen Wrench and a 1/2" Wrench, adjust the Deck from front
to rear as needed by moving the top and/or the bottom Bolt to a different
hole in the Rear Adjustment Bracket (Figure 19).
Blade
Measure
Here
Mower
Deck
Figure 18
Before performing any maintenance procedure or inspection, stop the engine
of the Field and Brush Mower, wait five (5) minutes to allow all parts to cool.
Disconnect the spark plug wire, keeping it away from the spark plug.
Main Belt
Cover
Figure 16
Knob
Front Adjustment
Brackets (side to
side adjustments)
Rear Adjustment
Bracket (front to
rear adjustments)
Figure 17
Wood Piece Inserted
to Block the Blade
Tighten
Figure 15
Blade
Flange towards
Ground