I/o connectors, Chapter 2 – DFI HM100-HM86 User Manual
Page 20
www.dfi .com
20
Chapter 2 Hardware Installation
Chapter 2
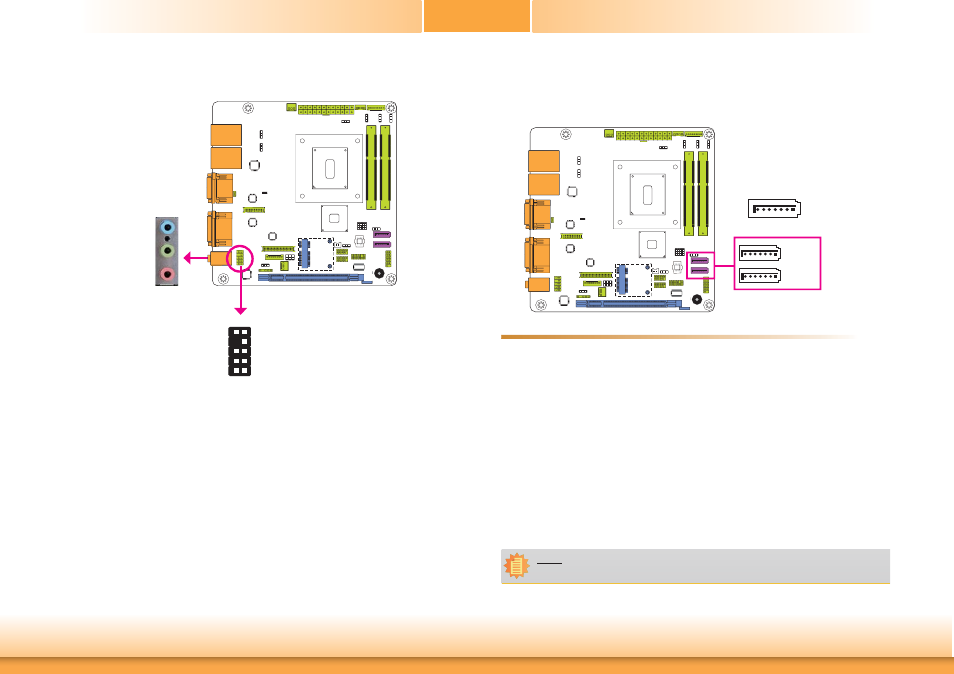
Audio
Rear Audio
The system board is equipped with 3 audio jacks. A jack is a one-hole connecting interface for
inserting a plug.
• Line-in Jack (Light Blue)
This jack is used to connect any audio devices such as Hi-fi set, CD player, tape player,
AM/FM radio tuner, synthesizer, etc.
• Line-out Jack (Lime)
This jack is used to connect a headphone or external speakers.
• Mic-in Jack (Pink)
This jack is used to connect an external microphone.
Front Audio
The front audio connector allows you to connect to the second line-out and mic-in jacks that
are at the front panel of your system.
Driver Installation
Install the audio driver. Refer to the chapter 4 for more information.
Front Audio
1
Mic2-L
Line2-R
Front_IO_Sense
GND
Presence Signal
Key
2
10
Mic2-JD
Line2-JD
9
Mic2-R
Line2-L
Line-out
Line-in
Mic-in
Rear audio
I/O Connectors
SATA (Serial ATA) Connectors
SATA 3.0 6Gb/s
SATA 4
SATA 5
7
RXN GND
TXP
TXN
GND
1
RXP
GND
• 2 Serial ATA 3.0 ports with data transfer rate up to 6Gb/s (SATA 4 and SATA 5)
• Integrated Advanced Host Controller Interface (AHCI) controller
• Supports RAID 0/1 (HM100-QM87)
• Supports
Intel
®
Smart Response Technology (HM100-QM87)
The Serial ATA connectors are used to connect Serial ATA devices. Connect one end of the Serial
ATA data cable to a SATA connector and the other end to your Serial ATA device.
The system board package comes with a power cable that must be connected from the system
board’s peripheral power connector to the SATA drive’s power connector in order to provide
power to the drive.
BIOS Setting
Configure the Serial ATA drives in the Advanced menu (“SATA Configuration” submenu) of the
BIOS. Refer to the chapter 3 for more information.
Features
Note:
SATA port 4 provides adequate space for SATA DOM.