Web-sync season, Dakstats web-sync setup guide 3 of 7 – Daktronics DakStats Web-Sync User Manual
Page 3
DakStats Web-Sync Setup Guide
3 of 7
201 Daktronics Drive PO Box 5128, Brookings, SD 57006-5128
Tel: 1-800-DAKTRONICS (1-800-325-8766) Fax: 605-697-4746
Web: www.daktronics.com
ED-14571 Rev 3
12 December 2012
4. Select the Season and a Team. Both of these must be setup beforehand
through the appropriate Configure menus.
5. Enter your E-mail address.
6. Select Full Web-Sync.
Note: Retrieve Only Web-Sync is for teams that Webcast to the
Web-Sync site.
7. Click Save and then click Done. This will be your profile for the
entire season.
8. Repeat steps 1-7 for any other teams that will be using the Web-Sync.
(Ex: Men’s and Women’s teams are Web-Synced separately.)
Web-Sync Season
With the Web-Sync profile set up, follow the steps below. Web-Syncs should
be performed as soon as possible after every game.
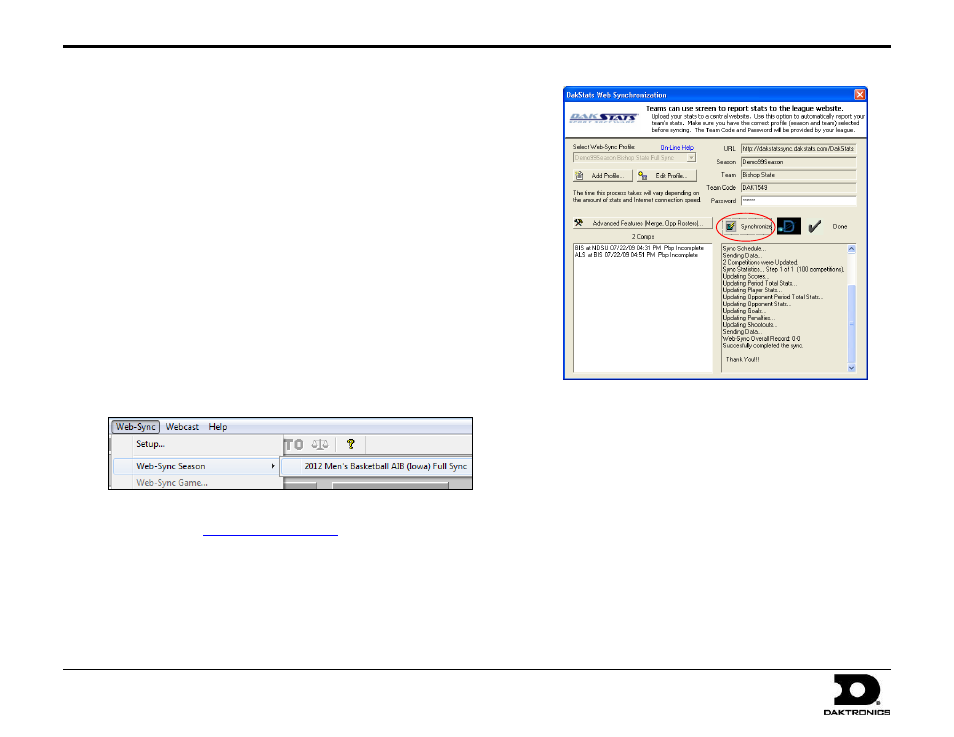
1. To start the Web-Sync, go to Web-Sync > Web-Sync Season, and
then select the appropriate profile from the list.
2. Enter your Password provided by DakStats. If you do not have your
school name.
3. Click Synchronize button. The gray box will display the status of the
Web-Sync.
4. Click Done when the sync is finished.
Note: The following steps do not occur each time a team Web-Syncs:
1. When Web-Syncing for the first time, a window will appear
asking to verify the team and gender. Click Yes if it is correct.
2. DakStats will download last year’s roster to compile career
reports. You will then see the Problem Resolving Player window.
3. There will be a name in the gray box at the top of the window.
Select the same player from the roster in white and click Select.
If the player in gray is no longer with the team, choose Add New.
4. After the roster has been resolved, the Configure Rosters screen
will appear. Highlight any player that is no longer on the team
(added from step 3) and click Delete.
5. Click Close when finished.