Daktronics DF-12xx User Manual
Page 37
Maintenance and
4-5
Troubleshooting
To replace the driver in the display enclosure:
1. Open the digit panel or display face panel as described in Section 4.2.
2. Remove the cover from the driver enclosure.
3. It is helpful to have the cables labeled as to which was removed from which
connector.
4. Disconnect all connectors from the driver. Release each connector by
squeezing together the locking tabs as you pull the connector free. Note:
When reconnecting, remember that these are keyed connectors and will
attach in one way only. Do not attempt to force the connections.
5. Remove the wing nuts securing the driver to the inside of the enclosure.
6. Carefully lift the driver from the display and place it on a clean, flat surface.
7. Follow the steps in reverse order to attach a new driver.
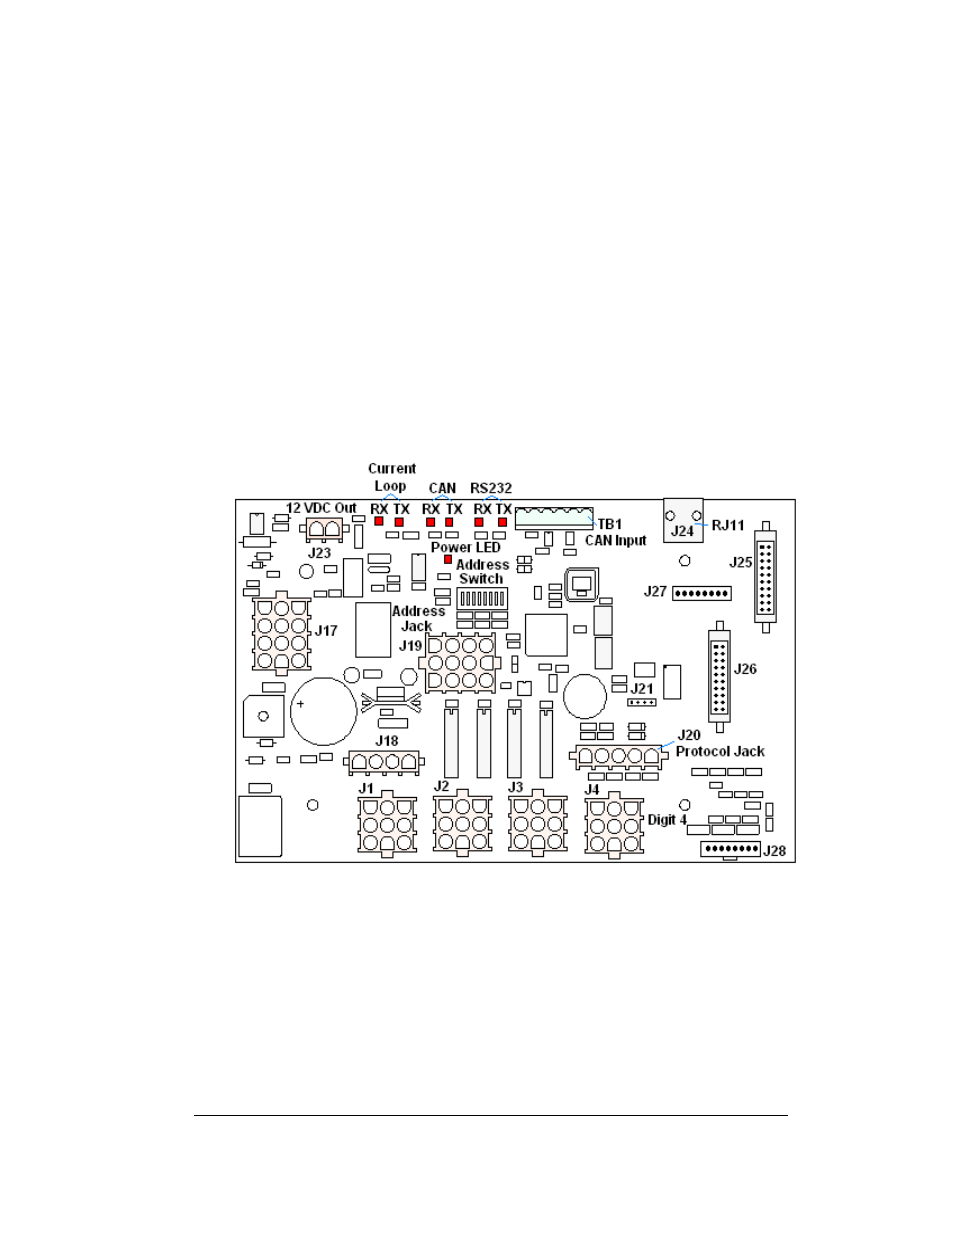
DataMaster Gas Price displays may use 4-, 8-, or 16-column drivers, depending on
the model and size of digits. Each 16-column driver is so named because it has 16
outputs to digits as compared to the 8- and 4-column drivers.
Figure 19
identifies the
major functions for a 4-column driver. (Major functions are the same on 8- and 16-
column drivers.)
In the display, the LED drivers perform the task of switching digits on and off. Refer
to Drawings A-166216, A-167237, and A-184475 for a complete listing of
connector functions and wiring pin numbers for the correct driver for your display.
Figure 19: 4-column Digit Driver