5 scoreboard protective devices, Scoreboard protective devices, Clamping angles – Daktronics TN-2601 Outdoor LED Tennis Scoreboard User Manual
Page 17
Mechanical Installation
11
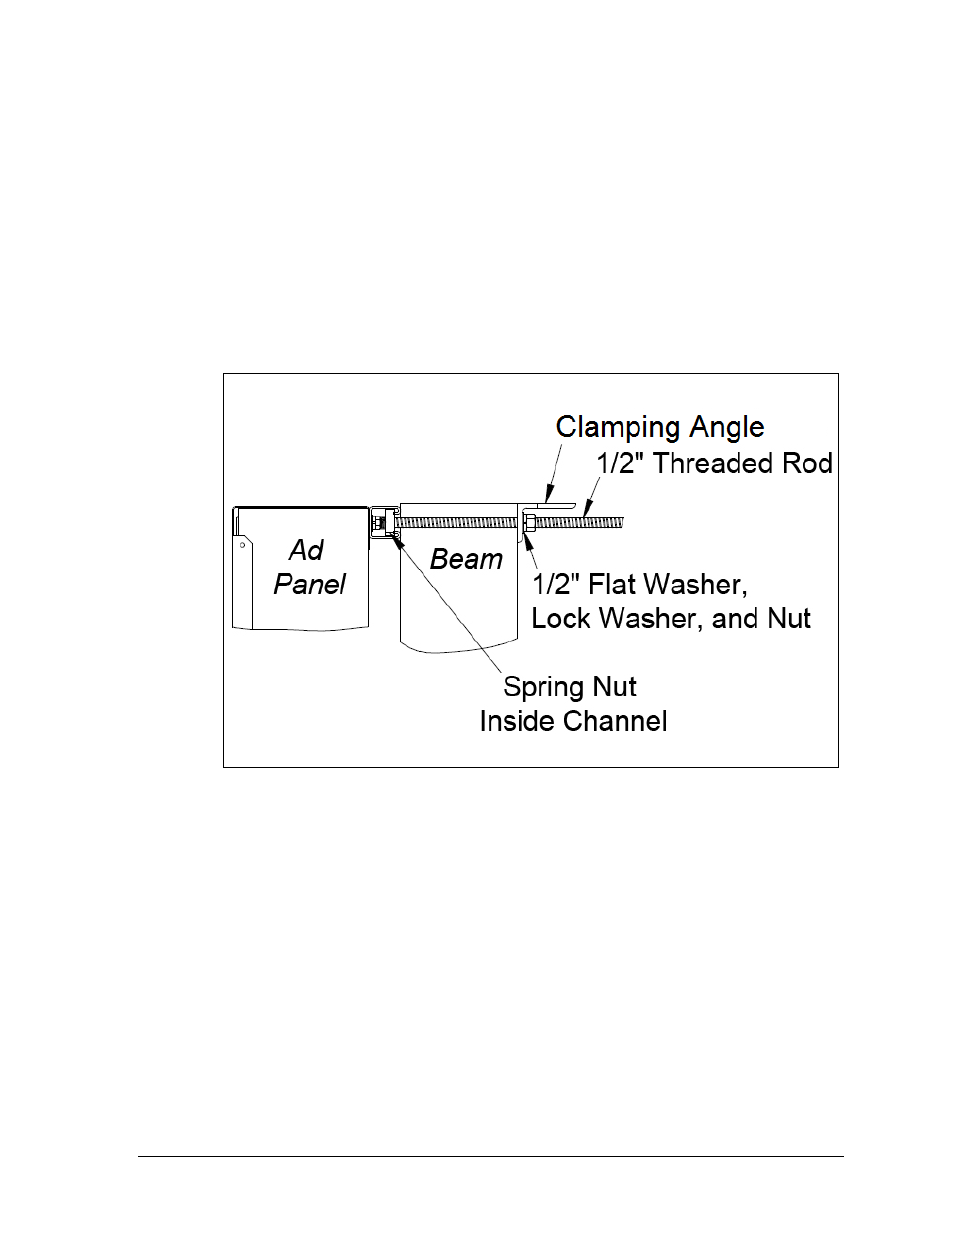
Clamping Angles
Mounting hardware includes rear clamping angles;
1
/
2
-13 x 24" threaded rods; and
1
/
2
" nuts,
flat washers, and lock washers. Refer to Figure 12 and Drawing A-1052388 in Appendix B.
Note: The threaded rods do not pass through the beams; they run along both sides.
1. Screw a threaded rod into each of the spring nuts as far as it will go.
2. Position the scoreboard at the front of the beams, and lift it to the desired height.
3. Slide clamping angles over the ends of the rods and loosely install the washers and
nuts.
4. Make final adjustments in the positioning of the ad panel to ensure it is flush and
level, and firmly tighten all of the
1
/
2
" hex nuts.
2.5 Scoreboard Protective Devices
Daktronics makes optional protective devices, including screens and netting, to help prevent
damage to the scoreboard due to normal ball impacts.
Note: Some users install devices to protect the scoreboard from projectiles. Scoreboard
protection devices not provided by Daktronics must be approved by Daktronics prior to
installation. Failure to follow this approval procedure will void the scoreboard warranty.
Figure 12: Ad Panel Mounting with Clamping Angles, Side View
- TN-2603 Outdoor LED Tennis Scoreboard TN-2604 Outdoor LED Tennis Scoreboard TN-2605 Outdoor LED Tennis Scoreboard TN-2606 Outdoor LED Tennis Scoreboard TN-2607 Outdoor LED Tennis Scoreboard TN-2650 Outdoor LED Tennis Scoreboard TN-2651 Outdoor LED Tennis Scoreboard TN-2652 Outdoor LED Tennis Scoreboard TN-2653 Outdoor LED Tennis Scoreboard TN-2654 Outdoor LED Tennis Scoreboard TN-2655 Outdoor LED Tennis Scoreboard TN-2656 Outdoor LED Tennis Scoreboard TN-2657 Outdoor LED Tennis Scoreboard P1647 Single-Section Outdoor LED Scoreboard P1647 Multi-Section Outdoor LED Scoreboard FB-2500 Modular LED Football Scoreboard FB-2600 Modular LED Football Scoreboard