Installation – Desa LMFP33PR User Manual
Page 18
www.desatech.com
111604-01E
18
4.
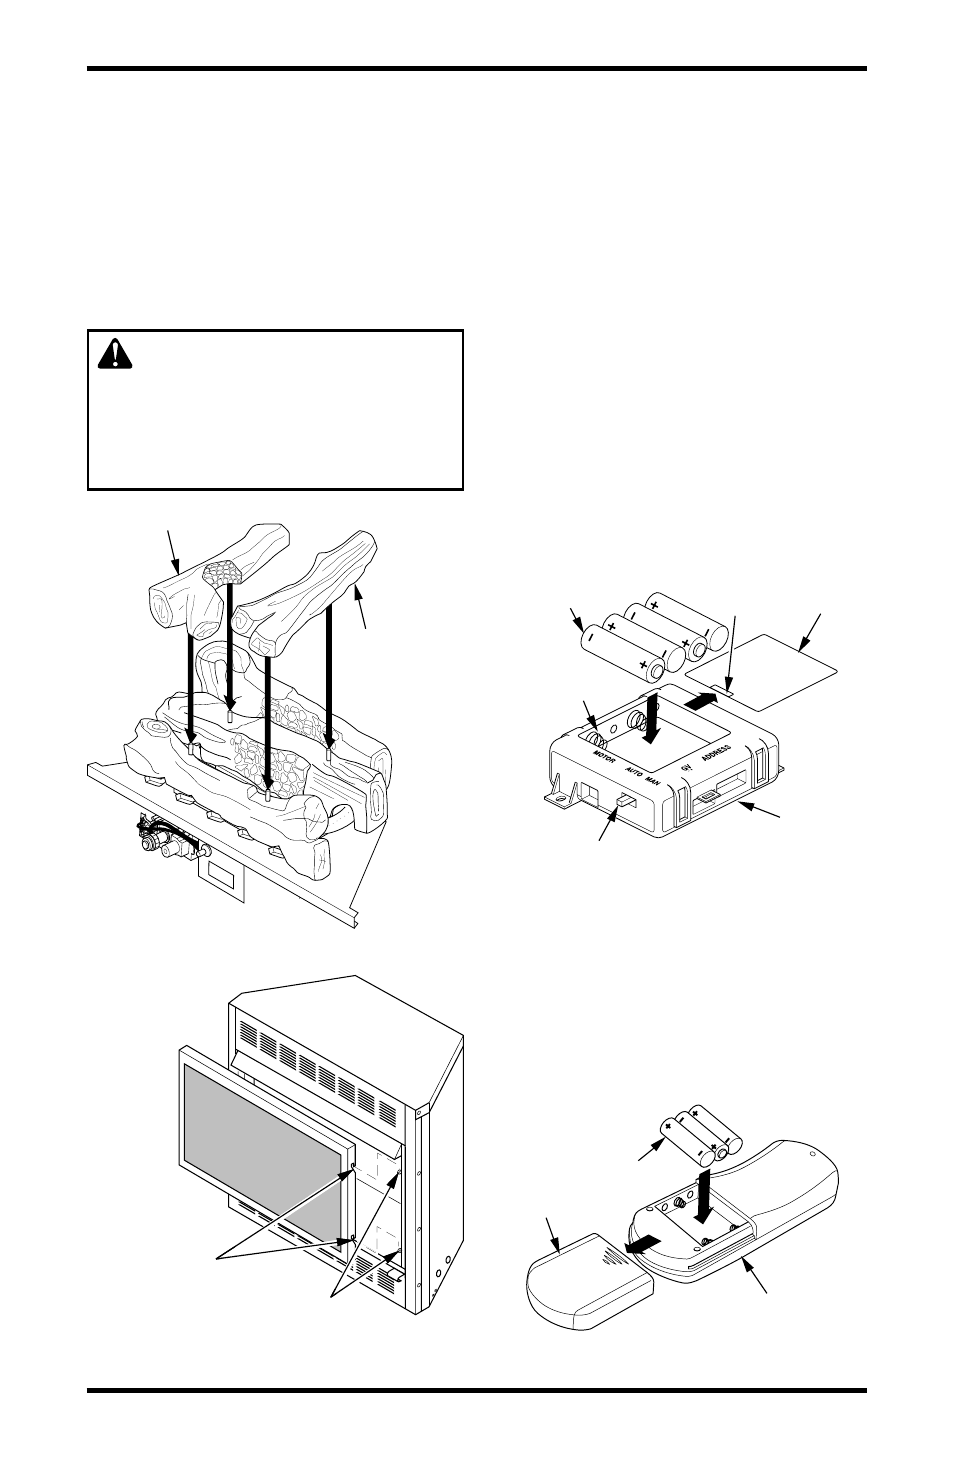
Place left top log on left pins on logs 2 and 3,
resting it on log 1 (see Figure 28).
5.
Place right top log on right pins on logs 2 and
3 (see Figure 28).
6.
Install fireplace screen by slipping notches of
fireplace screen over screws on front of fire-
place (see Figure 29).
WARNING: You must oper-
ate this fireplace with the fire-
place screen in place. Make sure
fireplace screen is in place be-
fore running fireplace.
INSTALLATION
Continued
Screws for Mounting Screen
Notches
Figure 29 - Installing Fireplace Screen
Figure 28 - Installing Logs 4 and 5
O
F
F
P
IL
OT
O
N
Right Top Log
Left Top Log
Figure 31 - Installing Batteries in Remote
Control
Cover
Remote
Control
3 AAA Batteries
Figure 30 - Installing Batteries in
Receiver
Cover
Receiver
Slot
4 AA Batteries
Battery
Housing
Backup Switch
INSTALLING BATTERIES FOR
REMOTE RECEIVER AND HAND
HELD REMOTE CONTROL
Four AA batteries and three AAA batteries are re-
quired to operate this heater with the wireless hand-
held remote control set. Four AA batteries must
be installed in the receiver and three AAA batter-
ies in the hand-held remote control unit.
Note:
Only use alkaline batteries.
Installing Batteries in Receiver
1.
Locate slot on battery cover of receiver (see
Figure 30). Firmly insert tool such as a small
screwdriver, butter knife, or dime into the slot
and lift up to remove cover.
2.
Insert 4 AA batterines into receiver. Positive
and negative are marked inside receiver cas-
ing.
Note:
Receiver will not function if bat-
teries are not installed correctly.
3.
Slide tab on cover into receiver housing and
snap cover back into place.
Installing Battery into Remote
1.
Remove remote cover (see Figure 31).
2.
Insert 3 AAA batteries into remote control (see
Figure 31). Positive and negative are marked in-
side remote control casing.
Note:
Remote will
not function if batteries are not installed correctly.
3.
Slide remote cover back into place.