Remote controls – Cloud Electronics LM-2B User Manual
Page 8
LM-2 Installation Guide v1.1
8
This also applies to multiple music sources simultaneously connected (though the possibility of resulting cacophony makes this
a less likely scenario!)
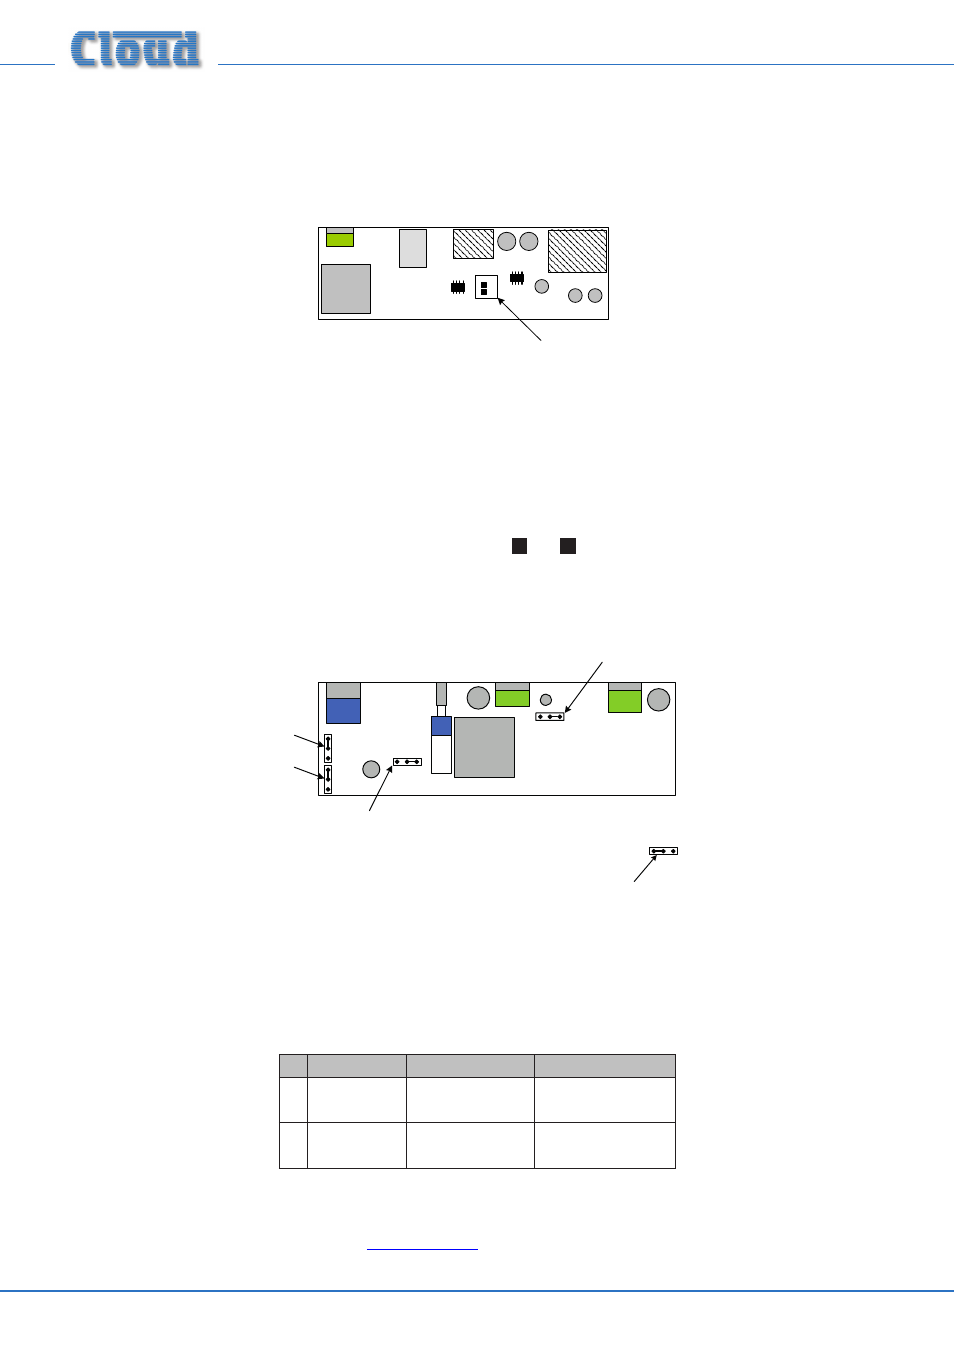
LM-2 LOWER PCB
PHONOS
XLR
DISABLE
LINK
GATE
LINK THESE TWO PADS
NOTE: Users should be aware when using simultaneous microphones and/or music sources from multiple linked modules, that
the operation of the LM-2’s Priority function may become unpredictable. We recommend that the Priority function is not used
under these circumstances.
Remote controls
When modules are linked, only one may act as the remote control for each of the host unit’s background music functions:
source and level. The MUSIC SOURCE and MUSIC LEVEL controls
7
and
8
(see “Faceplate Controls and Connections” on
page 4) on all but one of the linked modules must be disabled. This is done by moving jumpers J1 and/or J3 on the upper
PCB as required.
LM-2 UPPER PCB
J1
J3
J4
J2
LOCATION OF JUMPERS
Link indicates default jumper setting
The default setting for J1 and J3 is LOCAL; this enables both the faceplate background music source and level controls. Set both
jumpers to LINK to “pass” the remote control functions to the LM-2 connected at the LINK connected.
Note that the two functions – background music source selection and background music level – may be disabled individually, so
that one LM-2 in a Zone could control the music source and another the music volume.
FUNCTION
LOCAL
LINK
J1
Source select
Local LM-2 selects
music source
Linked LM-2 selects
music source
J3
Level
Local LM-2 sets
music volume
Linked LM-2 sets music
volume
Note that it is also possible to “daisy-chain” standard Cloud RL-1 and RSL-6 remote control plates to the LINK connector.
This would be useful if additional background music control points were required in the Zone, but not additional system inputs.
Please refer to the Technical Notes section at
or further information on this topic.