Faceplate controls and connections, Lm-2 installation guide v1.1 4 – Cloud Electronics LM-2B User Manual
Page 4
LM-2 Installation Guide v1.1
4
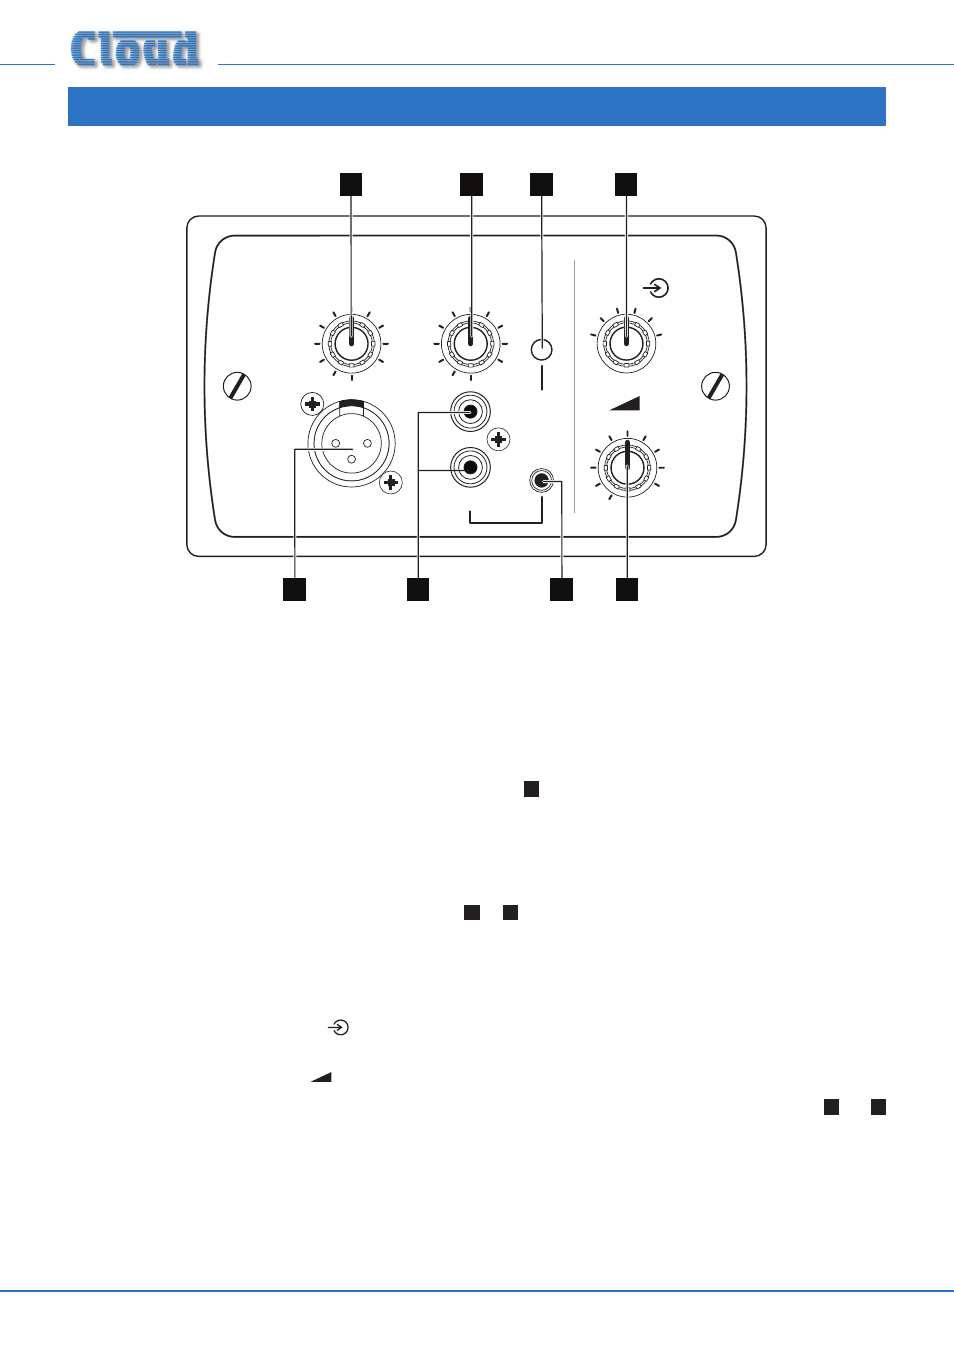
Faceplate Controls and Connections
MIC LEVEL
1
2
3
4
5
6
MUSIC LEVEL
UK version illustrated
LINE INPUT
MIC INPUT
LM-2
MIC
PRIORITY
1
4
5
2
3
6
7
9
10
8
0
1
4
5
2
3
6
7
9
10
8
0
1
4
5
2
3
6
7
9
10
8
0
2
1
3
8
4
5
7
6
1.
MIC INPUT – 3-pin XLR3F connector for dynamic microphones. Note that the LM-2 does not provide phantom power.
2.
LINE INPUT (a) – 2 x phono (RCA) sockets for connection of sources such as CD players, audio mixers, radio mic
receivers, etc; suitable for line level signals with a nominal level of 0 dBu.
3.
LINE INPUT (b) – 3-pole 3.5 mm jack socket for connection of sources such as computers, laptops and digital media
players; suitable for line level signals with a nominal level of +8 dBu. A source plugged into this input will be summed to
mono and mixed with any source connected to the phono inputs
2
.
NOTE: Both stereo line inputs are summed internally to mono; hence, if using a mono source such as a radio mic receiver, only
one channel need be connected.
4.
MIC LEVEL – gain control for mic input. Up to 60 dB gain is available; with the control fully anti-clockwise, the input is
effectively ‘off’.
5.
MUSIC LEVEL – gain control for whichever line input (
2
or
3
) is in use. With the control fully anticlockwise, the source
will be ‘off’; in the fully clockwise position, 10 dB of gain is provided.
6.
MIC PRIORITY – default function for this button is to give the microphone input priority over both the module’s line
input and the background music selected at the host unit. This operation can be modified by jumpers on the rear PCBs. See
“LM-2 Priority Operation” on page 9.
7. BACKGROUND MUSIC SOURCE
– six-position switch selecting which of the host unit’s six Line Inputs will be routed
to the Zone to whose Facility Port the LM-2 is connected (usually the Zone where the LM-2 is installed).
8. BACKGROUND MUSIC LEVEL
– adjusts the background music level in the Zone.
NOTE: Switches and internal jumpers will need to be set in the host unit in order for the background music controls
7
and
8
to operate as required. See “Remote controls” on page 8.