Simple file network wi-fi setup – BrightSign HD1010w WiFi Setup User Manual
Page 6
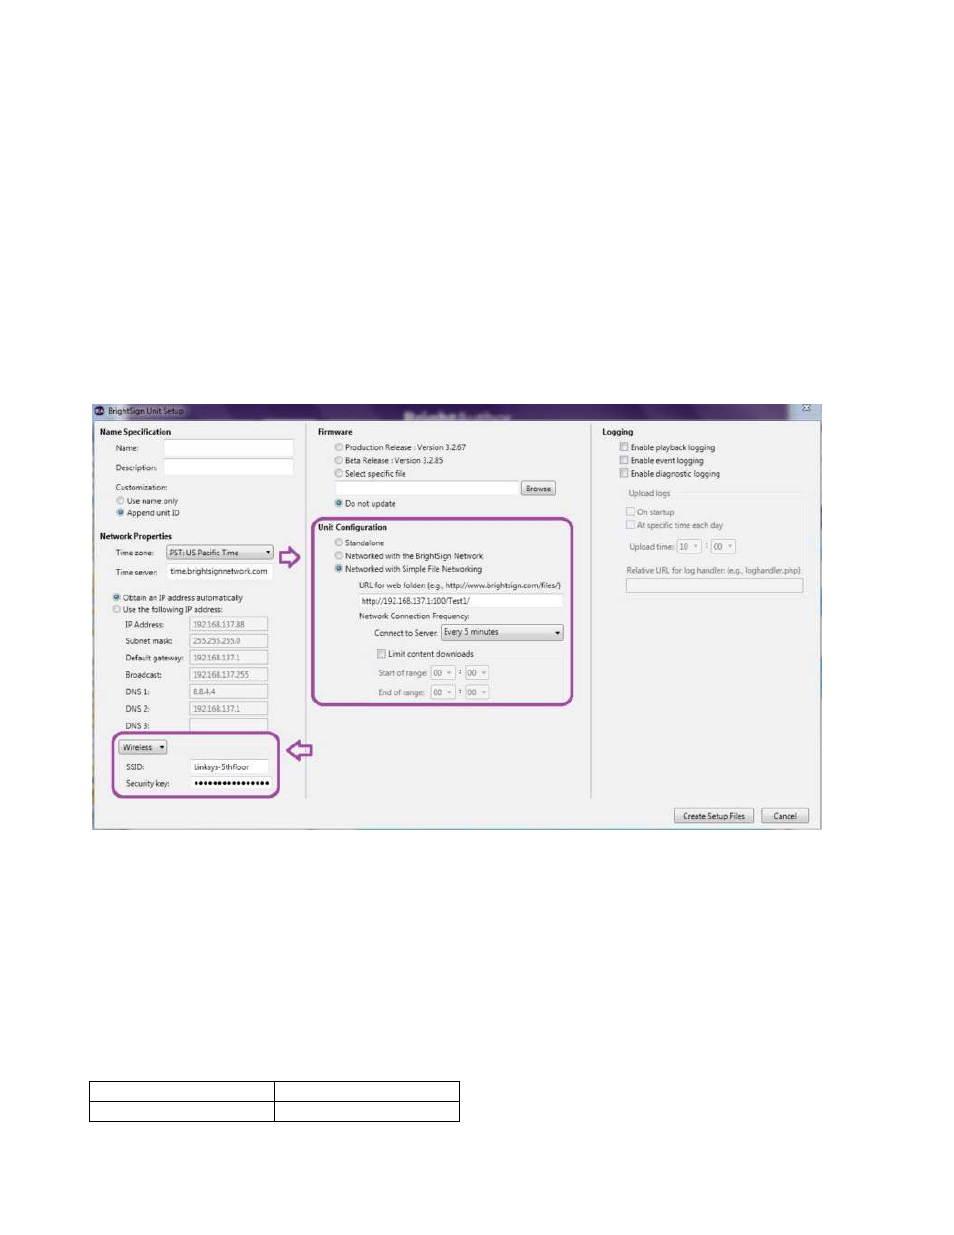
2.3
Simple File Network Wi-Fi Setup
Use this option to connect to a web server for content updates.
1. Under Tools Menu, select Setup BrightSign Unit
2. Select Networked with Simple File Networking under Unit Configuration
3. Enter the URL that the BrightSign will be using for updates. This must be an http URL, one access using
a web browser.
This URL must be identical to the Web folder URL you enter when you publish your
presentation.
4. In the lower left, Select Wireless from the dropdown menu
a. Enter your SSID
b. Enter your Wireless Security Key
5. Click Create Setup Files and save to setup card
6. Power up the BrightSign with the setup card
Note: In order to use Wi-Fi, you must configure Wi-Fi via the setup card (Setup BrightSign Unit process) and
unplug the Ethernet cable before powering on the BrightSign with the Wi-Fi setup card inserted.
Tip 1: If you’re updating from BrightAuthor 2.0, you do not need to redo the setup files on your units that are
currently using Simple File Networking for updates. You can publish changes using BrightAuthor 2.2, and the
units will update normally.
Tip 2: With BrightAuthor 2.2, files published for Simple File Networking updates now reside in the Pool folder.
These files are named using their hash key values, so they have no extensions. Since some web server do not
download files with no extensions, you may need to add a new mime type with a “.” as the only extension.
Extension
Mime Type
“.”
Application/Octet-Stream