Getting started, Stand-alone wi-fi setup – BrightSign HD1010w WiFi Setup User Manual
Page 4
2.
Getting Started
Please watch the web video
ou can use the BrightAuthor setup page
(Tools -> Setup BrightSign Unit) to configure a Stand-alone unit to use Wi-Fi, or to Setup BrightSign Unit using
Simple File Networking (updates from a web server) or Brightsign Networking (updates from BrightSign's
hosted service).
Note: Please read the “BrightAuthor 2.2 Network Features” section at the end of document for more details
about What’s New in BrightAuthor 2.2 that’s related to networking.
2.1
Stand-Alone Wi-Fi Setup
Use this option if you are not connecting to a web server or to the BrightSign Network, but need to be able to
set the date and time over the network, download RSS or Media RSS feeds, or Send and Receive UDP
commands.
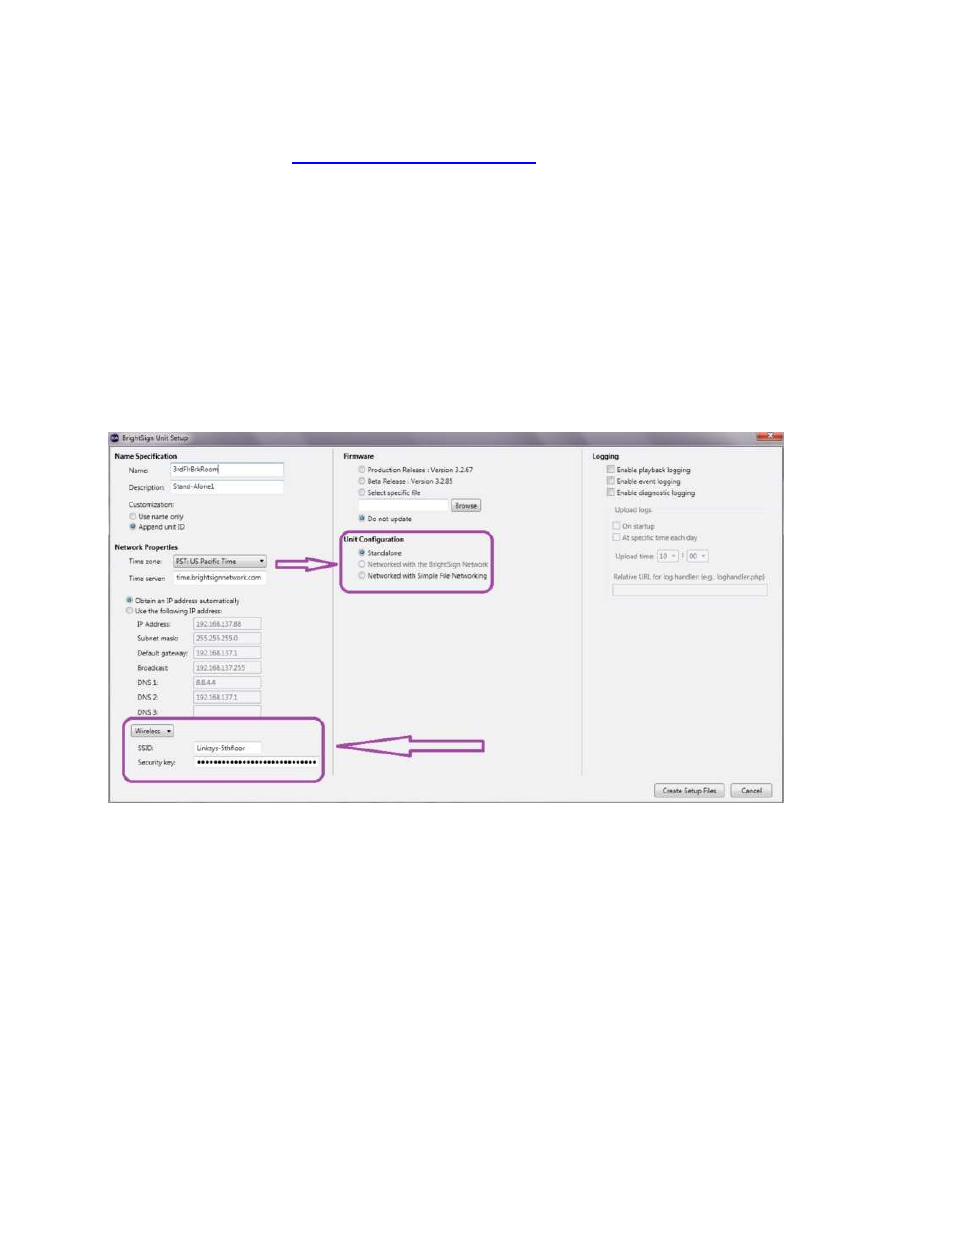
1. Under Tools Menu, select Setup BrightSign Unit
2. Select Standalone under Unit Configuration
3. In the lower left, Select Wireless from the dropdown menu
a. Enter your SSID
b. Enter your Wireless Security Key
4. Click Create Setup Files and save to the setup card
5. Power up the BrightSign with your setup card
6. Remove the setup card and restart the unit when prompted on-screen
7. Test the unit with a project that displays the date / Time, and an RSS feed
Note: In order to use Wi-Fi, you must configure Wi-Fi via the setup card (Setup BrightSign Unit process) and
unplug the Ethernet cable before powering on the BrightSign with the Wi-Fi setup card inserted.