Approx. 2, Attach a, Bracket – BDI 5156 Eileen Shelf User Manual
Page 3
3
assembly
instructions
bdiusa
.
com
customerservice
@
bdiusa
.
com
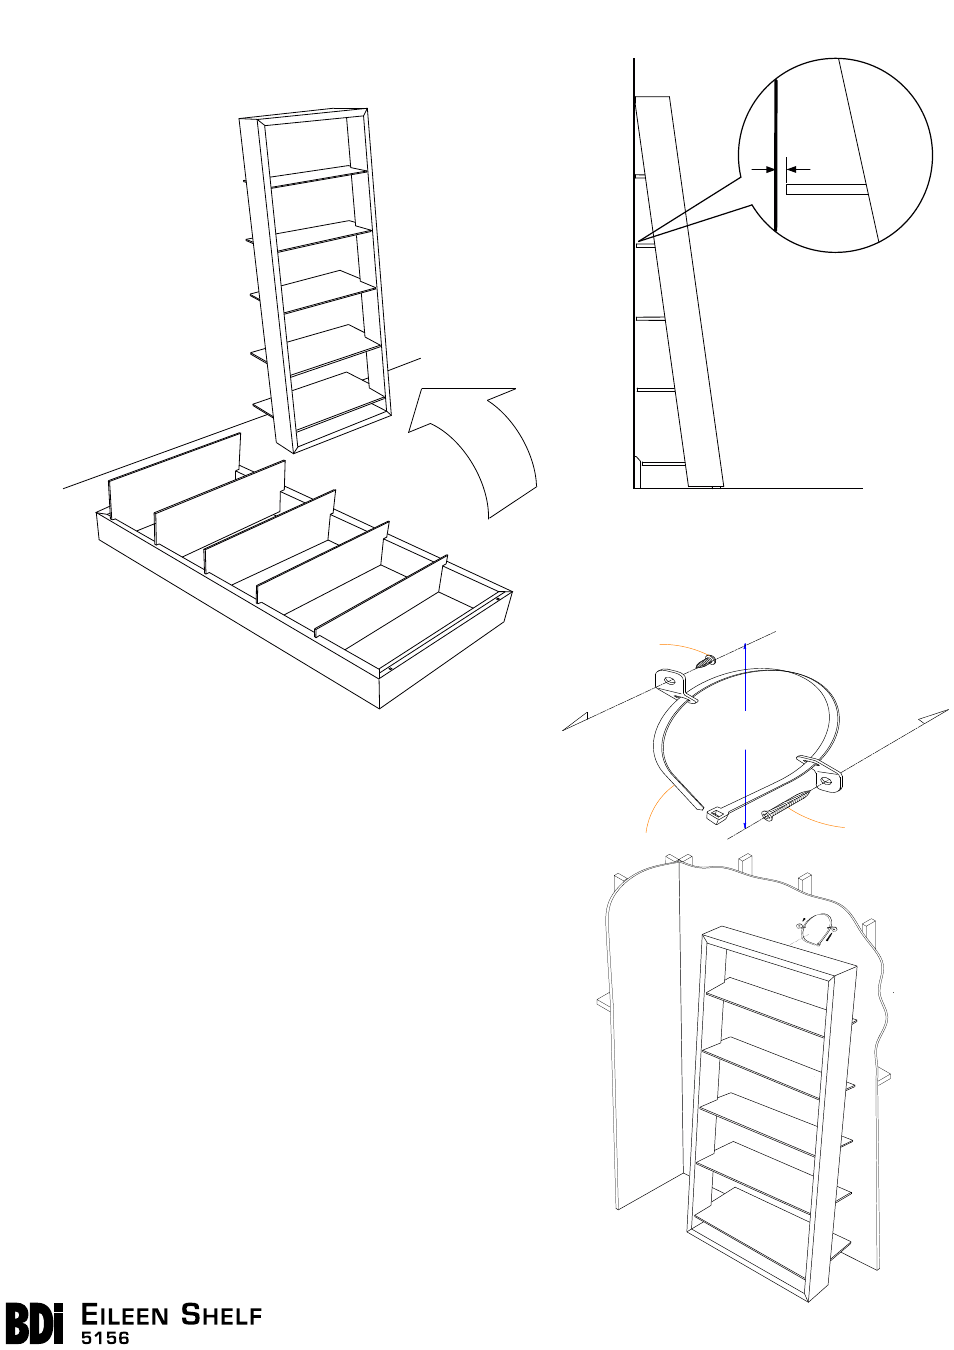
Approx. 2”
Restraint Strap
Wall Screw
1/8”
Side Elevation
The rear edge of all shelves (except
bottom shelf) should be approximately
1/8” from the wall.
Step 6
Once step 4 and 5 have been completed, lift assembled Eileen against
the wall.
Step 6 - Install Tipping Restraint Kit.
On the rear side of the top frame, there is a pre-drilled hole for
installing the HH510 Furniture Tipping Restraint Kit (included).
This tip restraint must be attached to a wall stud using the
2” screw enclosed.
1. Attach a
bracket
to the back top rail or back top edge of the
mirror, using the 5/8” screw provided, through the smaller hole
in the bracket.
2. Determine where mirror is to be placed and mark location on
the wall over a wall stud for the wall bracket hole approximately 2”
below the mounting bracket secured to the back of your mirror.
Attach to the wall stud, using the 2” screw provided, through the
smaller hole.
3. Place the mirror into position so both mounting brackets are
vertically in line.
4. Lace the end of the
restraint strap through the larger hole
in each bracket. Bring both ends together and slide the flat
end through the locking end and draw it through until all slack is
removed.
5. Confirm that strap is securely laced and locked.
Approx. 2”
To
Wa
ll
2" Wall Screw
5/8" Screw
To Mirror
Restraint Strap
*Note
HH-510
Furniture
Tipping
Restraint
Kit
is
supplied
by
Walter
of
Wabash.
For
further
information,
visit
www.walterofwabash.com