Working with the trk-800, Front panel description – Analog Way TRK-800 User Manual
Page 2
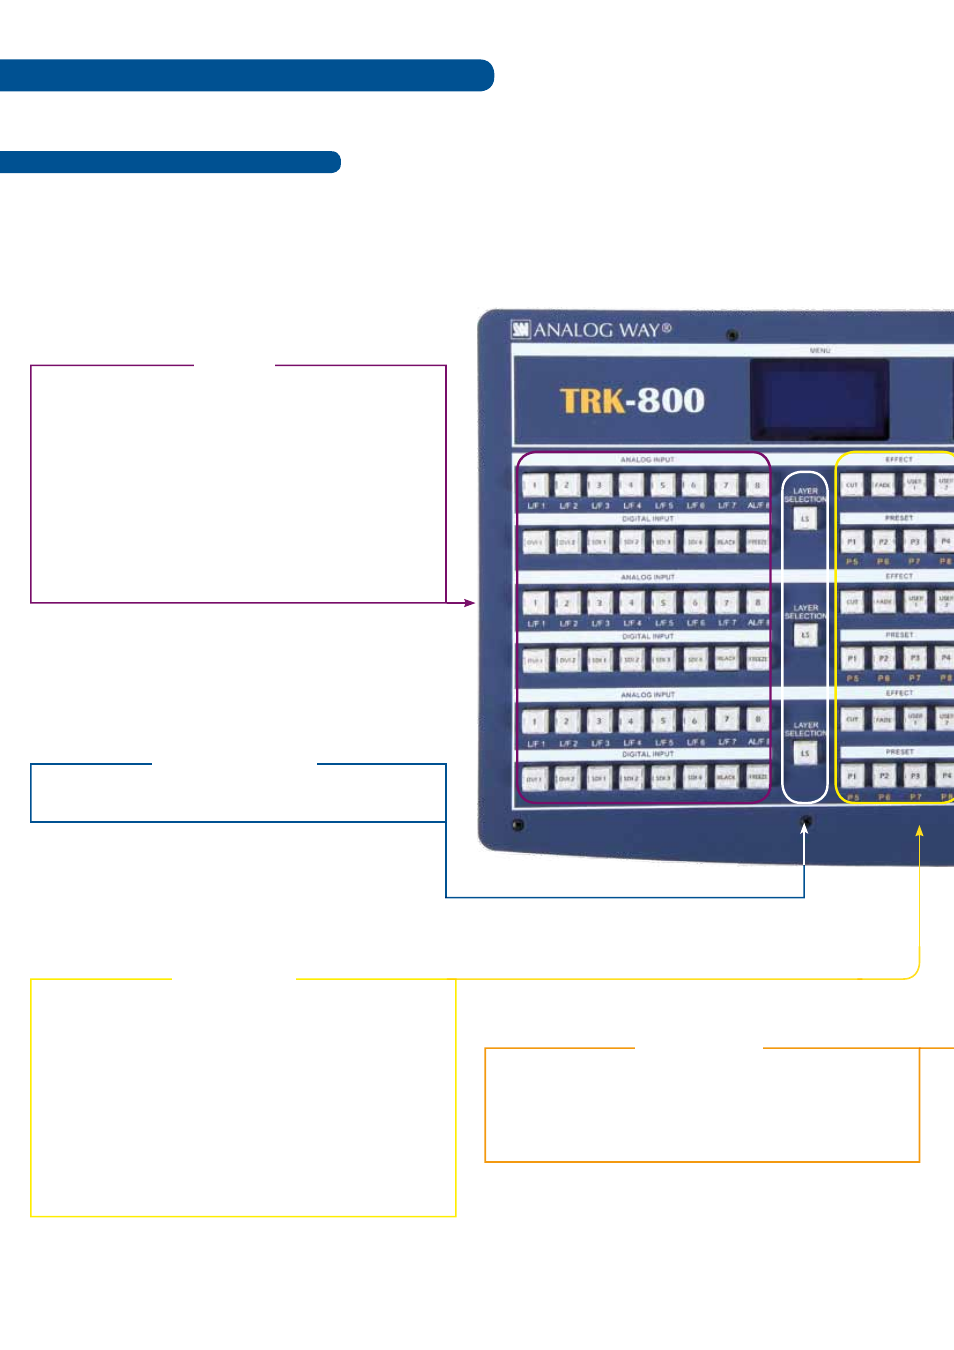
Front Panel Description
WORKING WITH THE TRK-800
The following setup is an example of a typical
TRK-800 configuration for an event or roadshow, but can of course be
modified according to your specific needs :
OUTPUT #1: Press to select the output #1, select a layer and a source,
then press TAKE.
OUTPUT #2: Press to select the output #2, select a layer and a source,
then press TAKE.
MATRIX #1 & #2
#1 L/ F 1: Press to access source #1, Display Frame #1 or Logo #1.
#2 L/ F 2: Press to access source #2, Display Frame #2 or Logo #2.
#3 L/ F 3: Press to access source #3, Display Frame #3 or Logo #3.
#4 L/ F 4: Press to access source #4, Display Frame #4 or Logo #4.
#5 L/ F 5: Press to access source #5, Display Frame #5 or Logo #5.
#6 L/ F 6: Press to access source #6, Display Frame #6 or Logo #6.
#7 L/ F 7: Press to access source #7, Display Frame #7 or Logo #7.
#8 AL/ F 8: Press to access source #8, Display Frame #8 or Logo #8
or Animated Logo.
DVI 1 to DVI 2: Press to access DVI #1 or DVI #2.
SDI 1 to SDI 4: Press to access SDI #1 or SDI #4.
BLACK: Change the active layer to Black.
FREEZE: Freeze the input linked to the current layer on MAIN.
INPuT
LAYER SELECTION
Preset section: Stores and recalls 8 presets available.
CUT: Select Cut as the current transition type.
FADE: Select Fade as the current transition type.
USER 1: Select user #1 as a customized transition.
USER 2: Select user #2 as a customized transition.
P1/P5: Select P #1 as a customized preset or P #5 by ShIFT function.
P2/P6: Select P #2 as a customized preset or P #6 by ShIFT function.
P3/P7: Select P #3 as a customized preset or P #7 by ShIFT function.
P4/P8: Select P #4 as a customized preset or P #8 by ShIFT function.
EFFECT/PRESET
Press to access Layer section.