1 first time set-up, 2 set-up – AXING SKQ 4-01 User Manual
Page 9
Operation Instructions SKQ 4-01
Chapter 3: Programming
12.09.11
© AXING AG • Swizzerland • Reserving change in design and type - We cannot be held liable for printing error
9
3.1
First time set-up
When using the unit for the first time, you must first connect video and audio connectors to monitor. After
this you can continue set-up using on-screen menus (see Fig. 3 on page 6).
3.1.1
Receiver 1+2 or 3+4
To control the unit first slide front panel switch to left or right position to control receiver 1+2 or 3+4
respectively.
After exit the programming, the programming selection switch must be set to centre position.
3.1.2
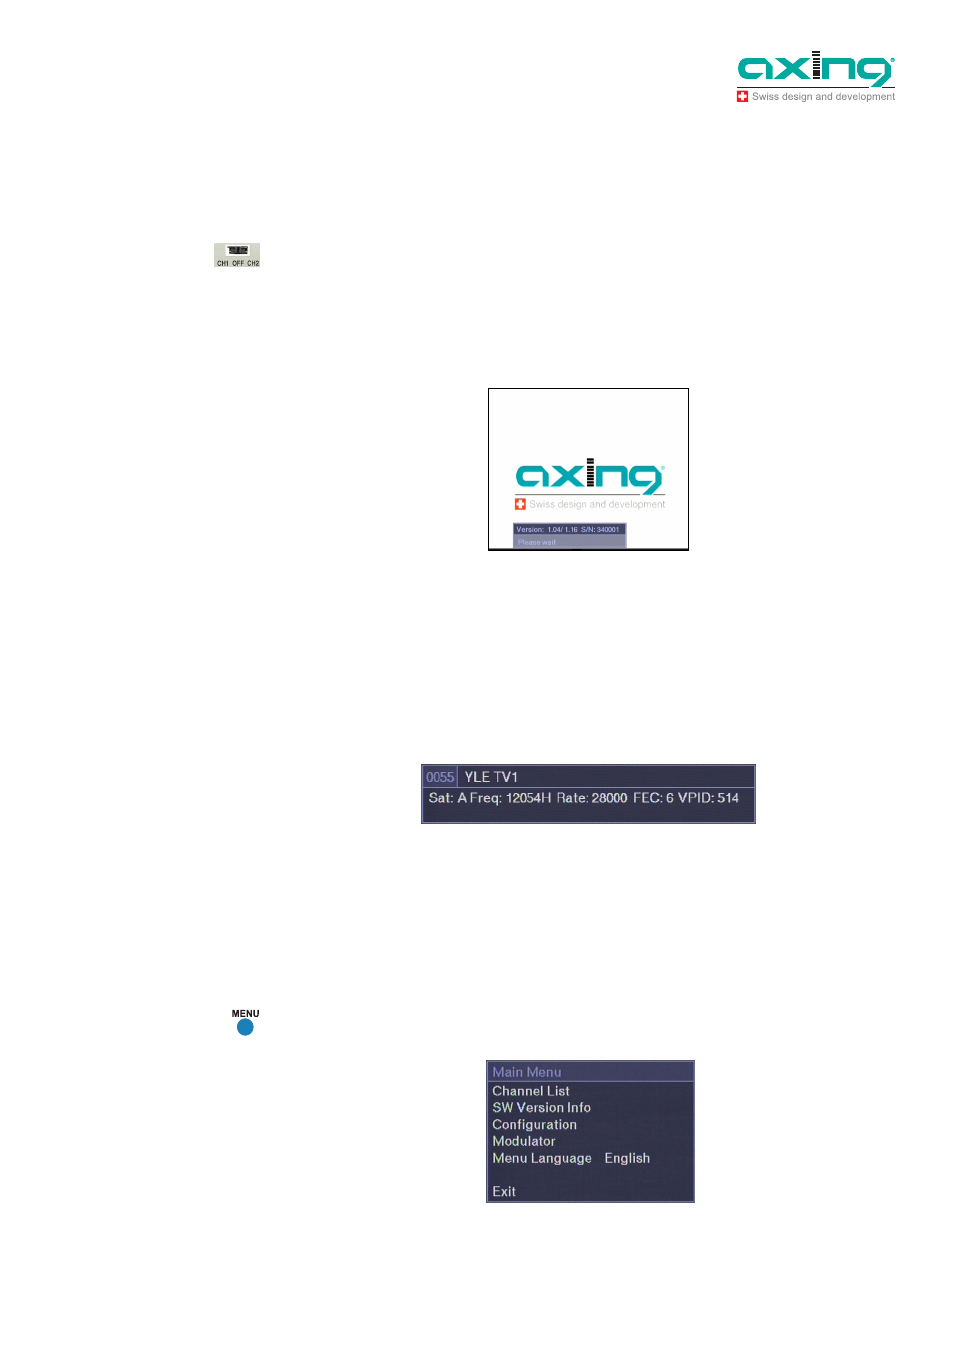
Power-up
At power-up this welcome screen is displayed. Main SW and user interface SW version numbers plus
unit serial number are shown.
When the unit is powered the display lights up showing selected output channels (Fig 1. no 2) of main
modulators 1 and 2. The factory set channels are E21 (main modulator 1), E22 (sub modulator 2) and
E23 (main modulator 3), E24 (sub modulator 4).
The display is switched off after 3 minutes. Two signal led indicate, that the unit is powered. The display
lights up again by pressing any button of remote control unit.
Next program info for channel previously selected is displayed and the channel opened, if possible. Info
shows satellite number i.e. DiSEqC switch control, transponder frequency, data rate, FEC and channel
video PID number.
If the channel list is empty, welcome screen will remain displayed.
3.2
Set-up
To start set-up, press Menu key . Main menu will be displayed.
Select “Configuration”.
Fig. 6: Welcome screen
Fig. 7: Program info
Fig. 8: Main menu