Connecting a computer, Connecting headphones, Connecting an external sound system – Dynex DX-32L130A10 User Manual
Page 15: E “connecting a computer
12
Making connections
DX-32L130A10
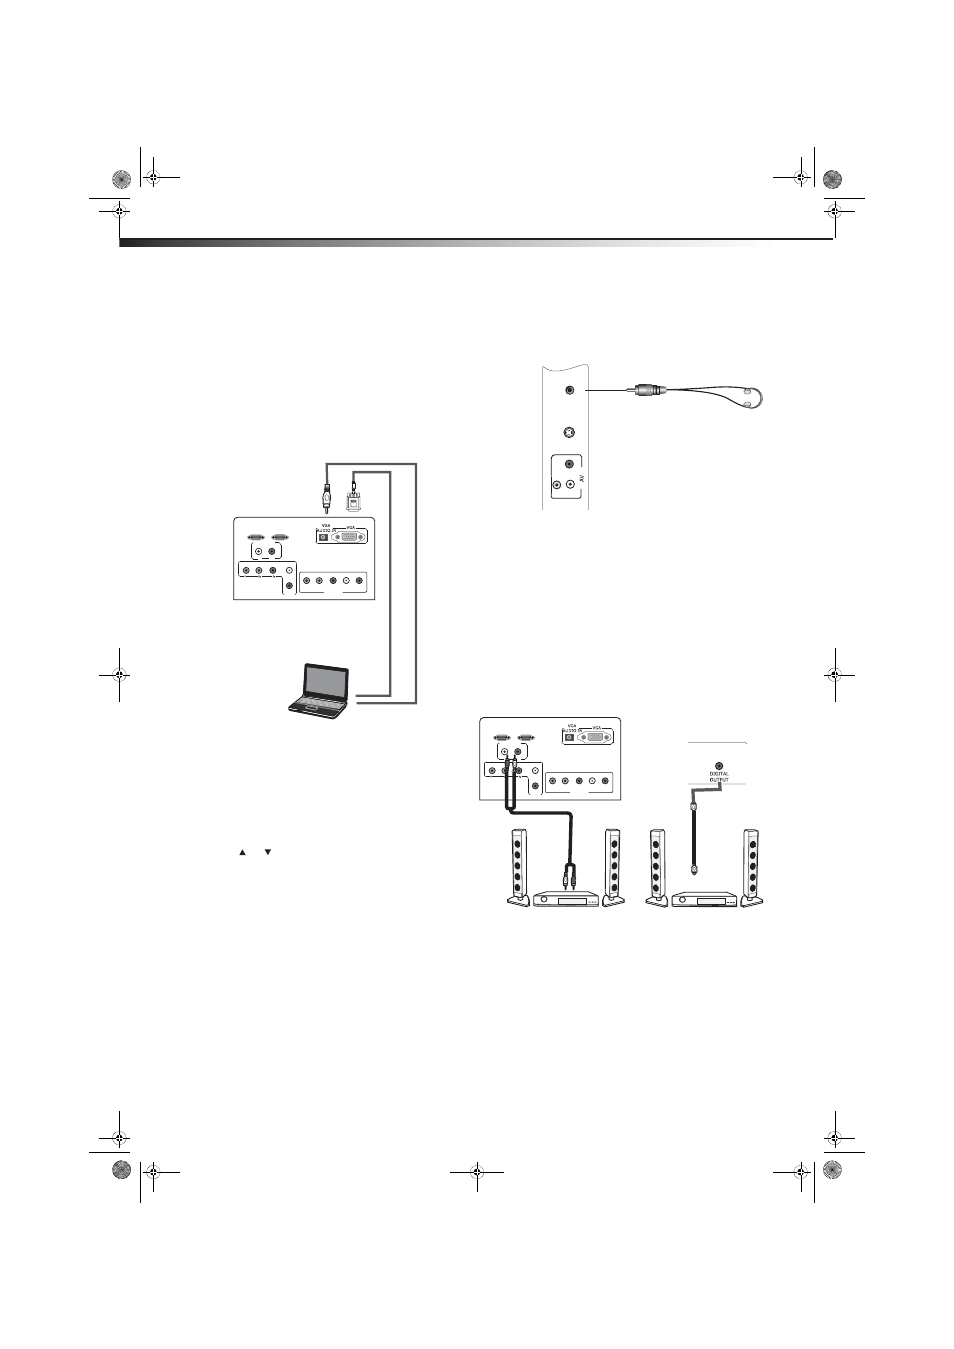
Connecting a computer
Tip: Some computers have an HDMI connector, which can be
used for a better picture.
To connect a computer:
1 Make sure that your TV’s power cord is
unplugged and the computer is turned off.
2 Connect a VGA cable to the VGA jack on the
computer, then connect the other end of the
cable to the VGA jack on the back of your TV.
Note: The VGA cable should be a 15-pin D-Sub (analog RGB)
cable.
3 Connect an audio cable to the AUDIO OUT jack
on the computer, then connect the other end of
the cable to the VGA AUDIO IN jack on the back
of your TV.
Note: The audio cable should have a stereo mini plug.
To play video from a computer:
1 Turn on your TV, then press INPUT. The INPUT
SOURCE menu opens.
2 Press
or
to
select
VGA, then press ENTER.
3 Turn on the computer, then adjust the display
properties, if necessary.
Connecting headphones
To connect headphones:
• Connect your headphones to the HEADPHONE
jack on the side of your TV.
Note: Loud noise can damage your hearing. When using
headphones, use the lowest volume setting that still lets
you hear the sound.
Connecting an external sound system
To connect an external audio device:
1 Make sure that your TV’s power cord is
unplugged and the component video device is
turned off.
2 Connect an analog audio (L and R) cable to the
Audio Out (L/R) jacks on the back of your TV.
- OR -
Connect a digital coaxial cable to the DIGITAL
OUTPUT jack on the side of your TV.
3 Connect the other end of the analog audio (L
and R) cable to the AUDIO IN jacks on the
analog stereo receiver.
- OR -
Connect the other end of the digital coaxial
cable to the DIGITAL INPUT jack on the digital
amplifier.
To play audio from a digital sound system:
1 Turn on your TV.
2 Turn on the external audio device and set it to
the correct output mode. See the audio device’s
user guide for more information.
HDMI2 HDMI1
COMP2
R
COMP1
Y
P
B
P
R
L
R
L R
AUDIO OUT
L
Audio cable (stereo mini plugs)
VGA cable
Back of TV
Computer
L
R
VI
DEO
S-
V
ID
EO H
EA
D
PH
O
NE
Side of TV
Headphones
L R
VIDEO
S-VIDE
O HEADP
HDMI1
SERVICE
HDMI2 HDMI1
COMP2
R
COMP1
Y
P
B
P
R
L
R
L R
AUDIO OUT
L
Side of TV
Stereo
Analog audio cables
Digital optical (Toslink)
audio cable
Digital amplifier
Back of TV
DX-L32L130A10_09-0617_MAN_ENG_V1.book Page 12 Thursday, July 30, 2009 2:41 PM