Vortech 1992-1996 5.7L LT1 Corvette User Manual
Page 21
11
11. INTAKE AIR TEMPERATURE (IAT)
SENSOR THREADING
A. Disconnect the IAT sensor from the harness.
B. With a file, remove the ridges from the sensor and
thread the sensor to 1/2"-20 with a die.
C. Install the threaded sensor into the supercharger
discharge duct and secure.
REMOVE RIDGES
USE A 1/2"-20 DIE TO
THREAD THIS PORTION
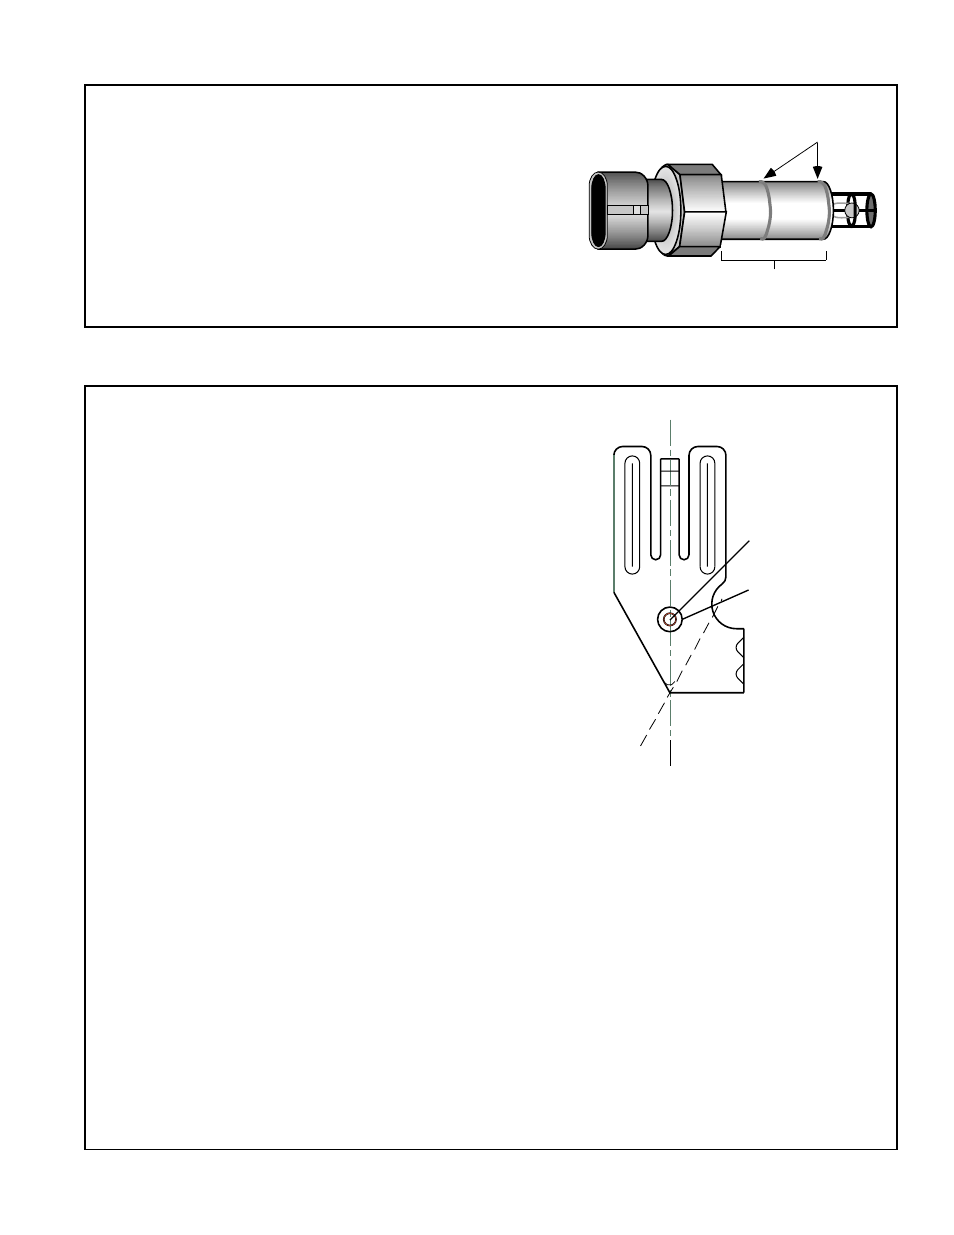
12. MOUNTING BRACKET
A. Mount the spring tensioner to the mounting bracket with
the supplied hardware. Place the bolt through the center
hole in the bracket and position it so that the alignment
stud fits into the hole.
B. Fasten the mounting bracket to the engine block and
heads using three (3) 3/8-16 x 2-1/4" bolts, one (1)
3/8-16 x 4-1/4" bolt, and four (4) 3/8" flat washers. Make
sure that the power steering lines and plug wires are
safely secured behind the bracket and the three sections
of heat sleeve are positioned properly, staying clear of
the exhaust.
C. Modify the power steering bracket by cutting the existing
tab to mirror the opposite side of the bracket (refer to
graphic).
D. Attach the power steering reservoir to the appropriate
hoses with the supplied clamps.
E. Using the dimple as a location point, drill a .25" through
hole. Countersink to .40".
F. Attach the modified power steering reservoir bracket to
the backside of the mounting bracket with the 1/4-20 x
1" flat head screw, locking nut and flat washer. Refer to
graphic on following page for further reference.
CUT
DRILL OUT
DIMPLE TOP .25"
COUNTERSINK
TO .40"