Vortech 1992-1996 5.7L LT1 Corvette User Manual
Page 20
•
ACCUMULATOR
AIR FILTER
COOLANT
RECOVERY TANK
9. COOLANT RECOVERY TANK
A. Install the supplied coolant reservoir into the right side
front headlight well (next to the air inlet). Use the
existing hole and supplied fasteners to attach the
reservoir to the fender well (see photo).
B. Carefully bend the original overflow line around the
fender well and connect to the new reservoir.
C. Attach the 5/32" vent line to the top fitting on the
reservoir and route out of the engine compartment.
10
AIR CONDITIONING LINE
CLAMP
FRAME
FRONT
TOP VIEW
DRILL HOLE #12
USE #12
SHEET METAL SCREW
"T" BRACKET
EXISTING HOLE,
SCREW IN CLAMP
CANISTER
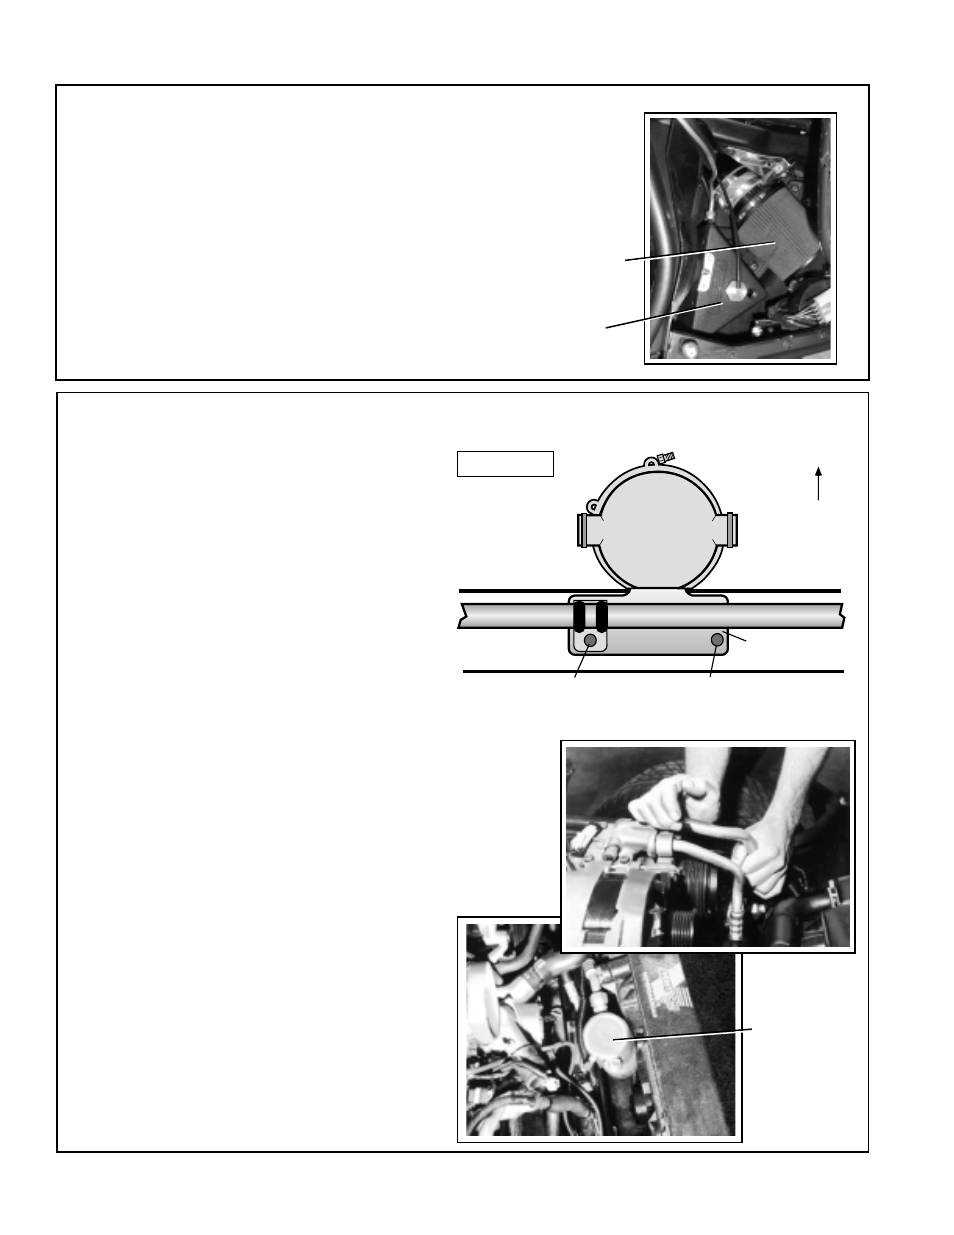
10. AIR CONDITIONING ACCUMULATOR RELOCATION
A. Remove the air conditioning line from
the accumulator to the evaporator (right
side).
B. Remove the air conditioning line clamp
and screw located on the frame
crossmember in front of the water pump
near the accumulator.
C. Use the mounting hole and bolt to line
up the supplied "T" bracket (refer to the
graphic). Mount the adel clamp and air
conditioning line on top of the "T"
bracket. Drill a hole with a #12 drill in
the frame using the remaining hole in
the bracket for a template. Install the
supplied #12 sheet metal screw.
D. Carefully bend the outermost line at the
air conditioning compressor outward
slightly to pull the accumulator into
position onto the bracket. Use a second
hand to support the line at the
compressor, being careful not to kink
the line (refer to the photo).
E. Position the accumulator onto the
bracket and secure with the band clamp
provided.
F. Install the supplied aluminum air
conditioning line making sure the
O-rings are in place at the ends of each
fitting.