Installing a drive into the drive carrier – StorCase Technology 12-Bay 4U SCSI Ultra320 User Manual
Page 8
InfoStation 12-Bay Installation Guide - Rev. A02
StorCase Technology, Inc.
Installation
3
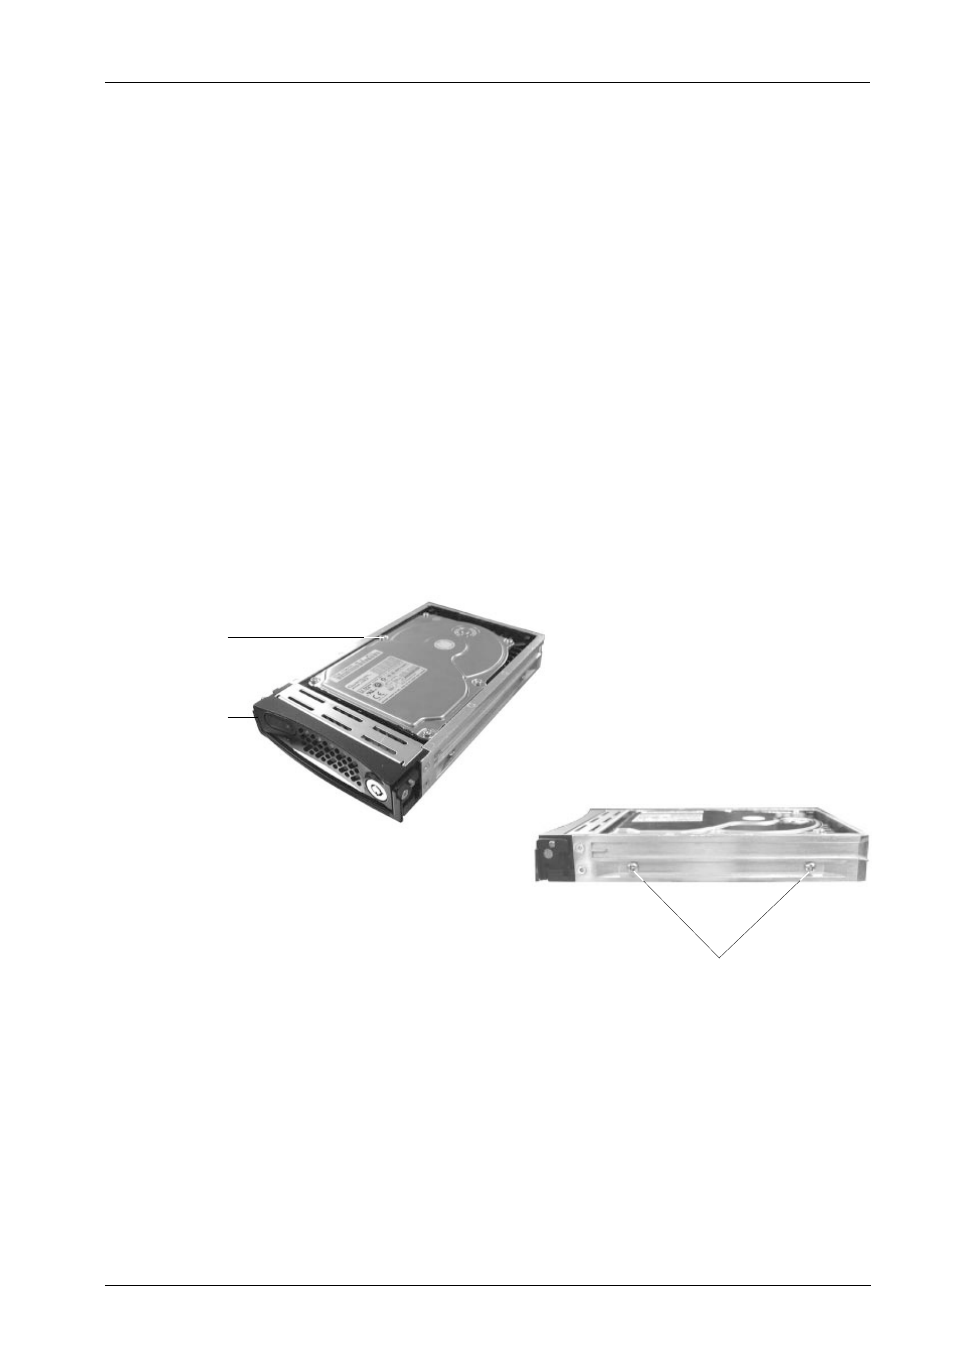
Installing a Drive into the Drive Carrier
NOTES:
Before installing the drive into the carrier, the ID jumpers and spin-up option
jumper on the disk drive must be removed. This is required so that the Info-
Station itself can set the drive SCSI ID and spin-up option.
A #2 Phillips screwdriver will be required for this procedure.
1.
Install the drive(s) into the drive carrier(s). Drive(s) must be side-mounted into the
drive carrier(s) using #6-32 Phillips Pan Hd. screws (Figure 3).
2.
After the drive(s) have been installed in to the drive carrier(s), carefully insert the
carrier(s) back into the chassis (refer to section "Inserting a Drive into the Chassis"
for further information).
Figure 3: Drive Installation
Drive
Carrier
SCSI SCA Drive
(Not Included)
IFS14_8
#6-32 Phillips
Pan Hd. Screw
(2 on each Side)
IFS14_9
- DE100i-SW (35 pages)
- DE110 (33 pages)
- DE110 (2 pages)
- DE110 (31 pages)
- DE110 (27 pages)
- DE50 (33 pages)
- DE50 (27 pages)
- DX115 (25 pages)
- DE75i-A (31 pages)
- DE75i-A66 (29 pages)
- DE75i-A100 (31 pages)
- SATA DE75 (28 pages)
- DE75i-S (31 pages)
- DE75i-SW (33 pages)
- DE75i-SWC (33 pages)
- DE75i-SW160 (29 pages)
- S20A114 (29 pages)
- DE75i-SWC160 (29 pages)
- DE90i-A (29 pages)
- DE90i-A66 (23 pages)
- DE90i-A100 (23 pages)
- DE90i-S (25 pages)
- DE100i-A (33 pages)
- DE100i-A66 (29 pages)
- DE100i-A100 (29 pages)
- DE100i-CSWTN (2 pages)
- DE100i-S (39 pages)
- DE100i-SWD (33 pages)
- DE100i-SWU2 (37 pages)
- DE100i-SWCU2 (33 pages)
- DE100i-SWU2X (35 pages)
- DE100i-SW160 (35 pages)
- S20A102 (33 pages)
- DE100i-SWC160 (39 pages)
- Ultra320 DE100 (31 pages)
- DE110 (27 pages)
- DE110 (31 pages)
- DE110 (29 pages)
- DE150i-SWC (33 pages)
- DE200i-S (33 pages)
- DE200i-CSWTN (2 pages)
- DE200i-SW (35 pages)
- DE200i-SWU2 (37 pages)
- DE200i-SWCU2 (35 pages)
- S20A108 (33 pages)