Star Headlight & Lantern 7400 Star Lase User Manual
Page 9
-6-
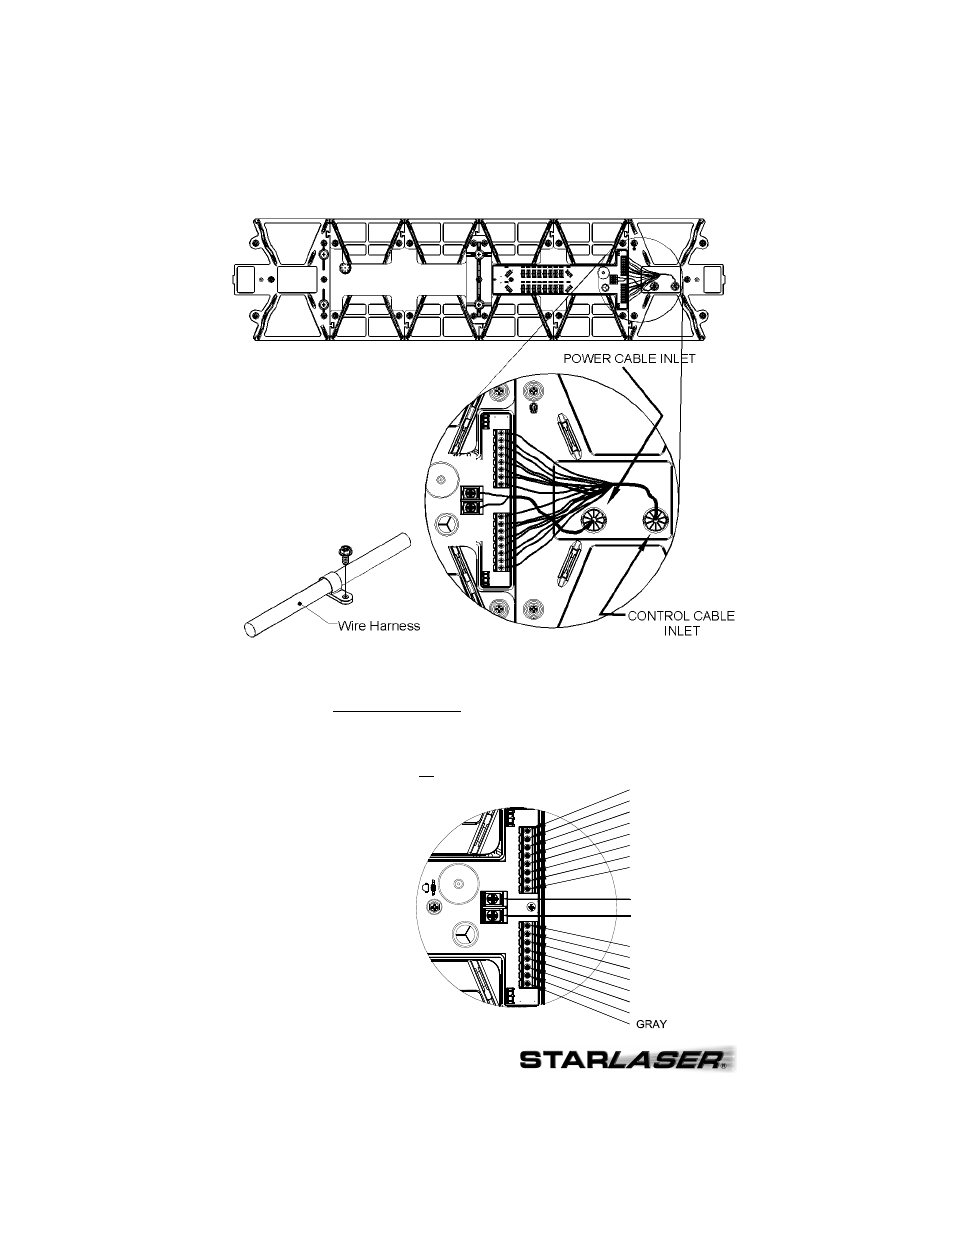
YELLOW/PURPLE
BLACK (GROUND)
RED (POWER)
GREEN/WHITE
RED/GREEN
WHITE/ORANGE
WHITE/BLUE
WHITE/PURPLE
WHITE/BLACK
WHITE/RED
YELLOW/BLUE
YELLOW/BLACK
YELLOW/ORANGE
YELLOW/RED
PURPLE
GREEN/YELLOW
BLUE
(Wire Harness Replacement CONT’D)
2. Locate the end of the lightbar with the wire
harness attached to it. The terminal
blocks, which you will be making your wire
terminations to, are also
located at this same end. The
two harnesses enter the bar
through separate openings and
are each fastened to the
extrusion with a small clamp.
3. Remove the screw that
attaches the cable clamp to
the extrusion.
4. Loosen the screws that secure the wires in each terminal block, and slide the old
harness(es) out through the inlet.
5. Run the new external harness up through the wire bushing into the base and into the
terminal blocks. Take extreme caution that none of the wires frays at the end, shorting
out to the adjacent terminal and/or adjacent wire.
6. Strip each wire 1/4". Connect each wire to the proper terminal, as indicated in the
diagram below, by inserting the stripped portion of the wire under the rising clamp screw
and tightening down the screw. No wire terminals are needed for connecting wires to this
terminal block.
Be sure to check that no strands
of wire are loose and shorting to
the adjacent terminal or to the
base of the lightbar.
7. Once your new wire
harness has been
connected to the lightbar,
secure it with the cable
clamp and reassemble
the top extrusion and
endcaps. Then you may
continue to the Wire
Connections section.