Connecting a standard video device, Connecting a component video device, Setting up your tv combo – Dynex DX-LTDVD20 User Manual
Page 8
8
Setting up your TV combo
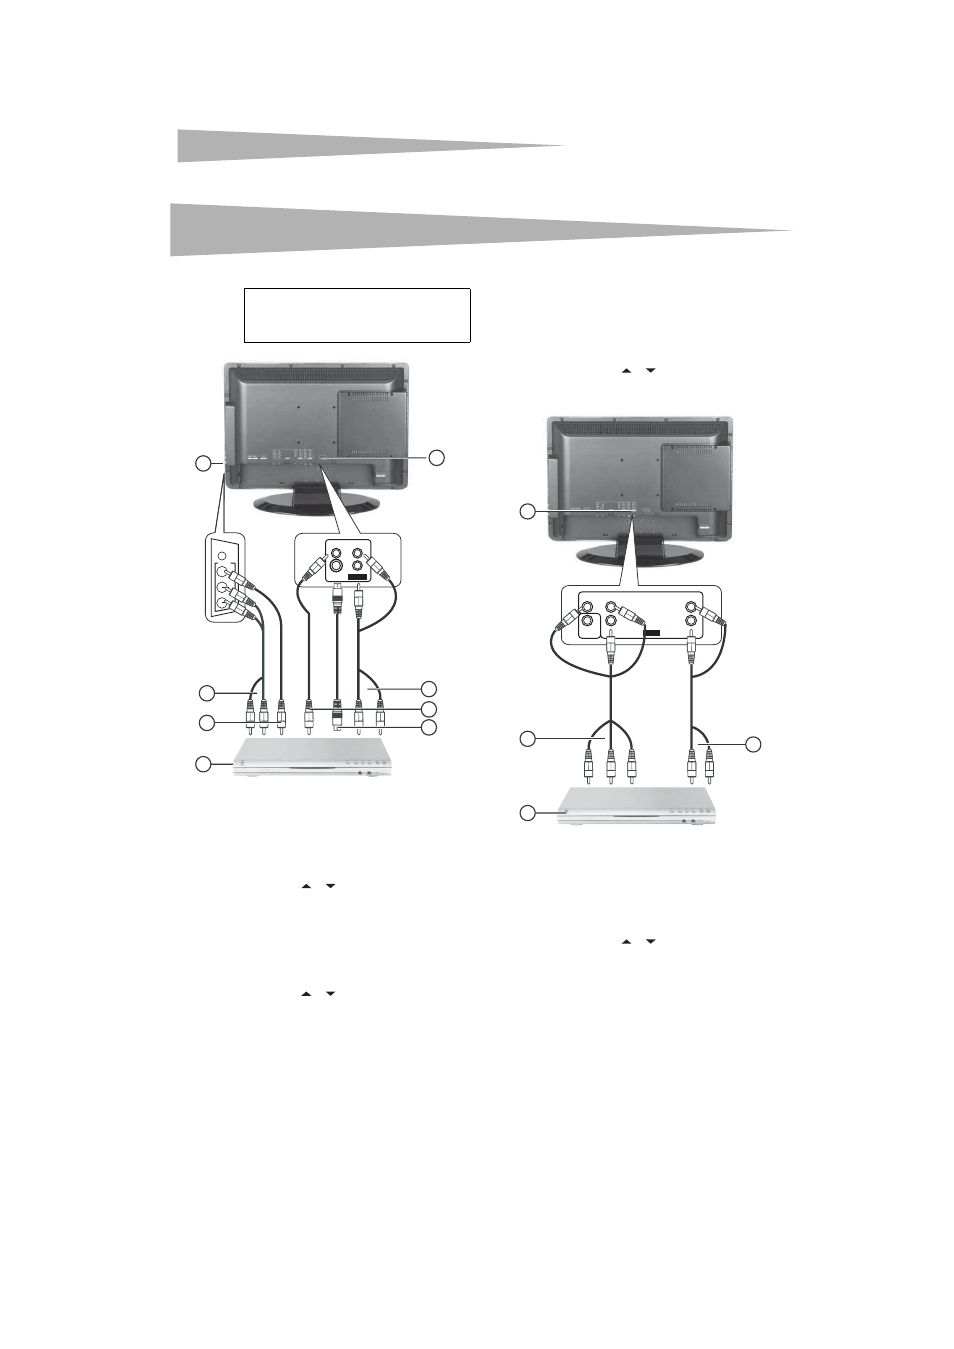
Connecting a standard video device
To connect an standard video device to the AV1 jacks:
1 Plug an RCA video cable (2) into a standard video device (1) and
into the VIDEO jack on the back of your TV combo.
2 Plug the RCA audio cables (2) into the video device’s audio output
jack and into the upper AUDIO L and AUDIO R jacks on the back of
your TV combo.
3 Turn on your TV combo.
4 Press INPUT and the
or
to select AV1.
To connect an external video device to the AV2 jacks:
1 Plug the RCA video connector (7) into a standard video device (1)
and VIDEO jack (8) on the side of your TV combo.
2 Plug the RCA audio connectors (6) into the audio out jacks on the
video device and into the AUDIO L and AUDIO R jacks (8) on the
side of your TV combo.
3 Turn on your TV combo.
4 Press INPUT and the
or
to select AV2.
To connect an standard S-Video device to AV1 jacks:
1 Plug an S-Video cable (4) into the S-Video out jack on an S-Video
device (1) and into the S-VIDEO jack (5) on the back of your
TV combo.
2 Plug the RCA audio cables (2) into the S-Video device audio output
jacks and into the AUDIO L and AUDIO R jacks (1) on the back of
your TV combo.
3 Turn on your TV combo.
4 Press INPUT and the
or
to select S-Video.
Connecting a component video device
To connect a progressive-scan or HDTV video source to Y/Pb/Pr jacks:
1 Plug a component video cable (2) into the progressive-scan or
HDTV video device (1) and into the Y/Pb/Pr jacks (3) on the back
of your TV combo.
2 Plug the RCA audio cables (4) into the audio out jacks on
progressive-scan or HDTV video device and into the lower AUDIO L
and AUDIO R jacks (3) on the back of your TV combo.
3 Turn on your TV combo.
4 Press INPUT and the
or
to select Component.
Note
Your TV supports multiple video source inputs.
For temporary or easy-access video connections,
use the side jacks (AV2). For more permanent
connections, use the rear jacks (AV1).
VIDEO
AUDIO
L
PHONES
VIDEO
L
AUDIO
INPUT 2
R
S-VIDEO
INPUT 1
5
8
R
6
7
1
4
2
3
C
B /
P
B
Y
C
R /
P
R
L
R
INPUT
AUDIO
COAXIAL
1
3
2
4