Front panel controls – Simaudio 700i Integrated Amplifier User Manual
Page 8
700i Reference Dual-Mono Integrated Amplifier
____________________________________________________________________________________
8
Front Panel Controls
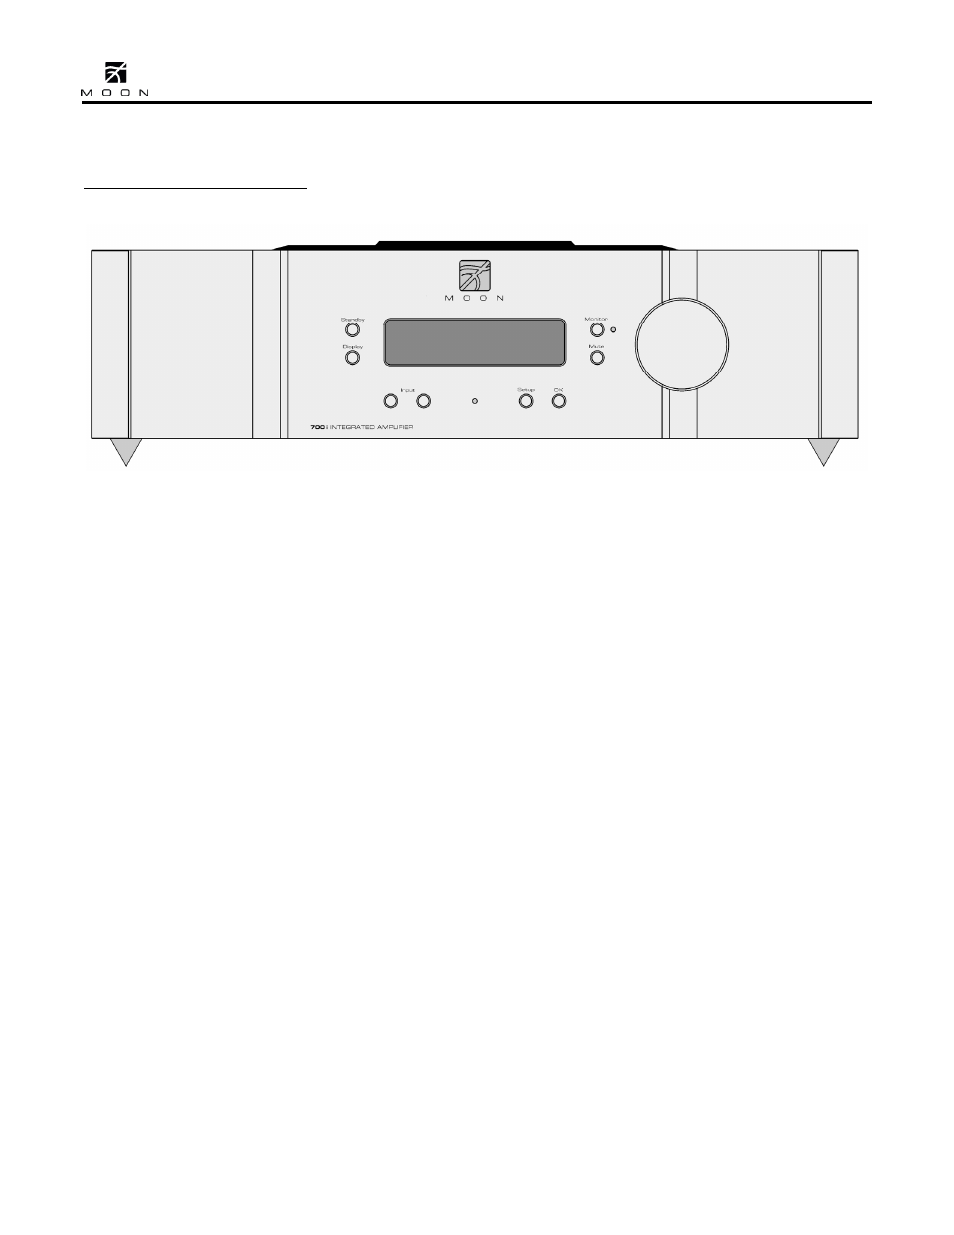
Figure 1: Front panel of MOON 700i dual-mono Integrated Amplifier
The front panel will look similar to Figure 1 (above).
The large display window normally indicates the
current volume level and, whenever you change the
input, it will briefly show the selected input label.
The “Standby” button disengages the input section
from the rest of the 700i’s circuitry and turns off
the digital display. However, when in “Standby”
mode all audio circuitry remains powered up to help
maintain optimal performance. When switching
back from “Standby”, both the ‘input’ and volume
settings are re-established from the previous
listening session. The blue pilot LED will not be
illuminated when the 700i is in “Standby” mode.
The “Display” button allows you to adjust the
brightness of the large digital display window. It also
provides you with the option of turning off the
display. There are three (3) different levels of
brightness; The default is medium. Pressing the
“Display” button once will increase the level to the
highest setting. Pressing the button a second time
will decrease the brightness to the lowest setting.
Pressing the “Display” button a third time returns
the display to its default setting of medium.
If you want to turn the display off, press and hold
the “Display” button for 2 seconds. When the
display is turned off, it will still come back on for a
short period of time whenever you press any of the
buttons located on the front panel or the remote
control, using the brightness level that was
previously set; the display will automatically turn off
again once you are done. To turn the display back
on, simply press and hold the “Display” button for 2
seconds.
The “Monitor” button provides for a dedicated loop
to be used with either a component that can record
& playback (Cassette Deck, DAT, CD-Recorder, etc.)
or a signal processor such as an equalizer. Pressing
this button allows you to 1) monitor the recording
as it occurs on the recording device or 2) engage
the effects of the signal processor. The monitor
component’s outputs must be connected to the
700i’s “Tape Monitor In” and its inputs must be
connected to the 700i’s “Tape Monitor Out”. The
monitor output level is fixed and independent of the
700i’s volume setting. The LED immediately to the
right of this button will illuminate when the
“Monitor” function is engaged.
The “Mute” button reduces your volume setting to
zero. Pressing the “Mute” button a second time will
return the output volume to its previous level. As
well, adjusting the volume level while the “Mute”
function is engaged will effectively defeat the muting
function.