Front panel controls – Simaudio 850P Preamplifier User Manual
Page 9
850P Reference Dual-Mono Preamplifier
____________________________________________________________________________________
9
result, a dual-layered rear panel is required to
accommodate this suspension, with the outer layer
affixed to the 850P’s chassis and the inner layer –
with the audio connectors – affixed to the main
audio circuit board.
Consequently, when you
connect cables to (or disconnect cables from) the
850P, this inner rear panel will move slightly – This
is normal.
These rear panel layers are completely
independant of each other, only coming into physical
contact when either connecting or disconnecting
cables.
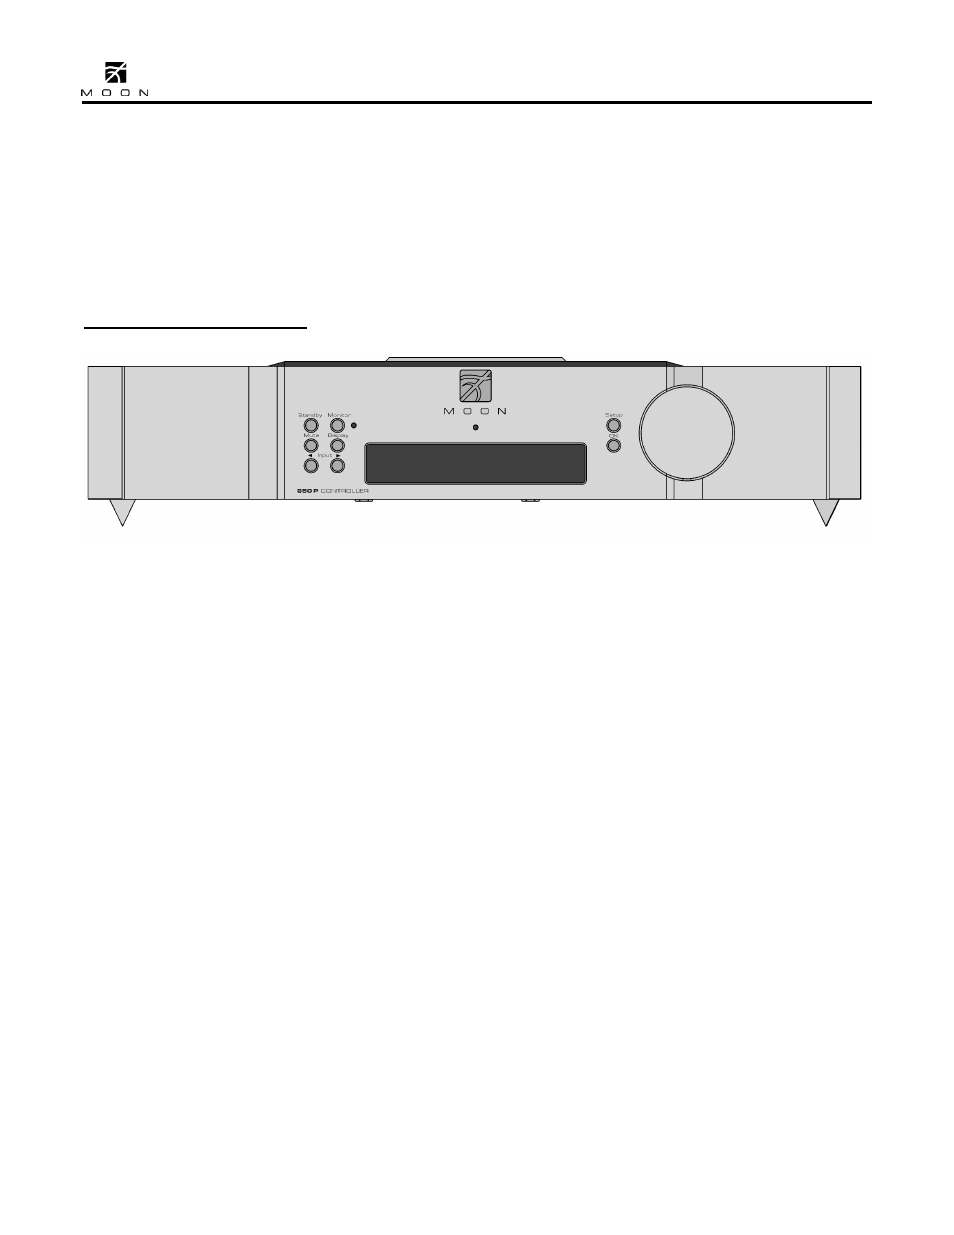
Front Panel Controls
Figure 2: Front panel of MOON 850P dual-mono Controller
The front panel will look similar to Figure 2 (above).
The large display window normally indicates the
current volume level and, whenever you change the
input, it will briefly show the selected input.
The “Standby” button disengages the input section
from the rest of the 850P’s circuitry and turns off
the digital display. However, when in “Standby”
mode all audio circuitry remains powered up to help
maintain optimal performance. When switching
back from “Standby”, both the ‘input’ and volume
settings are re-established from the previous
listening session. The blue pilot LEDs will not be
illuminated, on both the Preamplifier and Controller,
when the 850P is in “Standby” mode.
The “Monitor” button provides for a dedicated loop
to be used with either a component that can record
& playback (Cassette Deck, DAT, CD-Recorder, etc.)
or a signal processor such as an equalizer. Pressing
this button allows you to 1) monitor the recording
as it occurs on the recording device or 2) engage
the effects of the signal processor. The monitor
component’s outputs must be connected to the
850P’s “Tape Monitor In” and its inputs must be
connected to the 850P’s “Tape Monitor Out”. The
monitor output level is fixed and independent of the
850P’s volume setting. The LED immediately to the
right of this button will illuminate when the
“Monitor” function is engaged.
The “Mute” button reduces your volume setting to
zero. Pressing the “Mute” button a second time will
return the output volume to its previous level. As
well, adjusting the volume level while the “Mute”
function is engaged will effectively defeat the muting
function.
The “Display” button allows you to adjust the
brightness of the large digital display window. It also
provides you with the option of turning off the
display. There are three (3) different levels of
brightness; The default is medium. Pressing the
“Display” button once will increase the level to
medium. Pressing the button a second time will
further increase the brightness to the highest
setting. Pressing the “Display” button a third time
returns the display to its default setting of medium.