En first flight preparation, Control centering, Settings for control horns – ParkZone PKZU2280 User Manual
Page 7
7
EN
First Flight Preparation
1. Remove and inspect box contents.
2. Read this instruction manual thoroughly.
3. Install Flight battery in the airplane (once
it has been fully charged).
4. Bind aircraft to your transmitter.
5. Make sure control rods move freely.
6. Make sure fl ight control surfaces
are centered.
7. Perform the Control Direction Test with
the transmitter.
8. Adjust
fl ight controls and transmitter.
9. Adjust battery for center of gravity (CG).
10. Perform a radio system Range Check.
11. Find a safe and open area.
12. Plan fl ight for fl ying fi eld conditions.
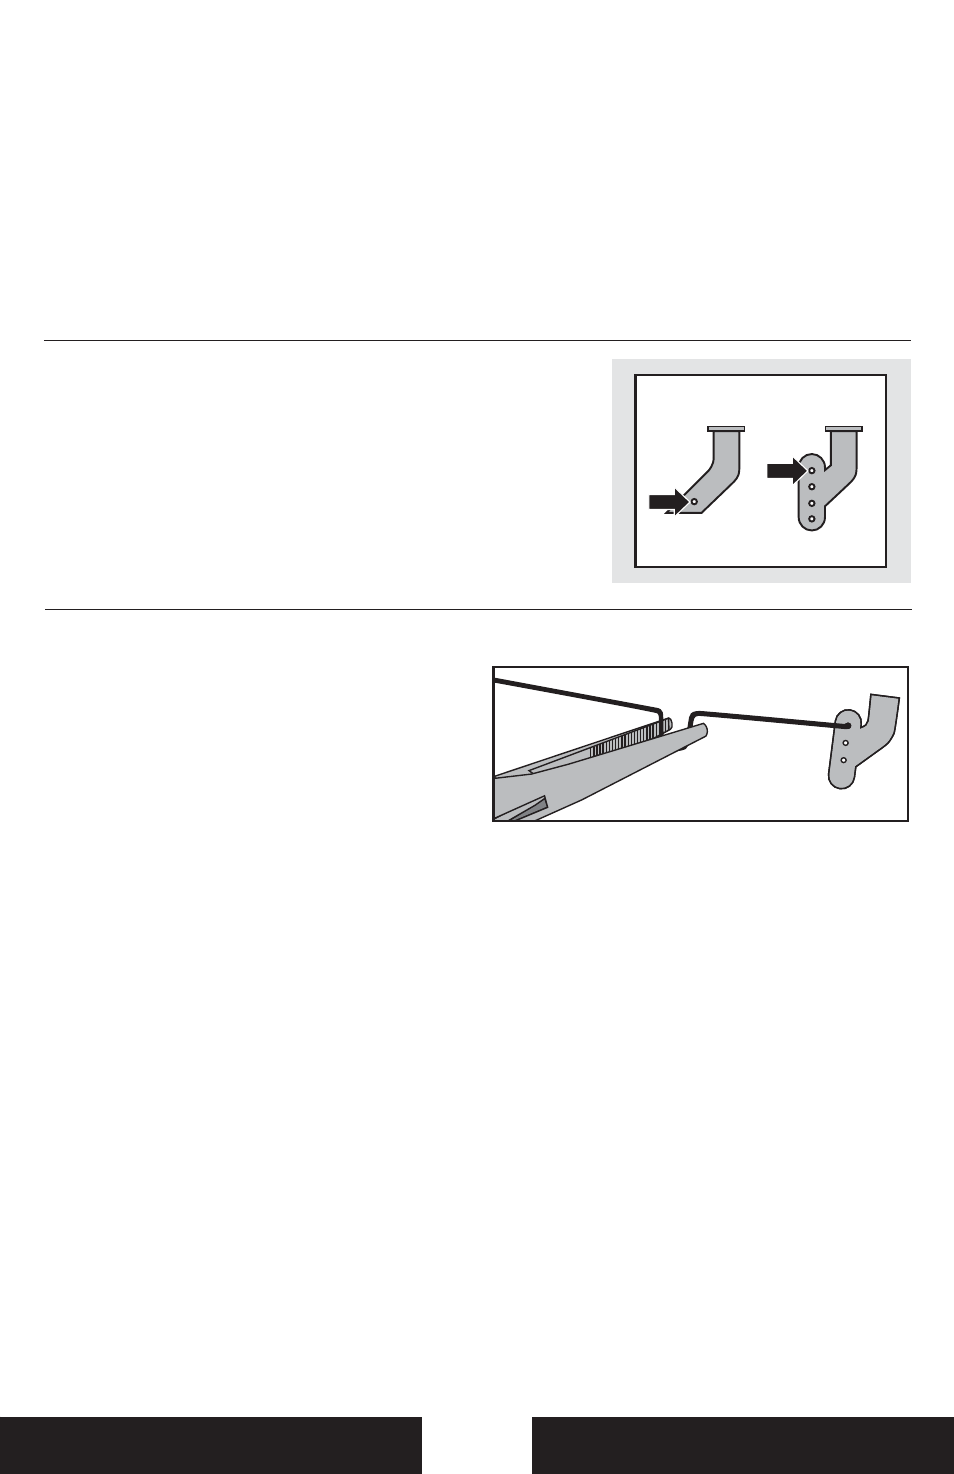
Control Centering
Before fi rst fl ights, or in the event of an
accident, make sure the fl ight control surfaces
are centered. Adjust linkages mechanically if
control surfaces are not centered.
Use of the transmitter trims may not correctly
center the aircraft control surfaces due to the
mechanical limits of linear servos.
1. Make sure control surfaces are neutral
when the transmitter controls and trims are
centered. Where possible, transmitter
sub-trim must be set to zero.
2. When needed, use a pair of pliers to
carefully bend the metal of the linkage
(see
illustration).
3. Make the U-shape narrower to make the
connector shorter. Make the U-shape wider
to make the linkage longer.
NOTICE: When using a programmable
transmitter, do not use sub-trim to adjust the
center position of the servo.
NOTICE: Ultra micro linear servos are unique
in that they are calibrated to reach maximum
travel at 100% travel adjust. Increasing the
value above 100% will NOT result in more
travel, but can cause the servo to lock and will
result in a crash.
Settings for Control Horns
The illustration shows factory settings for
linkages on control horns. After fl ying, if you
want to modify control throw, carefully adjust
linkage positions for desired
control response.
Rudder
Elevons