Control horn and servo arm settings, Clevis installation, Horizontal tail installation – ParkZone PKZ6680 User Manual
Page 8: Factory settings horns arms
EN
Factory Settings
Horns
Arms
Elevator
Rudder
Ailerons
Spoilers
Control Horn and Servo Arm Settings
More control throw
Less control throw
A
B
C
1.
2.
3.
4.
5.
6.
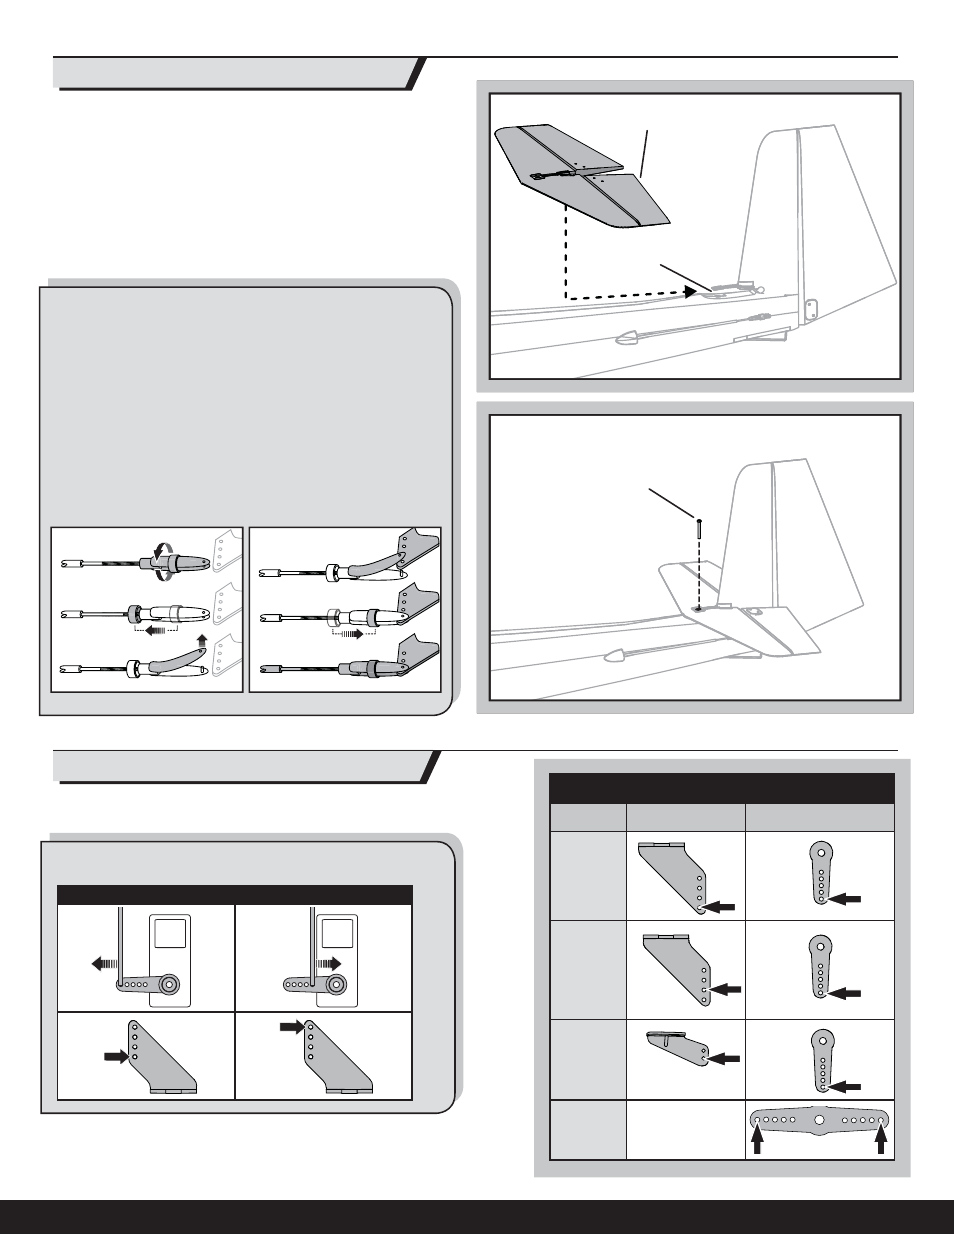
1. Install the horizontal tail (A) in the slot (B) in the vertical tail. Ensure the
elevator control horn faces down.
2. Secure the horizontal tail on the fuselage using a screw (C).
3. Attach the clevis to the elevator control horn (see instructions for clevis
connection).
When needed, disassemble in reverse order.
Clevis Installation
• Turn the clevis on the linkage to change the length of the linkage
between the servo arm and the control horn.
• Pull the tube from the clevis to the linkage.
• Carefully spread the clevis, then insert the clevis pin into the desired
hole in the control horn.
• Move the tube to hold the clevis on the control horn.
After binding a transmitter to the aircraft receiver, set the trims and
sub-trims to 0, then adjust the clevises to center the control surfaces.
Horizontal Tail Installation
The table to the right shows the factory settings for the control horns and servo
arms. Fly the aircraft at factory settings before making changes.
After fl ying, you may choose to adjust the linkage positions for the desired
control response. See the table below.
8