Attaching the right arm, Replacing crico tape/neck skin, Maintenance – Laerdal SimMan 3G Trauma User Manual
Page 38
38
MAINTENANCE
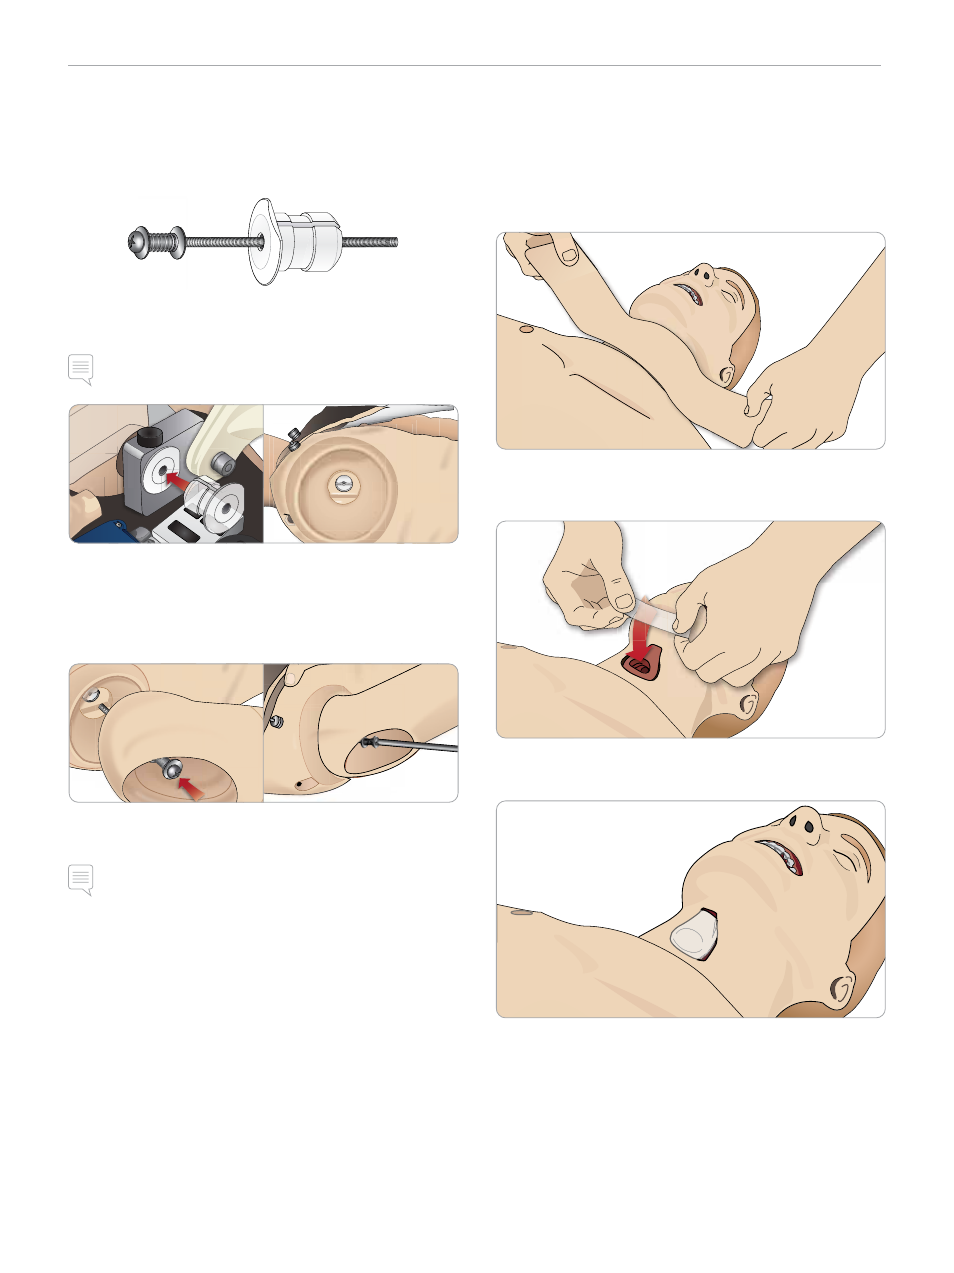
Attaching the Right Arm
Open the torso as described in steps 1 - 4, Opening the Torso.
The Arm Adapter and Adapter Screw are designed to attach the
Right Arm to the Patient Simulator.
1 Fit the Arm Adapter into the hole in the arm bracket from inside
of the torso.
Note: Ensure that the flat edge of the adapter is facing the chest
hinge.
LA PULSES
BP
LA
CONV
BP
U
PU
PU
PU
L
AP
ULS
PU
AP
U
2 The Adapter is now in place and the Right Arm can now be
connected with the Adapter Screw.
3 Thread the Adapter Screw through the Right Arm and align the
screw with the hole in the Arm Adapter.
4 Secure the Adapter with one hand from inside the torso. Screw
the Adapter Screw using the Phillips screwdriver.
Note: Tighten screw as desired to simulate more or less range of
motion in the arm.
Follow the procedures listed below in reverse to detach the arms.
Replacing Crico Tape/Neck Skin
After creating an emergency airway through the cricothyroid
membrane, replace the perforated membrane before starting a new
simulation session.
1 Remove the Neck Skin (velcro fasteners behind the neck).
2 Remove the old strip of Crico Tape.
3 Replace with a new Crico Tape.
4 Ensure Crico Tape completely covers and seals the opening to
prevent leakage while ventilating the Patient Simulator.