Labconco Purifie Horizontal Clean Benches 36125 Series User Manual
Page 54
50
Product Service 1-800-522-7658
Chapter 6: Maintaining Your Clean Bench
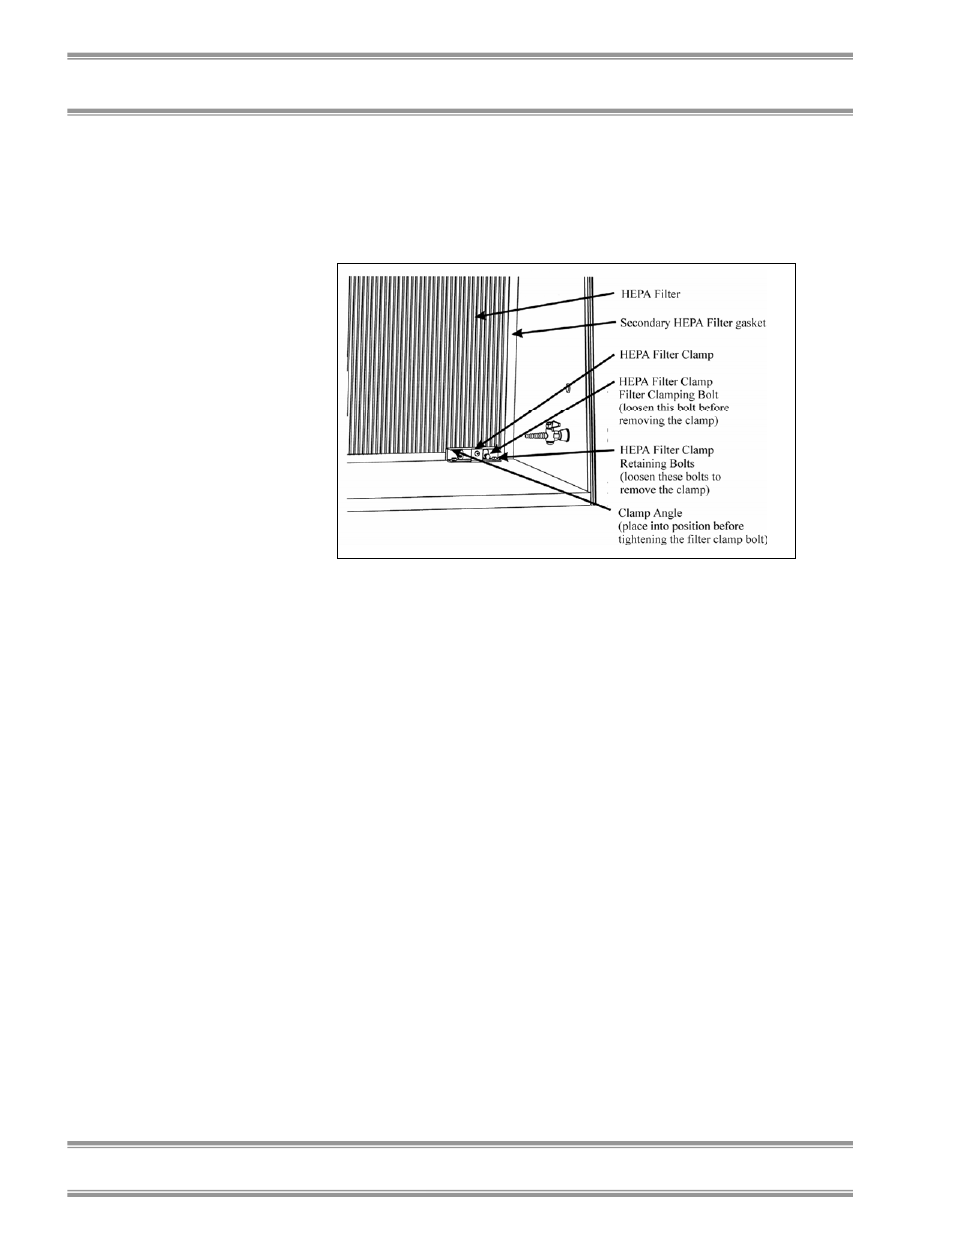
reinstallation. Remove the stainless steel clamp
angle placed between the clamps and the frame of
the HEPA filter.
5. Remove the filter by pulling it straight out of the
Purifier.
6. Install the new filter by placing the filter back into
the clean bench. Make sure that the HEPA filter is
centered side-to-side in the Purifier. Reinstall the
stainless steel plates on the HEPA filter frame.
7. Install the secondary HEPA filter seal, ensuring that
the seal is in place completely around the sides and
top of the filter frame.
8. Install the HEPA filter clamps, with the darker
colored clamps on the bottom of the filter, and the
lighter colored clamps on the top. Tighten the
clamp bolt until the filter gasket is compressed
approximately 50% or 1/8 of an inch. Plug the
clean bench back in.
9. Test the filter for leakage as described in IEST
recommended practice #IEST-RP-CC0002.2.
10. Reinstall the diffuser.
11. Establish the average velocity of the filter. It should
be 90 ± 10 FPM, with all values falling within ±
20% of the average.
Figure 6-4