Hanna Instruments HI 83749 User Manual
Page 9
9
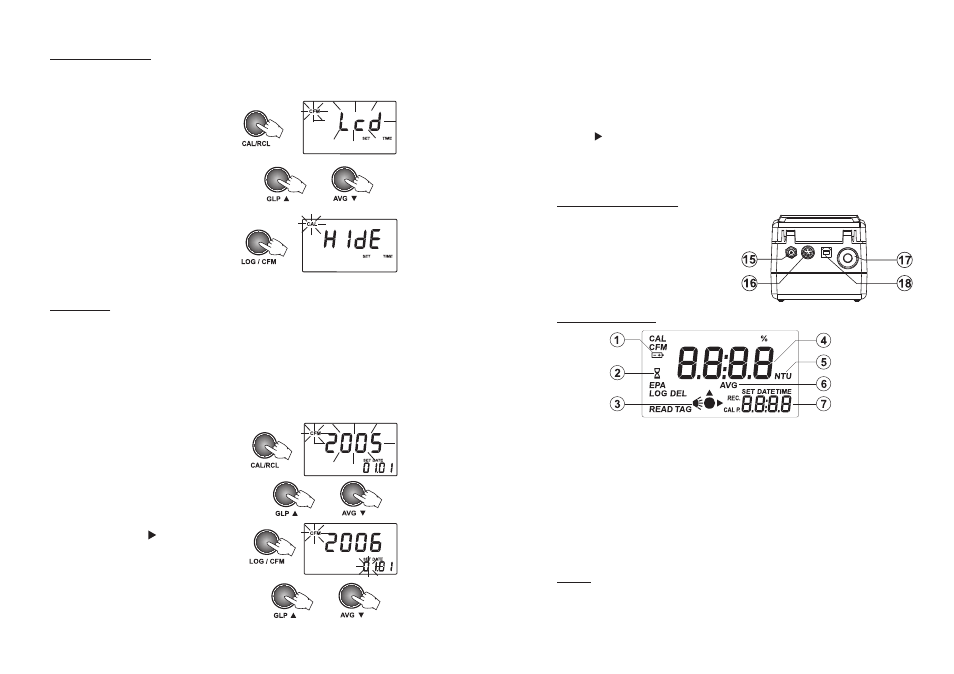
DISPLAY DESCRIPTION
1) Battery icon. This icon appears when the status of the battery is displayed or when the battery
voltage is getting low.
2) Hour glass icon. It is displayed when the instrument performs an internal checkup.
3) Lamp and read status indicator.
4) Four digit main display.
5) NTU measurement units. When average or continuous mode is selected, the “NTU” tag blinks
for each new displayed value. For conversions in other units see Measurement Units section.
6) AVG icon appears when the Signal Average Mode is selected.
7) Four digit secondary display.
BEEPER
A long beep indicates an error or an invalid key pressed. A short beep means that the current
operation is confirmed.
11) CAL/RCL: this is a bi-functional key. Just press to enter/exit calibration or in setup mode to
start/stop editing a parameter. Hold the key for 3 seconds to enter/exit viewing log content.
12) LOG/CFM: press to save a record or to confirm the selected option.
13) SETUP/DEL: press to enter/exit setup. The DEL function is available in Log Recall mode to
delete one or all records. In GLP it is used to restore factory calibration.
14) READ : press to start a measurement. Hold the key to make a continuous measurement. In
Log Recall mode it is used to view the content of a record. In GLP it is used to view all
available information. In Setup, during date or time editing, it is used to select day, month or
year and hour/minutes.
CONNECTORS DESCRIPTION
15) AC adapter connector.
16) RS232 connector, to be used with serial
cable to trasfer data to PC.
17) Tag reader.
18) USB connector.
32
or
or
or
SHOW / HIDE THE TIME
You can choose between showing or hiding the
current hour and minutes on the secondary LCD.
• To set hiding or showing the time, press
CAL/RCL when the “Show/hide time” panel is
displayed.
The time show status and the CFM tag will start
blinking.
• Press the UP or DOWN keys to set Lcd / hide for
time.
• Press LOG/CFM to save the change. The new
selected option will be displayed on the LCD.
Alternatively, press CAL/RCL to exit without
saving the changes.
SET THE DATE
The HI 83749 turbidimeter has a built-in real time
clock (RTC). The RTC time is used to generate a
unique time stamp for each recorded value and to
automatically store the last calibration date. The
current time can be displayed on the LCD when the
instrument is in measurement mode.
• To set the current date, press CAL/RCL when the
“Set date” panel is displayed. The date format
is YYYY.MM.DD. The last two digits of the year
value and CFM tag will start blinking.
• Press the UP or DOWN keys to set the year value.
• Press LOG/CFM or READ to start editing the
month value. The month value will start
blinking.
• Press the UP or DOWN keys to set the month
value.