Hanna Instruments HI 96104 User Manual
Page 22
22
DATE INPUT
or
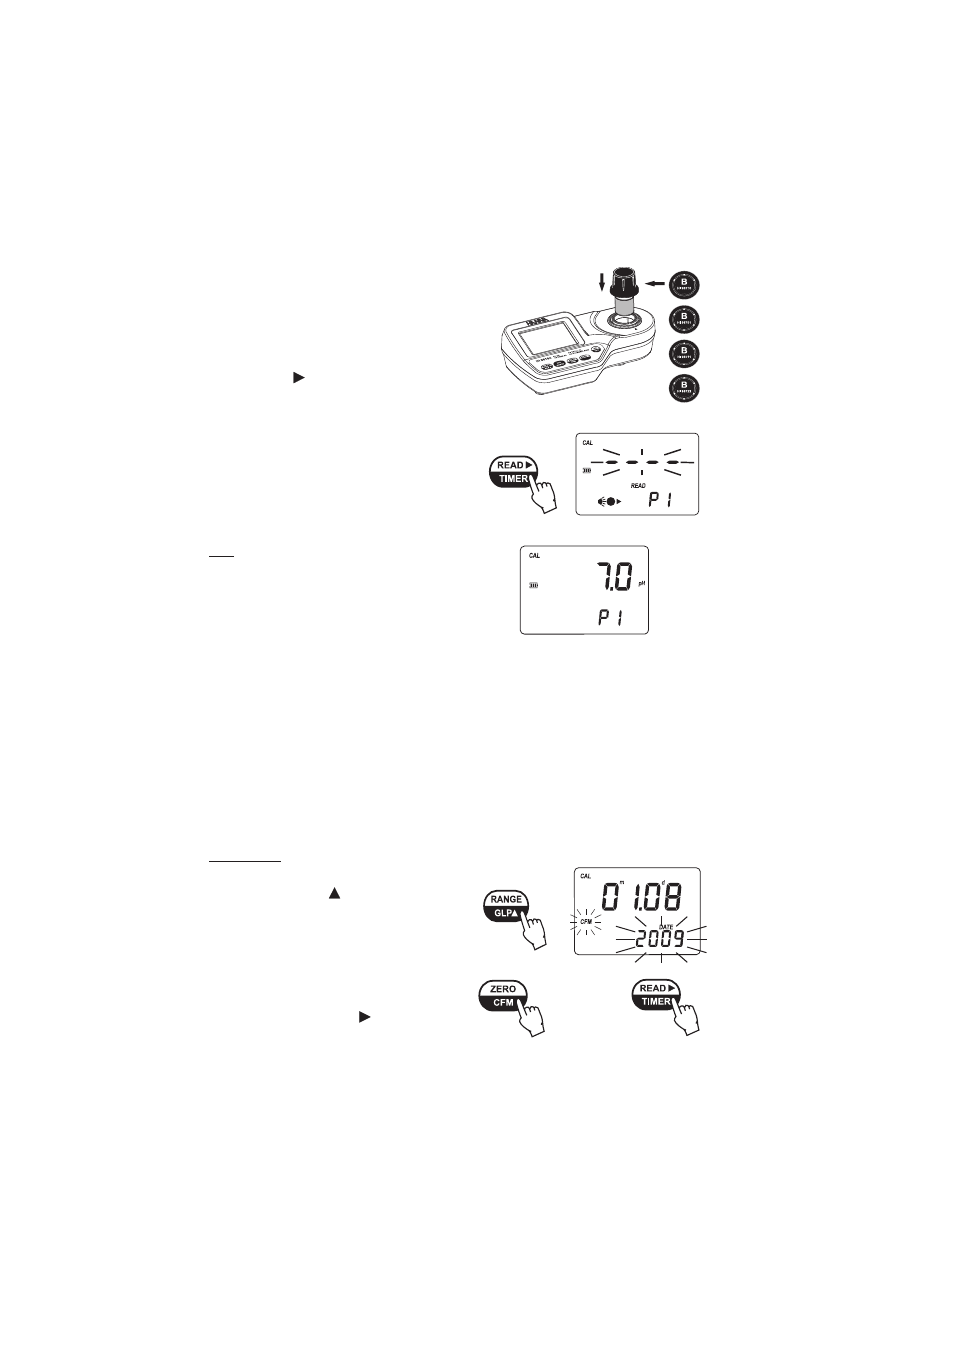
• Place the corresponding CAL CHECK
TM
Standard
Cuvette B into the cuvette holder and ensure
that the notch on the cap is positioned securely
into the groove.
• Press READ/ /TIMER and the lamp, cuvette
and detector icons will appear on the display,
depending on the measurement phase.
• After measurement the instrument will show
for three seconds the CAL CHECK
TM
Standard
value.
Note:
If the display shows “STD HIGH”, the
standard value was too high. If the display
shows “STD LOW”, the standard value
was too low. Verify that all CAL CHECK
TM
Standards Cuvettes, A and B are free from
fingerprints or dirt and that they are inserted
correctly.
• Then the date of the last calibration (e.g.:
”01.08.2009”
) appears on the display, or
“01.01.2009”
if the factory calibration was
selected before. In both cases the year number
is blinking, ready for date input.
• Press RANGE/GLP/ to edit the desired
year (2009-2099). If the key is kept
pressed, the year number is automatically
increased.
• When the correct year has been set, press
ZERO/CFM
or READ/ /TIMER to
confirm. Now the display will show the
month blinking.