Hanna Instruments pH 210 User Manual
Page 5
8
9
POWER CONNECTION
POWER CONNECTION
POWER CONNECTION
POWER CONNECTION
POWER CONNECTION
Plug the 12 VDC adapter into the power supply socket.
Notes: • These instruments use non volatile memory to retain the
pH, mV, temperature calibrations and all other settings,
even when unplugged.
• Make sure a fuse protects the main line.
ELECTRODE AND PROBE CONNECTIONS
ELECTRODE AND PROBE CONNECTIONS
ELECTRODE AND PROBE CONNECTIONS
ELECTRODE AND PROBE CONNECTIONS
ELECTRODE AND PROBE CONNECTIONS
For pH or ORP measurements connect an electrode with internal
reference to the BNC connector on the back of the instrument.
For electrodes with a separate reference connect the electrode’s BNC to the
BNC connector and the reference electrode plug to the reference socket.
For temperature measurements and automatic temperature compen-
sation connect the temperature probe to the appropriate socket.
INSTRUMENT START-UP
INSTRUMENT START-UP
INSTRUMENT START-UP
INSTRUMENT START-UP
INSTRUMENT START-UP
• Turn the instrument on by pressing the ON/OFF
switch.
• All LCD tags are displayed and a beep is heard
while the instruments perform a self test (pH 212
and pH 213 only).
pH 210 & pH 211
pH 212 & pH 213
pH MEASUREMENTS
pH MEASUREMENTS
pH MEASUREMENTS
pH MEASUREMENTS
pH MEASUREMENTS
Make sure the instrument has been calibrated before
taking pH measurements.
• Submerge the electrode tip and the temperature
probe approximately 4 cm (1½”) into the sample
to be tested and stir gently. Allow time for the
electrode to stabilize.
C
• The pH is displayed on the primary LCD and the temperature on
the secondary LCD.
• If the pH reading is out of range, “----” will be displayed on the
LCD.
If measurements are taken successively in different samples, it is
recommended to rinse the electrode thoroughly with deionized water
or tap water and then with some of the next sample in order to
prevent cross-contamination.
The pH reading is affected by temperature. In order to measure the
pH accurately, the temperature effect must be compensated for.
To use the Automatic Temperature Compensation feature, connect
and submerge the HI 7669/2W temperature probe into the sample
as close as possible to the electrode and wait for a few seconds.
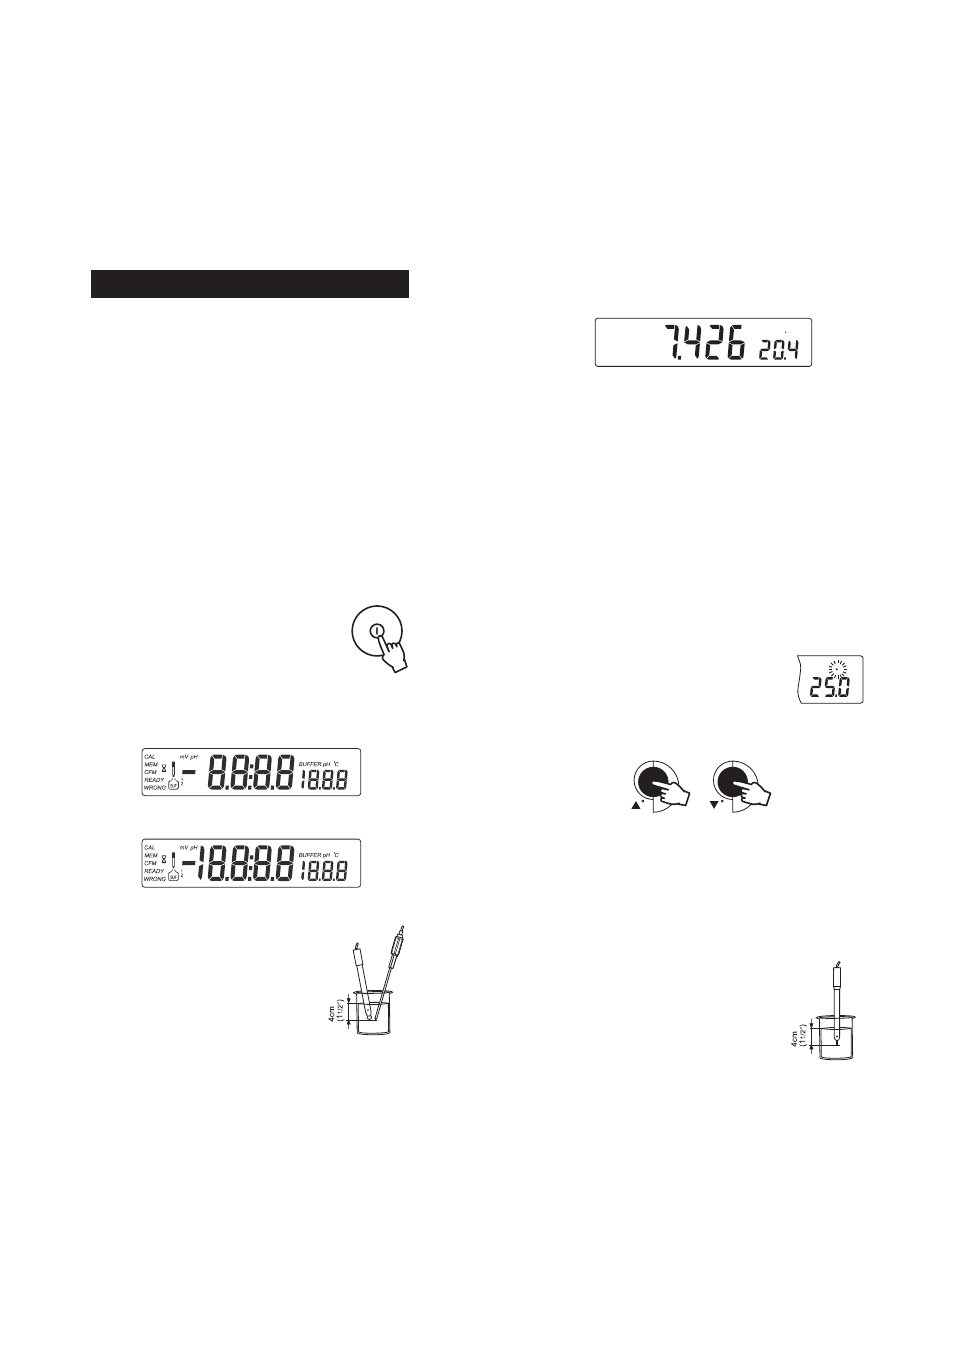
If the temperature of the sample is known,simple manual temperature
compensation can be performed by disconnecting the temperature probe.
The display will then show the default temperature
of 25 °C or the last recorded temperature reading
with the “°C” tag blinking. The temperature can now
be adjusted with the ARROW keys (from -9.9 °C to
120.0 °C).
ORP MEASUREMENTS (
ORP MEASUREMENTS (
ORP MEASUREMENTS (
ORP MEASUREMENTS (
ORP MEASUREMENTS (pppppH 211
H 211
H 211
H 211
H 211 and p
and p
and p
and p
and pH 213
H 213
H 213
H 213
H 213 only
only
only
only
only)))))
An optional ORP electrode must be used to perform ORP measurements
(see Accessories).
Oxidation-reduction potential (REDOX) measurements provide the
quantification of the oxidizing or reducing power of the tested sample.
To correctly perform a redox measurement, the surface
of the ORP electrode must be clean and smooth.
• Press RANGE to enter mV range.
• Submerge the tip of the ORP electrode (4 cm/
1½") into the sample to be tested and allow a
few seconds for the reading to stabilize.
OPERATIONAL GUIDE
OPERATIONAL GUIDE
OPERATIONAL GUIDE
OPERATIONAL GUIDE
OPERATIONAL GUIDE
C
C
pH
C