Step 1, Step 2, Step 3 – Glow-worm Chatsworth 4 User Manual
Page 7: Step 4, Step 5, Step 6, Step 7, Step 8, Instructions for use
7
221907C
5982
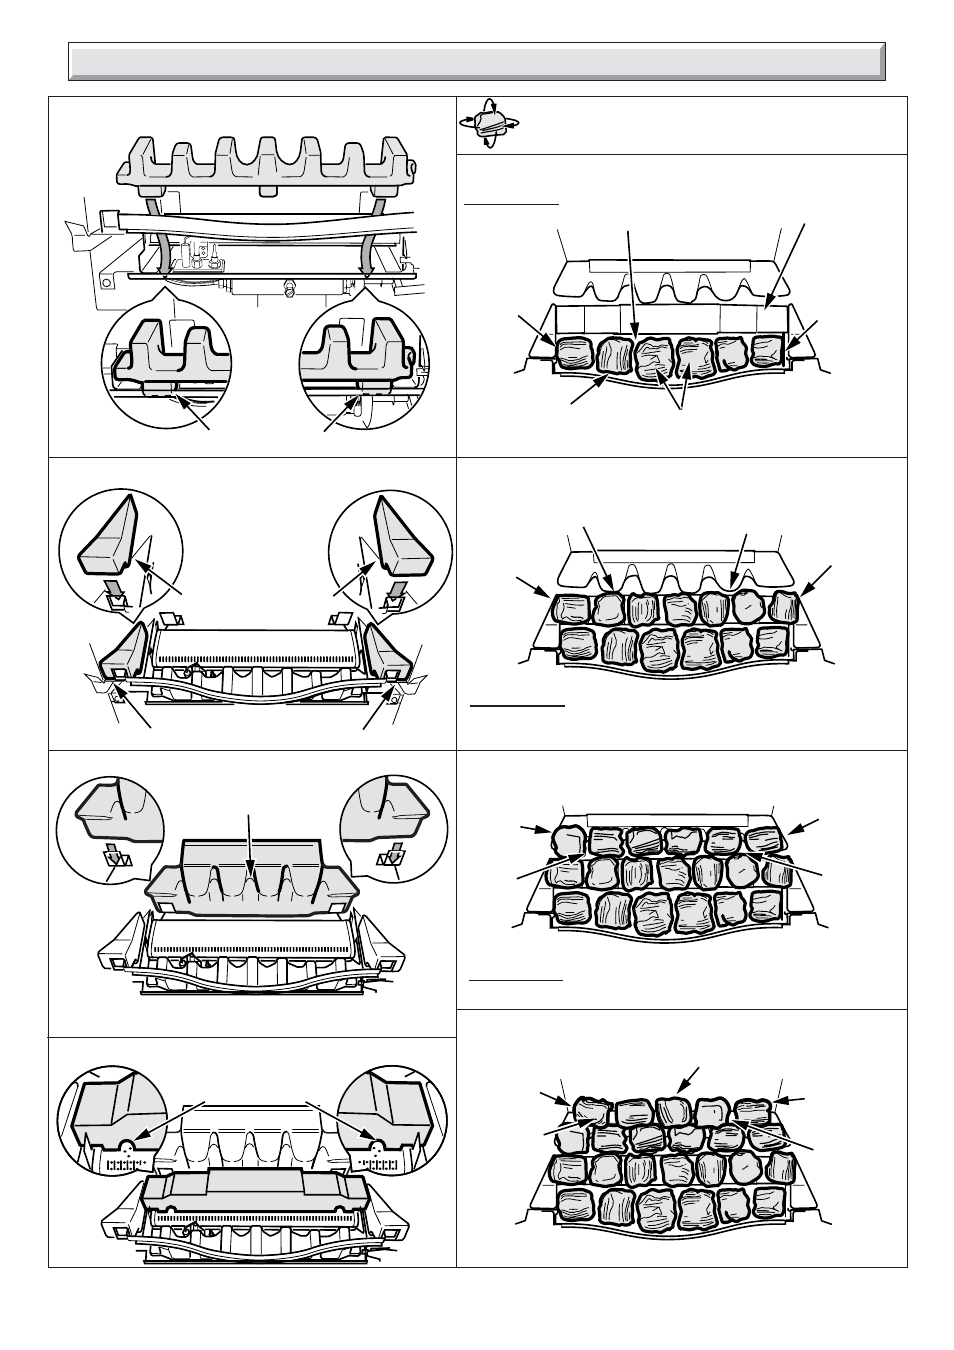
Diagram 6
STEP 1 -
Front support
STEP 2 -
Side supports
STEP 3 -
Rear support
STEP 4 -
Middle support
STEP 5 -
2 Large & 4 small fuel effect pieces
STEP 6 -
7 Small fuel effect pieces
STEP 7 -
6 Small fuel effect pieces
STEP 8 -
5 Small fuel effect pieces
Make sure feet are behind retaining lip
Position pieces to touch the front and side
Make sure the rear support sits on the bottom of the
brackets by pushing it down firmly
Place the 2 LARGE fuel effect pieces
with flat bases and round indents down
Sit 7 fuel effect pieces on the
middle support
Touch
the side
IMPORTANT Leave 3mm gap between
all fuel effect pieces and middle support
Fit 5 fuel effect pieces they must touch rear of fire
Not to touch
the side
Not to touch
the side
NOTE : The fuel effect pieces can be
rotated to achieve a random effect.
Touch
the side
Touch
the side
To touch the
left hand side
of support
bracket
Fit 4 small fuel
effect pieces
Sit 6 small
fuel effect
pieces on
rear
support
Keep cross lighting
ports clear
Middle support
Touch
the side
Touch
the side
This row of
fuel effect
pieces can
overlap
slightly
Make sure cut-out
is on bottom
Fit this
way up
Leave gaps
around
pieces
Leave gaps around pieces
Leave
gaps
around
pieces
IMPORTANT This row of fuel effect pieces must not
overlap the front row of fuel effect pieces. Position as
shown on the front edge of the middle support
IMPORTANT This row of fuel effect pieces must not
overlap the middle row of fuel effect pieces.
Instructions for Use