Gk013 p06_07_revert version, Let's operate "co-bot – Elenco Tumbling Robot User Manual
Page 4
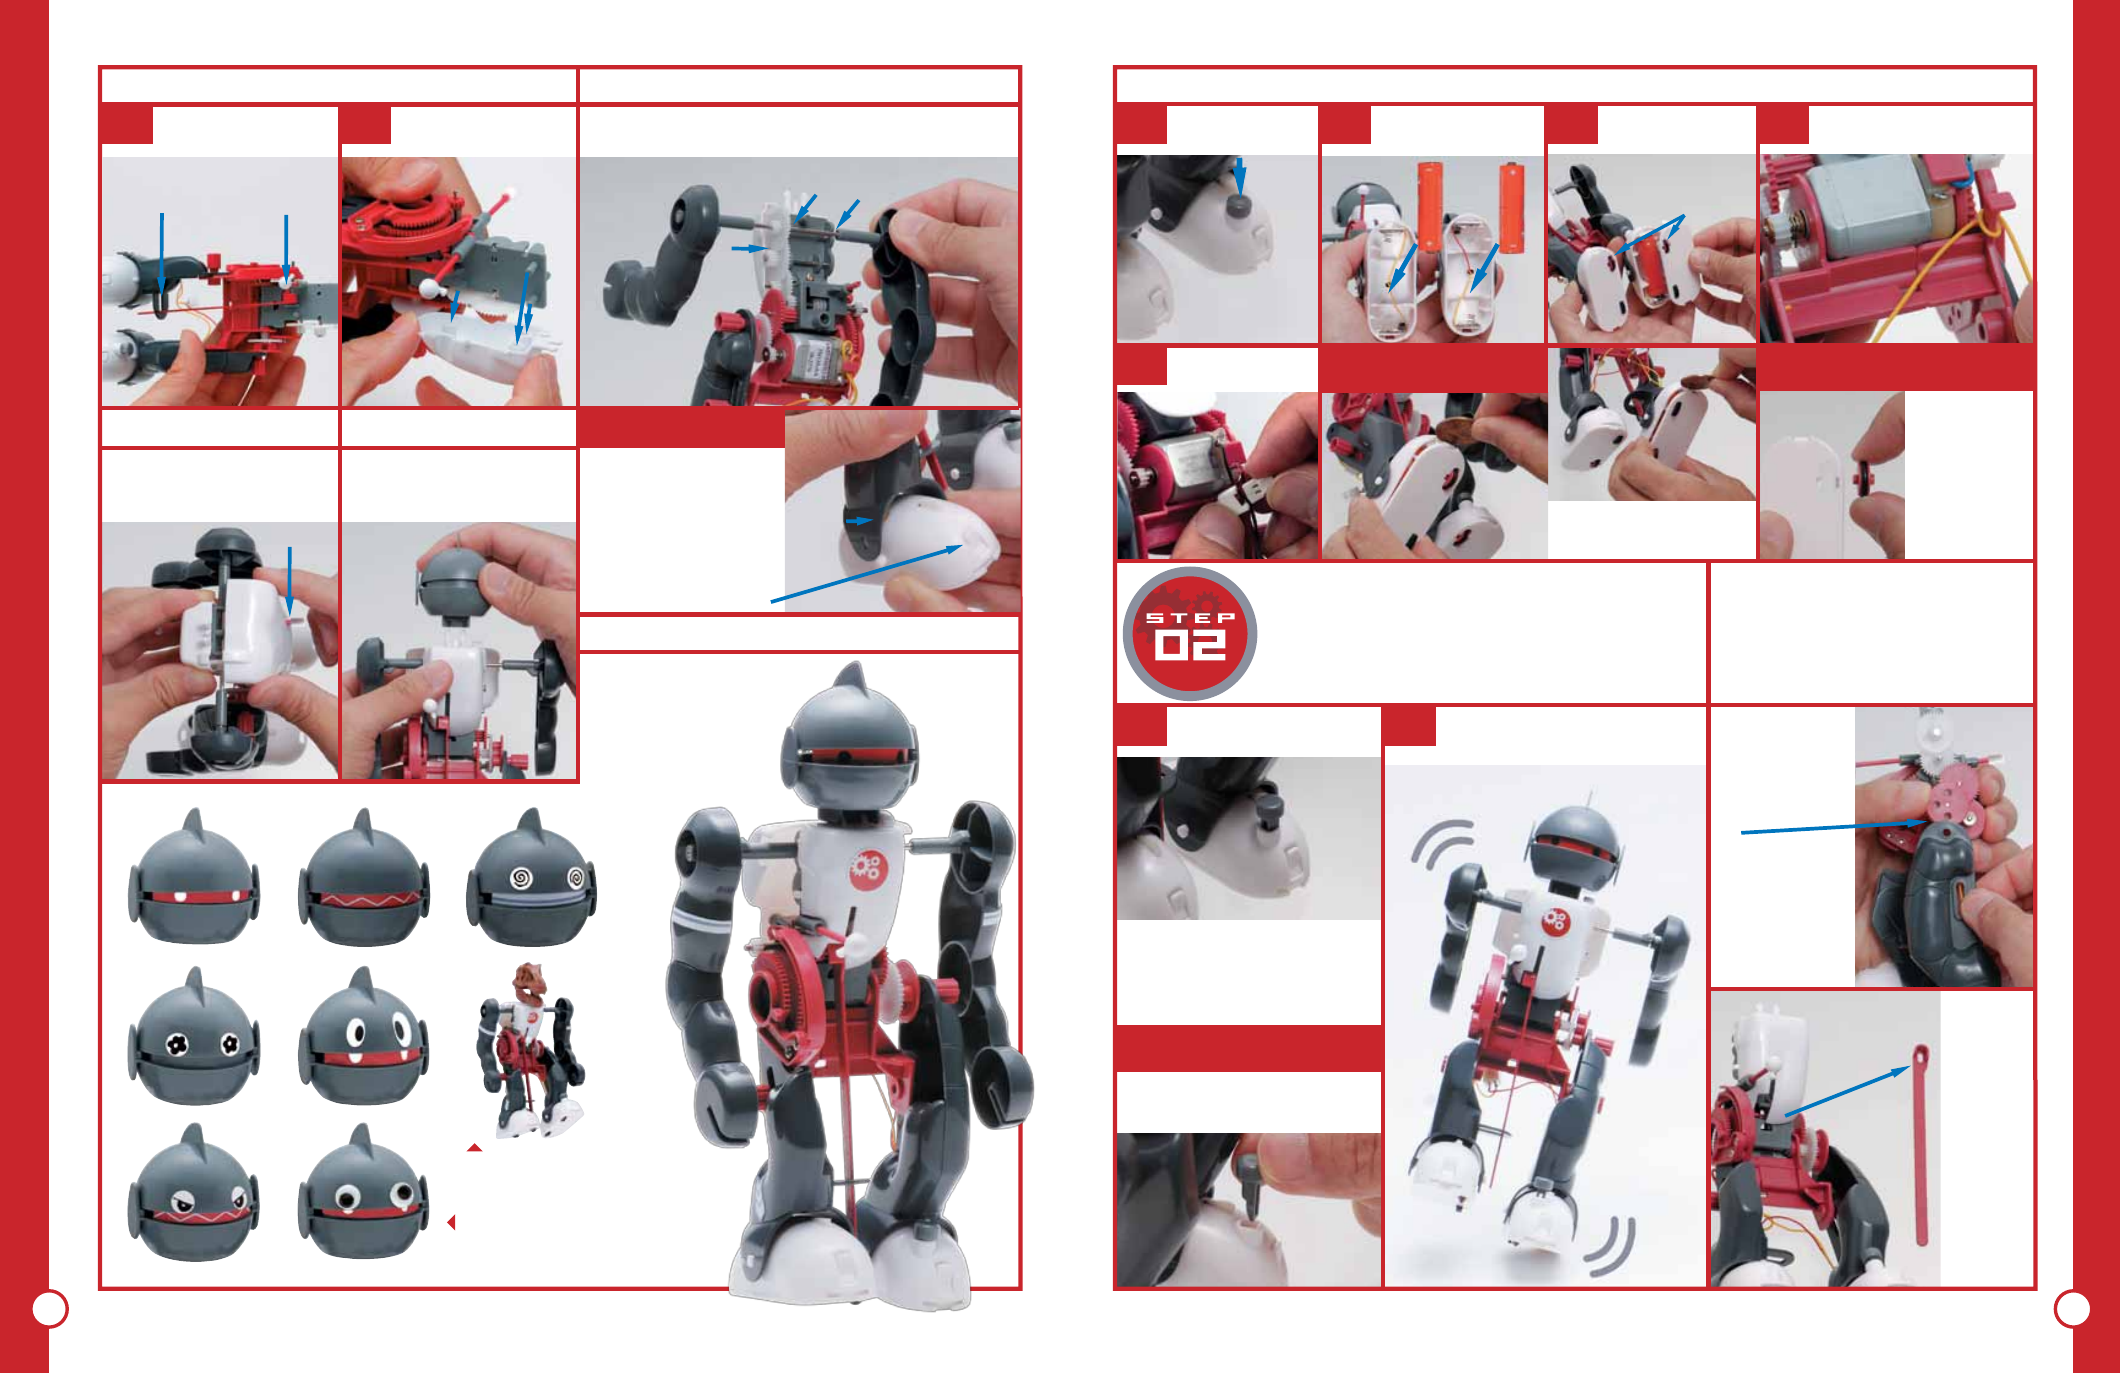
LET'S OPERATE
"CO-BOT"
Electrical Set Up
Keep foot button
pushed in.
Foot button pushed
in position switches
the robot off.
01
Pulling the foot button up
will turn the switch on.
Insert the button back into the
hole aligning the pointy side
with the toes.
Not recommended to operate
the robot on tables and furniture
that can be scratched and
damaged. Operating the robot
on the carpeted floor will make
the robot fall down easier.
There are 3 modes of Co-Bot. The
features of 3 modes are illustrated in
the next page.
01
Co-Bot starts moving vigorously.
Wobbly-funky!?
Dance Mode
Never tiring
Somersault
Mode
Remove leg
sensor from
the chest.
02
Be careful with
positive and negative
orientations of the
batteries.
02
Attach the soles of
feet. Be careful with
right and left soles!
*Wheels are
positioned
inside front.
03
Twist the yollow lead wire
around the hip hook (one turn).
04
Plug the
connectors.
05
right
foot
left
foot
Pry the sole off using
a coin at the grooves
on toes and heel.
Chest Assembly
Back Installation
Line the back so the back
sensor should penetrate the
back through the hole and
install the back.
Insert the foot back into
the bracket by slightly
opening the bracket.
Be careful not to insert
the foot backward.
Orientation of Toes and
heels is crucial for
walking.
* toes have big grooves
Head Installation
Align tongues and holes.
Push the head straight down.
Arms Assembly
Hold hip-leg assembly
sideway and attach
the leg sensor.
01
Align pegs and
grooves and snap on
the chest.
Line up the gears as shown in the picture. Snap on the
arm axis rod into the two side grooves (catch) of the
chest. Push the axis rod firmly in until it clicks.
How to use Decals
Be creative and find
your own expressions!
You can use a blank
sticker and draw your
own design, too!
Example of using
moving eye stickers.
(stickers not included.)
Replaced with a
head from different
toy figure!
02
First, pull
through
the hole.
Next, insert
one end into
the hip hook.
bracket
If the foot
detaches…
To exchange
batteries…
IF THE FOOT BUTTON
(SWITCH) DETACH …
If the wheels
detach…
Push the
square axle
of the wheel
into the
wider hole.
Orient the gear
as shown in the
picture, pin the
left leg on the
bottom hole.
6
7
JR. SCIENTIS
T
TUMBLING ROBO
T