Bird sounds project #447, Bird sounds (ii) project #448, Bird sounds (iii) project #449 – Elenco Projects 306-511 User Manual
Page 48: Bird sounds (iv) project #450, Bird sounds (v) project #451, Touch-control bird sound project #452
-47-
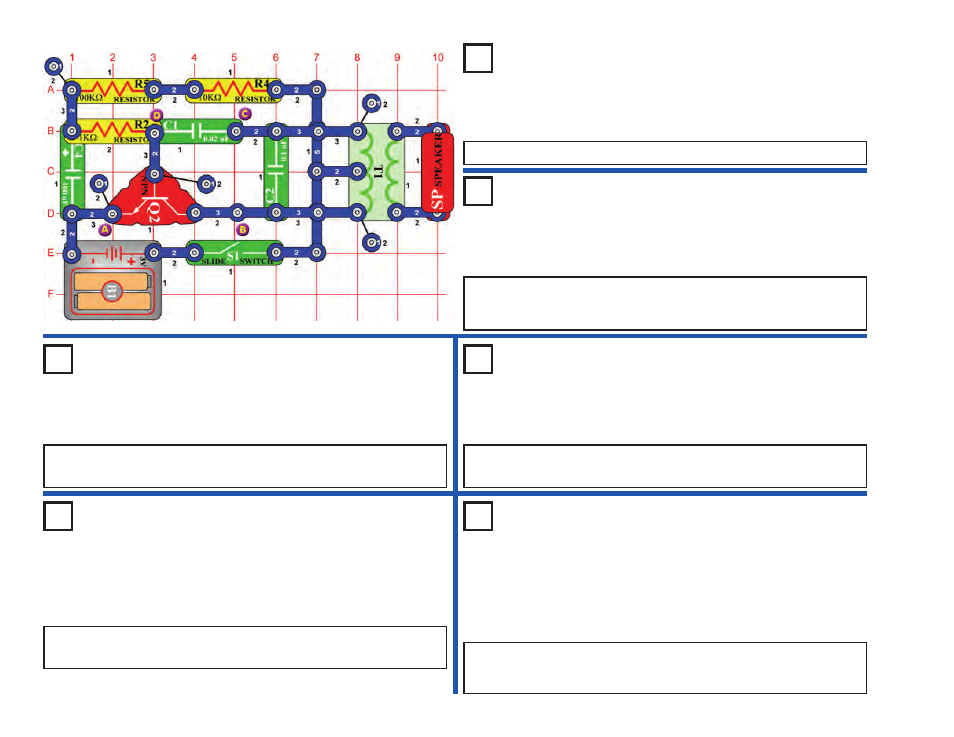
OBJECTIVE: To create bird sounds.
Turn on the switch (S1). The circuit makes a bird sound.
Bird Sounds
Project #447
OBJECTIVE: To create bird sounds.
Use the circuit in project #447. Replace the 100
μ
F (C4) capacitor with the
10
μ
F capacitor (C3), the tone should sound like a buzzer. Now use the
470
μ
F capacitor (C5) and hear how the tone gets longer between chirps.
Bird Sounds (II)
Project #448
OBJECTIVE: To create bird sounds.
Use the circuit in project #447. Using the jumper wires, connect the
whistle chip (WC) across points A & B and the sound changes.
Bird Sounds (III)
Project #449
OBJECTIVE: To create bird sounds.
Use the circuit in project #447. Connect the whistle chip (WC) across
points B & C.
Bird Sounds (IV)
Project #450
OBJECTIVE: To create bird sounds.
Use the circuit in project #447. Replace the 100k
Ω
resistor (R5) with the
photoresistor (RP). Wave your hand over the resistor and the sound
changes. With the photoresistor installed, redo projects #448 - 451.
Bird Sounds (V)
Project #451
OBJECTIVE: Show variations of project #447.
Using the jumper wires, connect the whistle chip (WC) across points C &
D.
Touch-Control
Bird Sound
Project #452