Project #340, Music meter, Project #334 – Elenco Projects 306-511 User Manual
Page 19: Display #5 project #335, Display #6 project #336, Display #7 project #337, Display #8 project #338, Display #9 project #339, Display #0
-18-
Project #334
OBJECTIVE: To configure the seven
segment to display the number 5.
Connect A, F, G, C, & D to the negative of the
battery.
Display #5
Project #335
OBJECTIVE: To configure the seven
segment to display the number 6.
Connect A, C, D, E, F, & G to the negative of
the battery.
Display #6
Project #336
OBJECTIVE: To configure the seven
segment to display the number 7.
Connect A, B, & C to the negative of the
battery.
Display #7
Project #337
OBJECTIVE: To configure the seven
segment to display the number 8.
Connect A, B, C, D, E, F & G to the negative
of the battery.
Display #8
Project #338
OBJECTIVE: To configure the seven
segment to display the number 9.
Connect A, B, C, D, F, & G to the negative of
the battery.
Display #9
Project #339
OBJECTIVE: To configure the seven
segment to display the number 0.
Connect A, B, C, D, E, & F to the negative of
the battery.
Display #0
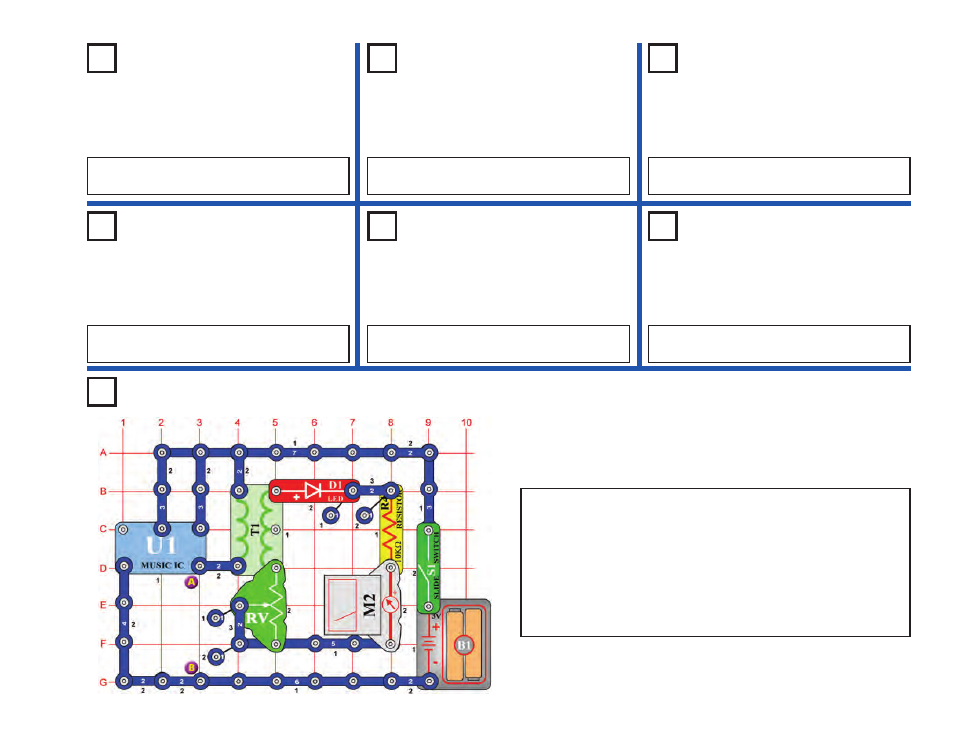
Project #340
OBJECTIVE: See and hear the output of the music IC.
Set the meter (M2) to the LOW (or 10mA) setting. In this circuit, the
output of the music IC (U1) is applied to the less windings side of the
transformer (T1), which lights the LED (D1) and deflects the meter.
Place the adjustable resistor (RV) to the bottom position and turn on
the switch (S1). Adjust the adjustable resistor upwards. This
increases the voltage across the LED and meter. The LED brightens
and the meter deflects more towards 10. Place the speaker (SP)
across points A & B and use a jumper wire to complete the connection.
Now you can hear and see the output of the music IC.
Music Meter
Visit www.snapcircuits.net or page 62 to learn about Snap Circuits
®
upgrade kits, which have more parts and circuits.