Setup requirements – Angelcare AC1100 User Manual
Page 5
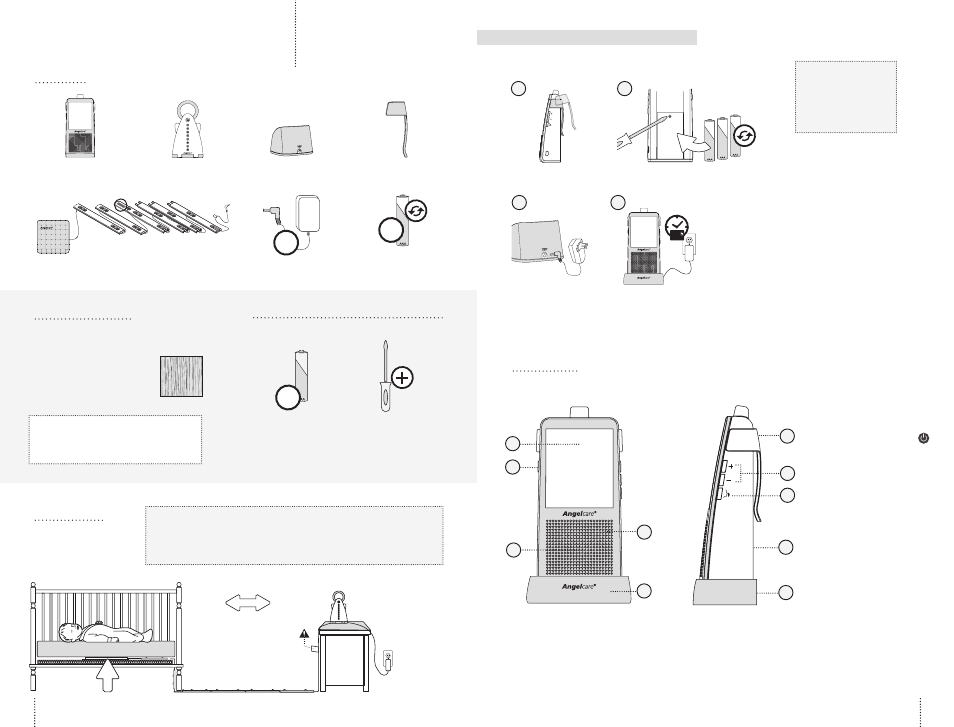
YOU MUST PREPARE:
One hardboard (not included)
Thickness:
6 mm
Minimum dimensions:
33 cm x 33 cm
Maximum dimensions:
equal to the mattress size
WHAT YOU WILL NEED (NOT INCLUDED):
Miniature Philips
Screwdriver
3 AAA Alkaline
Batteries
VIDEO, MOVEMENT
& SOUND MONITOR
Model AC1100
IMPORTANT
The hardboard must be larger than
the Sensor Pad surface area.
BABY’S ROOM:
SETUP REQUIREMENTS
3X
INCLUDED:
Rechargeable
Parent Unit
Nursery Unit
Charging Cradle
Belt Clip
6
5
4
3
2
1
1 Sensor Pad (AC1100) or 2 Sensor Pads (AC1100-2SP)
with pre-installed cord covers
3 Rechargeable
AAA Batteries
3X
2 AC Adapters
2X
Hardboard
6
5
4
3
2
1
Keep
at least
1 m.
IMPORTANT
Sensor Pad
IMPORTANT
Place the crib near a supporting wall and far from air currents.
Install the Nursery Unit on a flat, stable surface facing the crib
at a distance of at least 1 meter.
STEP 1 - CHARGING THE PARENT UNIT
1
2
3
4
1) Remove the Belt Clip.
2) Remove the battery door and insert
the Rechargeable Batteries (included).
3) Connect the AC Adapter to the
Charging Cradle and
into an electrical outlet.
4) Charge the unit for 15 continuous
hours (prior to first use).
15
IMPORTANT
Never use regular
alkaline batteries
in the Parent Unit;
they may explode.
PARENT UNIT:
Front Side
Left Side
F
B
C
A
D
E
G
J
I
H
A) LCD Touchscreen
B) POWER ON/OFF
C) Microphone
D) Speaker
E) Charging Cradle
F) Belt Clip
G) Speaker
Volume Buttons
H) Talk Back Button
I) Battery Door
J) AC Adapter Outlet
(not shown)
NOTE:
To optimize your battery performance
please refer to Battery Guidelines in the
Trouble Shooting section.
9
8