Installing a dialogic, Img 1010 voip or media module to dialogic, Img 1010 integrated media gateway – Dialogic Integrated Media Gateways IMG 1010 User Manual
Page 4
Installing a Dialogic
®
1010 VoIP or Media Module
Dialogic Corporation
Part # 07-8740-01
Page 4 of 6
Installing a Dialogic
®
IMG 1010 VoIP or Media Module to Dialogic
®
IMG 1010 Integrated Media Gateway.
Caution:
Electrostatic Discharge Protection (EDP) must always be used. Electrostatic Discharge (ESD)
protective straps, shoes, or mats must be used when working with electronic components.
Electrostatic discharge from your body can damage integrated circuits during installation.
Required Tools and Parts:
Dialogic
®
IMG 1010 VoIP Module or Dialogic
®
IMG 1010 Media Module (Dialogic supplied).
4 Phillips pan head screws (Dialogic supplied).
#1 Phillips head screwdriver (customer supplied).
Remove Dialogic
®
IMG 1010 Motherboard
1. Switch power to OFF (O) at rear of docking station.
2. Loosen the two ejector captive fasteners located on each side of the front panel.
3. Lift the ejectors upward and pull to unseat the tray from the docking station.
4. Remove Dialogic
®
IMG 1010 Motherboard. See
Diagram 1 - Removing Dialogic
®
IMG 1010
Motherboard Tray
.
5. Locate Module on Dialogic
®
IMG 1010 Motherboard. See
Diagram 2 - Dialogic
®
IMG 1010 VoIP
and Media Module Positions.
Installing Dialogic
®
IMG 1010 VoIP or Dialogic
®
IMG 1010 Media Module
1.
Position the module over the four standoffs on Dialogic
®
IMG 1010 Motherboard.
2.
Align the connectors on the module with the connectors on the motherboard and press together.
See diagram below:
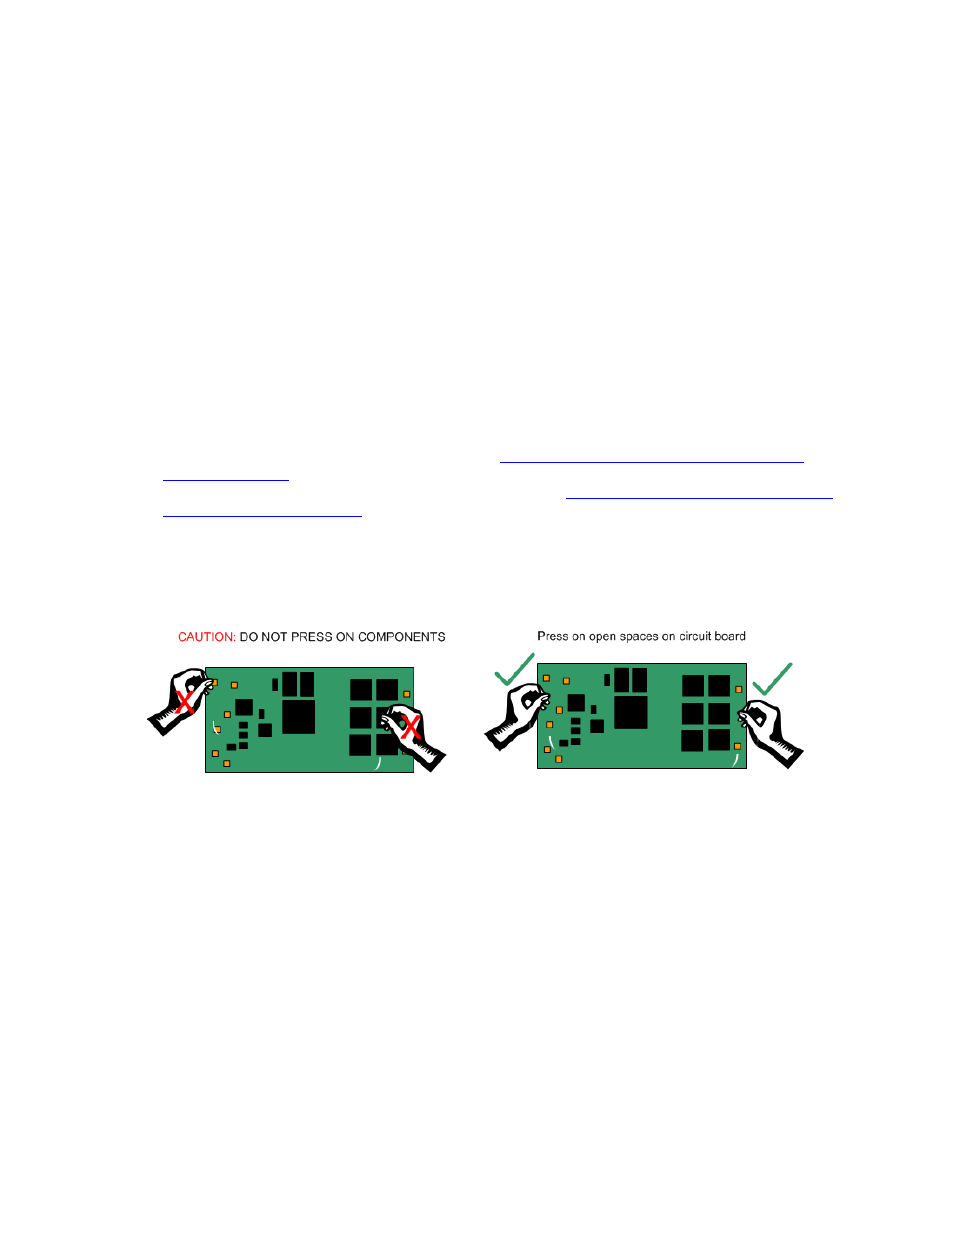
Cautions:
The connectors must be properly aligned and fully seated.
When pressing the module onto the motherboard do not press on the components installed on the
module; instead, do press on an open area on the edge of the Printed Circuit Board itself.
3.
Attach the module with the four (4) Phillips pan head screws. Do not over tighten the screws.
(Recommended torque: 3-5 in-lbs (.34-.56 N-M)).