Biscuit size selection, Biscuit location and layout, Biscuit location – Black & Decker 3382 User Manual
Page 9: Layout
Attention! The text in this document has been recognized automatically. To view the original document, you can use the "Original mode".
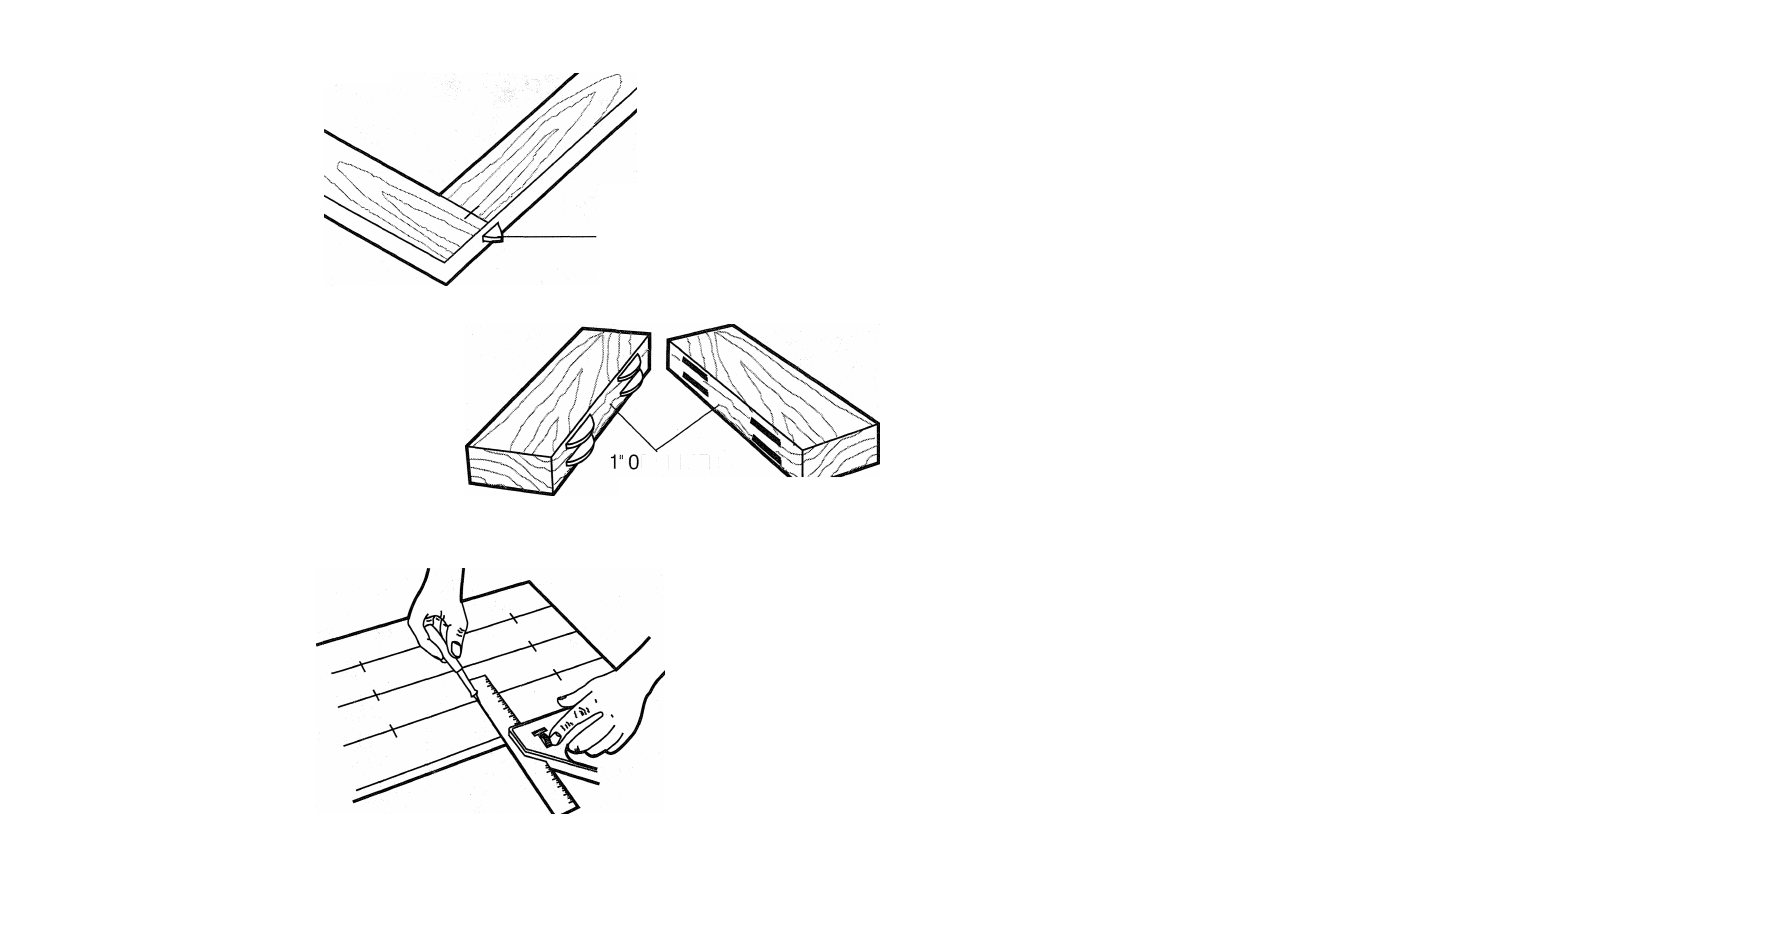
Figure 13
PROTRUDING BISCUIT
END (Trim off with saw
and sand smooth)
Figure 14
R GREATER
STOCK
THICKNESS
Figure 15
tions of joints that can be made with your plate joiner. We will limit our dis
cussion to six basic joints that can be used to build on and adapt to your own
applications. The following are some basic set-up steps that will apply to all
biscuit joints.
1. Biscuit Size Selection
As mentioned earlier, the three biscuit sizes are #0, #10 and #20. It is a good
rule of thumb to use the largest biscuit size that will physically fit in the appli
cation. Unless you are joining narrow face or picture frames or using 1/2"
(12.7mm) or thinner stock, you will find the #20 biscuit size to suit most
applications. After selecting the biscuit size, set the depth adjustment knob to
the corresponding size (see Controls section). Also, be sure the fine depth
adjustment is correctly set by first testing in a scrap piece. This is extremely
important as you do not want to discover during glue-up that your biscuit
slots are not quite deep enough.
2. Biscuit Location
and
Layout
Generally, biscuits may be spaced and located at your discretion. For edge
joints, a good rule is to space biscuits every 6-10" (150-250mm) on center. It
is further recommended that biscuits be placed so that the centerline of the
end biscuits is 2-3" (50-75mm) from the end of the work piece. When joining
face frames or picture frames where the work piece is narrow, you may have
to choose the smaller biscuit sizes to keep from breaking out on the end of the
joint. Breaking out should be avoided if possible, but if not you can assemble
the joint and trim off the exposed biscuit tip after the glue sets (See Figure 13).
When working with material up to 1/2" (25.4mm) thick, we advise to use a
single biscuit located in the approximate center of the material thickness. If
thicker stock is to be joined, you may choose to use 2 biscuits across the
thickness for greater strength (See Figure 14). Biscuit locations should be
marked by first positioning the mating pieces exactly as they are to be assem-