Throttle control adjustment, Carburetor adjustments, Lubrication – Bolens 112-428R372 User Manual
Page 11
Attention! The text in this document has been recognized automatically. To view the original document, you can use the "Original mode".
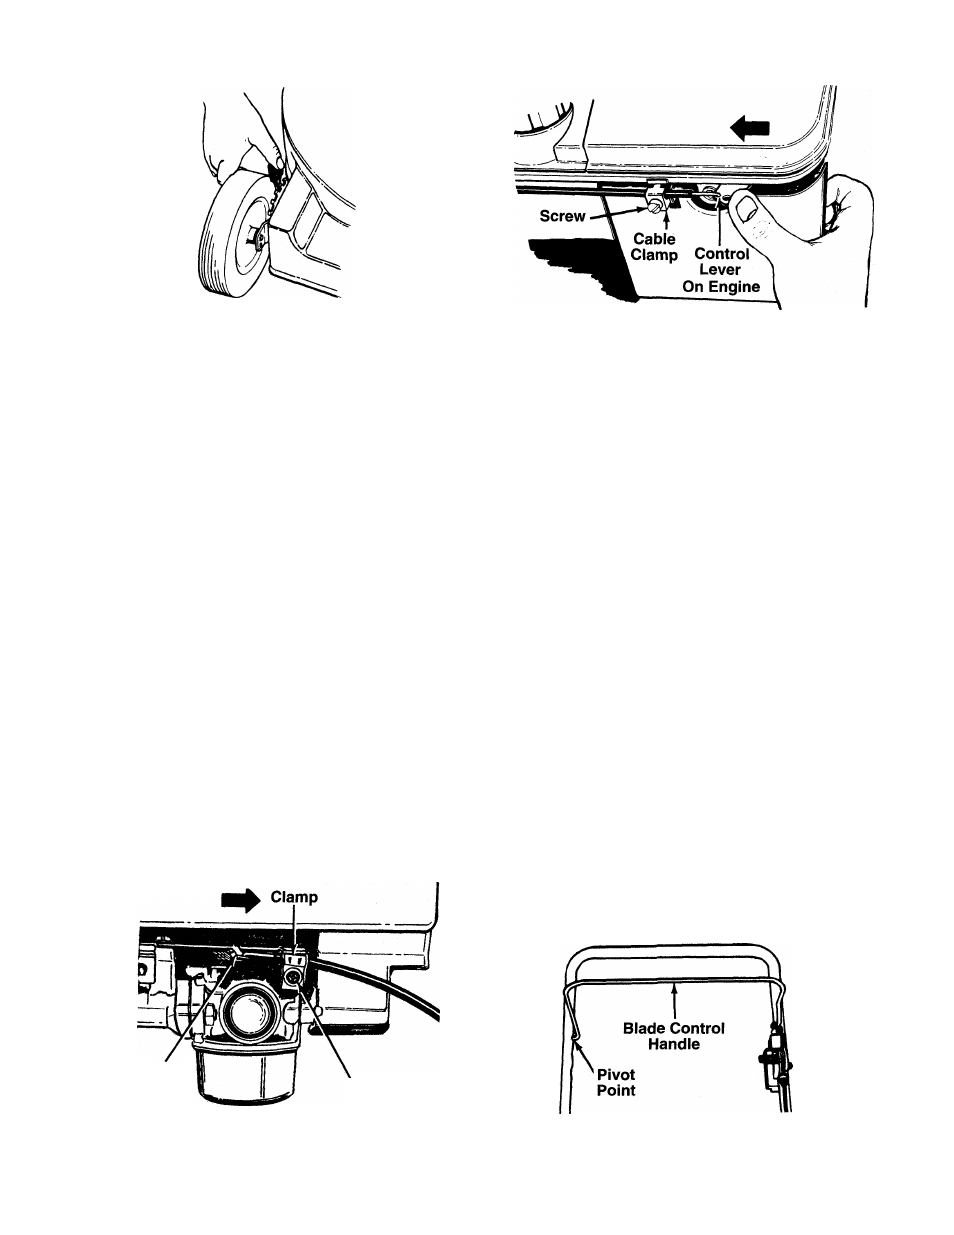
FIGURE 18.
THROTTLE CONTROL ADJUSTMENT
If the throttle control needs adjustment or if it has
been replaced, adjust as follows.
1. Remove the screw shown in figure 19. Remove
the cable clamp from the cable.
NOTE: If you have a Tecumseh engine, simply loosen
the screw shown in figure 19B so the cable will move
freely beneath the clamp. It is not necessary to
remove the screw and clamp completely.
2. Push the throttle control lever on the handle all
the way forward as far as it will go, then back it off
one “click.” Make certain the throttle control
lever remains in this position.
3. Push the control lever on the engine as far toward
the rear of the engine as it will go. Secure the
cable in this position with the cable clamp and
screw.
Cable
Control
Lever
Screw
On Engine
FIGURE 19A.—Briggs & Stratton Engines
FIGURE 19B.—Tecumseh Engines
CARBURETOR ADJUSTMENTS
A
WARNING: If any adjustments are made
to the engine while the engine is running
(e.g. carburetor), keep clear of all moving
parts. Be careful of heated surfaces and
muffler.
Minor carburetor adjustments may be required to
compensate for differences in fuel, temperature,
altitude and load. To adjust carburetor, refer to the
separate engine manual packed with your mower.
NOTE: A dirty air cleaner will cause an engine to run
rough. Be certain air cleaner is clean and attached to
the carburetor before adjusting carburetor. Refer to
the separate engine manual.
LUBRICATION
A
WARNING: Always stop engine and dis
connect spark plug wire before cleaning,
lubricating or doing any kind of work on
lawn mower.
Blade Control—Lubricate the pivot points on the
blade control handle and the brake cable at least
once a season with light oil. See figure 20. The blade
control must operate freely in both directions.
FIGURE 20.
11