Bench mounting – Black & Decker 9400 User Manual
Page 7
Attention! The text in this document has been recognized automatically. To view the original document, you can use the "Original mode".
Tilt the table as desired and
align the “0” mark on the table with
the appropriate mark on the scale.
Tighten the bolt to hold the table at
the desired angle.
ROTATING WORK TABLE: For
drilling applications where you need
a little extra height, the Work Table
can be rotated out of the way by
loosening the table clamping handle
and pushing the table to one side.
This allows you to clamp the
workpiece to the Base Plate and,
thus, get a little more height for taller
workpieces.
NOTE: WE STRONGLY
RECOMMEND THAT YOU FIRMLY
MOUNT YOUR DRILL PRESS TO
A SOLID WORKBENCH OR
OTHER RIGID FRAME.
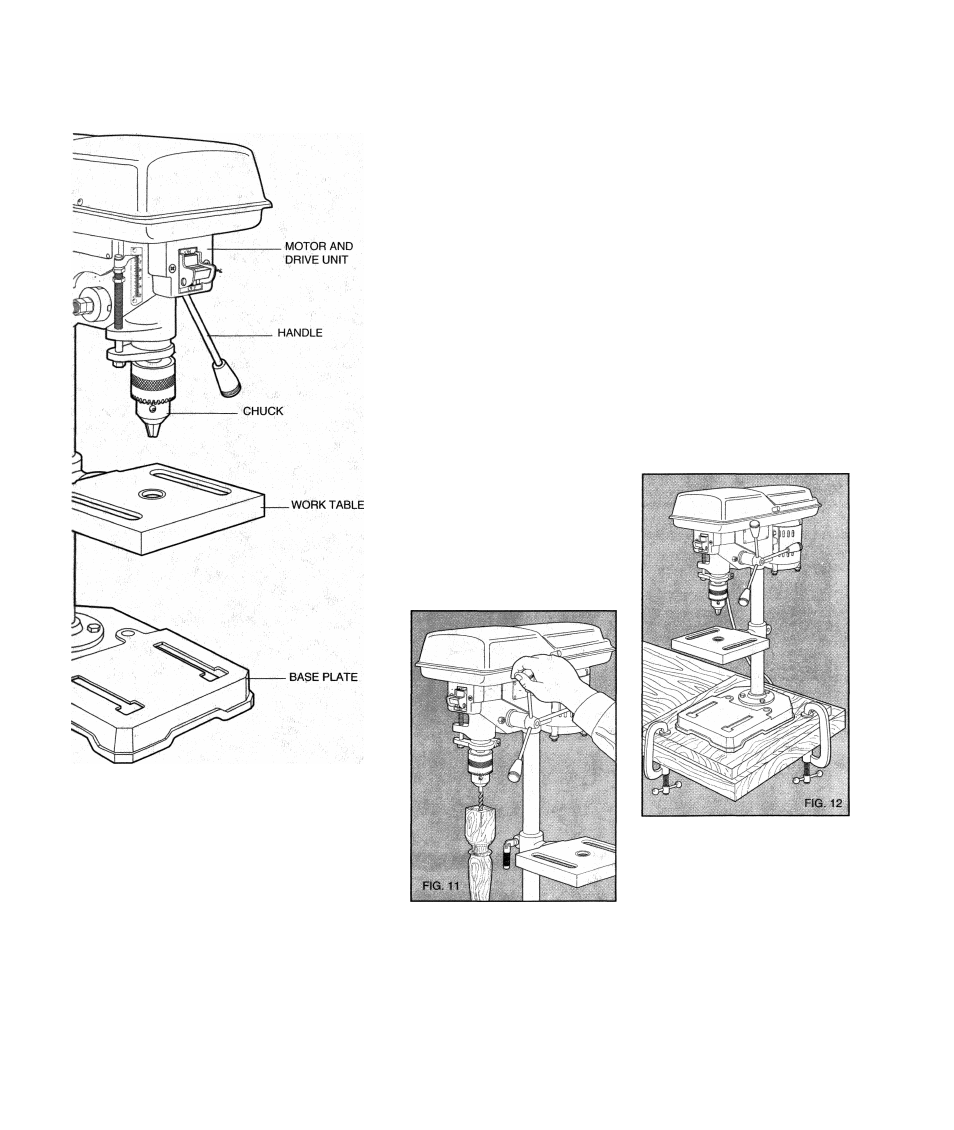
ROTATING MOTOR AND
DRIVE UNIT: The Motor and Drive
Unit rotates about the column in
order that you may drill objects that
are off the table such as that shown
in Figure 11. To rotate the Motor and
Drive Unit, use the hex wrench
provided and loosen the hex screw
that clamps to Motor & Drive Unit to
the column. Rotate as desired and
re-tighten the screw.
NOTE: WE STRONGLY
RECOMMEND THAT YOU FIRMLY
MOUNT YOUR DRILL PRESS TO
A SOLID WORKBENCH OR
OTHER RIGID FRAME.
Bench Mounting
NOTE: WE STRONGLY
RECOMMEND THAT YOU FIRMLY
MOUNT YOUR DRILL PRESS TO
A SOLID WORKBENCH OR
OTHER RIGID FRAME.Two holes
are provided In the base for this
purpose. Use large wood screws if
mounting to wood or appropriate
machine screws and nuts if mount
ing to metal.
To enhance the tool’s portabil
ity, It can be mounted to a piece of
5/8" or thicker plywood which can, In
turn, be “C” clamped to your work
surface as shown in figure 12 below.
ALWAYS CLAMP THE
WORKPIECE.
ALWAYS WEAR EYE
PROTECTION.