Maintenance, Attaching & removing blades, Figure 2 – Black & Decker cat 3027-90 User Manual
Page 5
Attention! The text in this document has been recognized automatically. To view the original document, you can use the "Original mode".
MAINTENANCE
It is recommended that, once a year, you take or send the tool to a B&D Service
Center for a thorough cleaning, inspection and lubrication of the gear case. Service
Center addresses are shown on the owner registration card packed with your tool.
RETRACTING
LEVER
FIGURE 1
MOlfITING
HOLE
SCREW WASHER
CLAMPING
SCREW OUTER CLAMP
WASHER
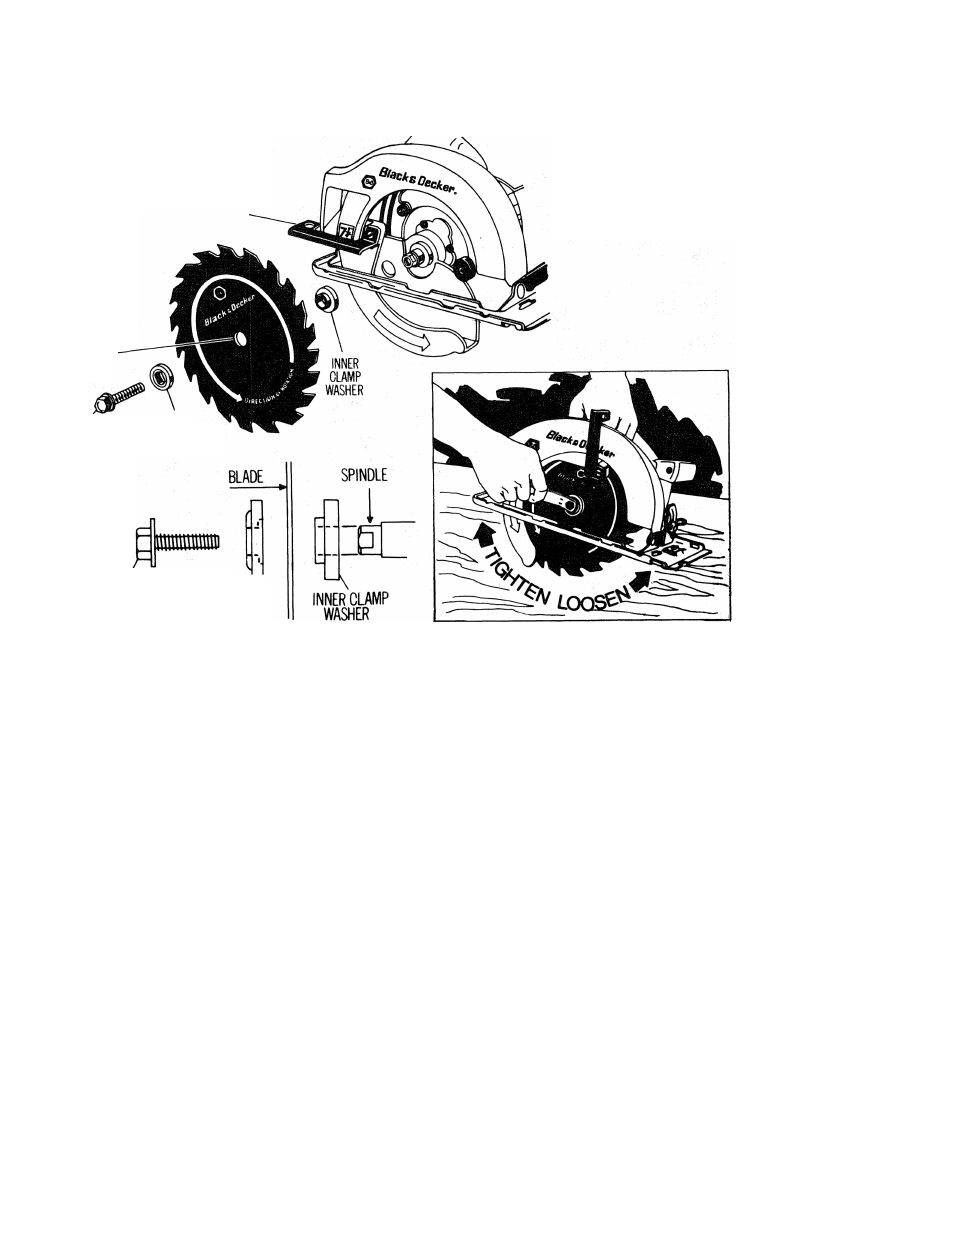
ATTACHING & REMOVING BLADES
FIGURE 2
1. BE SURE SAW IS DISCONNECTED FROM POWER SUPPLY!
2. To remove blade clamping screw (Fig. 1):
—a. ON NEW SAWS (without blade attached). Turn screw counter-clockwise with
blade wrench provided. If screw does not loosen easily from spindle, tap the outer
end of the wrench sharply in a counter-clockwise direction with a piece of wood
to "free” the screw threads. Remove screw and outer clamp washer.
—b. ON SAWS WITH BLADE ATTACHED. Using the retracting lever, retract the
lower blade guard and place the Saw on a piece of scrap lumber as shown in
Figure 2. Press down on the Saw so that the blade teeth dig slightly into the lum
ber and prevent the blade from turning. Then, with the blade wrench provided,
turn the clamping screw counter-clockwise and remove the screw and outer clamp
washer. Disengage the blade teeth from the lumber, and with the lower blade
guard still retracted, lift off the blade.
3.
To attach the blade: Place inner clamp washer on spindle if previously re
moved. Retract lower blade guard and place blade over inner clamp washer with
printed side of blade out (teeth at bottom of blade pointing forward). Fit outer
clamp washer onto spindle . . . “flats” on the outer washer must mesh with the
“flats” on the spindle. Thread on clamping screw firmly by hand to hold washers
in position. Place Saw on piece of scrap lumber as shown in Figure 2 and press
down on the Saw so that blade teeth dig slightly into wood and prevent the blade
from turning. Tighten clamping screw (clockwise) firmly with the blade wrench.
NOTE: An alternate way to keep the blade from turning, when tightening or loosen
ing the blade screw, is to hold a large nail through the hole in the blade and
against the forward part of the shoe. Rest the nail on top of the shoe when tight
ening, against the bottom when loosening. CAUTION: Remove nail before con
necting plug.