Assembly – MTD 249-610-000 User Manual
Page 4
Attention! The text in this document has been recognized automatically. To view the original document, you can use the "Original mode".
IMPORTANT
This unit has been shipped without
gasoline or oil in the engine. After
assembly, refer to separate engine
manual for proper fuel and engine oil
information.
O O
ASSEMBLY
j — I f
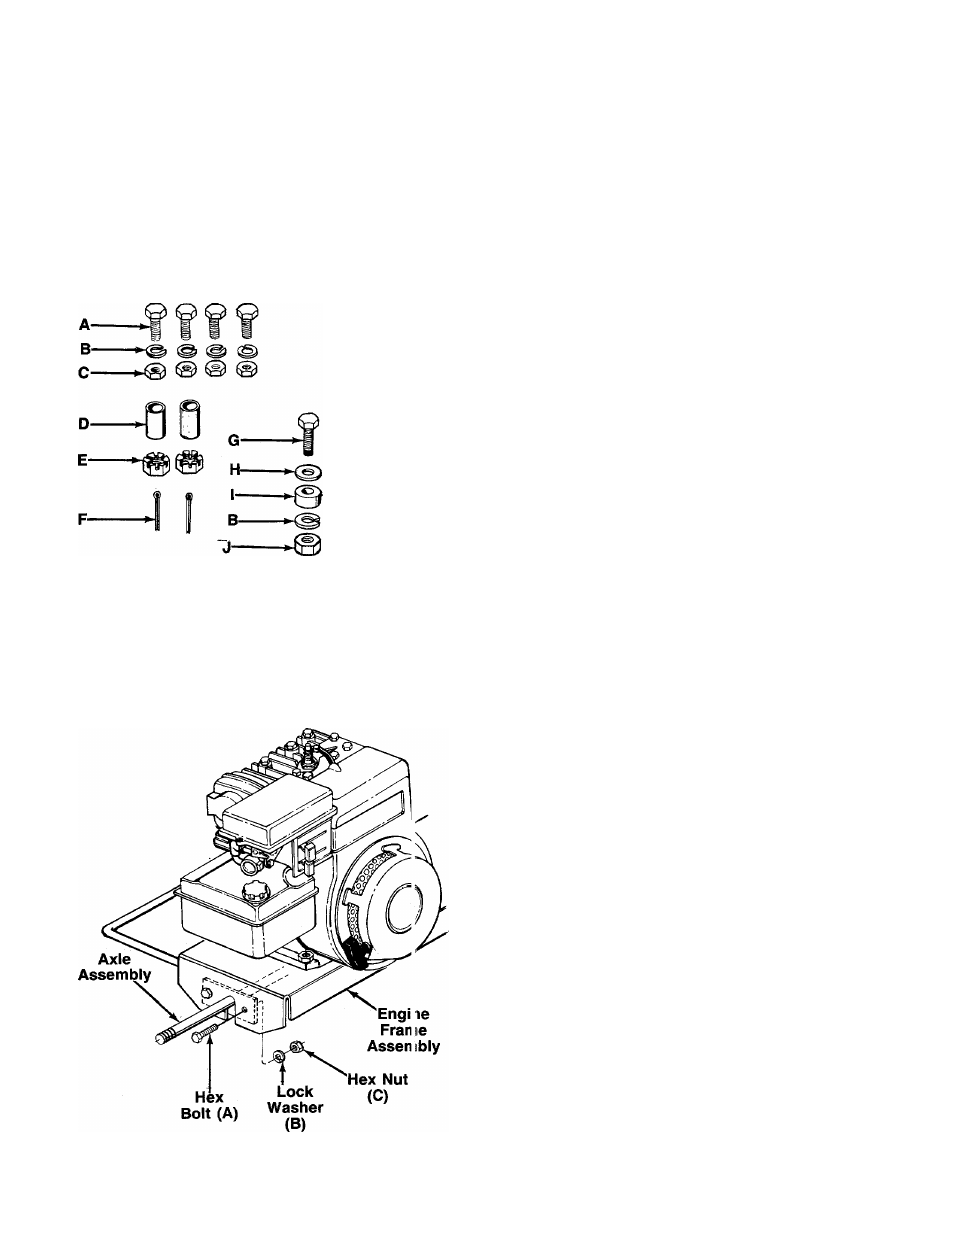
FIGURE 1.
UNPACKING
Remove the log splitter and loose parts from the car
ton by cutting the corners of the carton. Make certain
all parts and literature have been removed from the car
ton before the carton is discarded.
Loose Parts In Carton:
(1) Axle Assembly
(1) Tow Hitch Assembly
(1) Beam Stand
(1) Tow Hitch Chain
(1) Hardware Pack
-Contents of Hardware Pack (See Figure 1):
A (4) Hex Bolts 3/8-24 x 1" Long (Fine Thread)
B (7) Lock Washers 3/8" I.D.
C (4) Hex Nuts 3/8-24 (Fine) Thread
D (2) Spacers 3/4" I.D. x 1-1/2" Long
E (2) Castle Nuts 3/4-16 Thread
F (2) Cotter Pins
G (1) Hex Bolt 3/8-16 x 1-1/2" Long (Coarse Thread)
H (1) Flat Washers 3/8" I.D.
I (1) Spacer 3/8" I.D. x 1/4" Long
J (3) Hex Nuts 3/8-16 (Coarse) Thread
K (2) Hex Bolts 3/8-16
X
3-1/4" Long (Coarse Thread)
L (2) Spacers 3/8" I.D. x 2" Long
(1) Automotive Grease (not shown)
Tools Required for Assembly
(2) 9/16" Wrenches*
(1) Flat Blade Screwdriver
(2) Adjustable Wrenches
(1) Pair of Pliers
(1) Soft Hammer or Mallet
*Adjustable Wrenches may be used.
Other Materials Required for Assembly
Engine Oil
Unleaded Gasoline
Approximately 3 Gallons of Dexron II Automatic
Transmission Fluid
FIGURE 2.
ATTACHING THE AXLE
1. Block up the engine frame assembly.
—2. Place the axle assembly in position inside the
engine frame assembly as shown in figure 2.
Secure with 1" long fine thread hex bolts (A), four
lock washers (B) and fine thread hex nuts (C), us
ing two 9/16" wrenches. Tighten securely.
Remove the protective plastic covers from the ends
of the axles.
3.
4.