Attaching the bag, Installing the shift knob, Shift lever – MTD 315B User Manual
Page 6: Drive clutch handle, Gas and oil fill-up, To start engine, Operation
Attention! The text in this document has been recognized automatically. To view the original document, you can use the "Original mode".
ATTACHING THE BAG
1. Place bag inside of handie assembly. Slip the
opening on the bag over the discharge chute,
making certain it is over the rib on the discharge
chute. See figure 6.
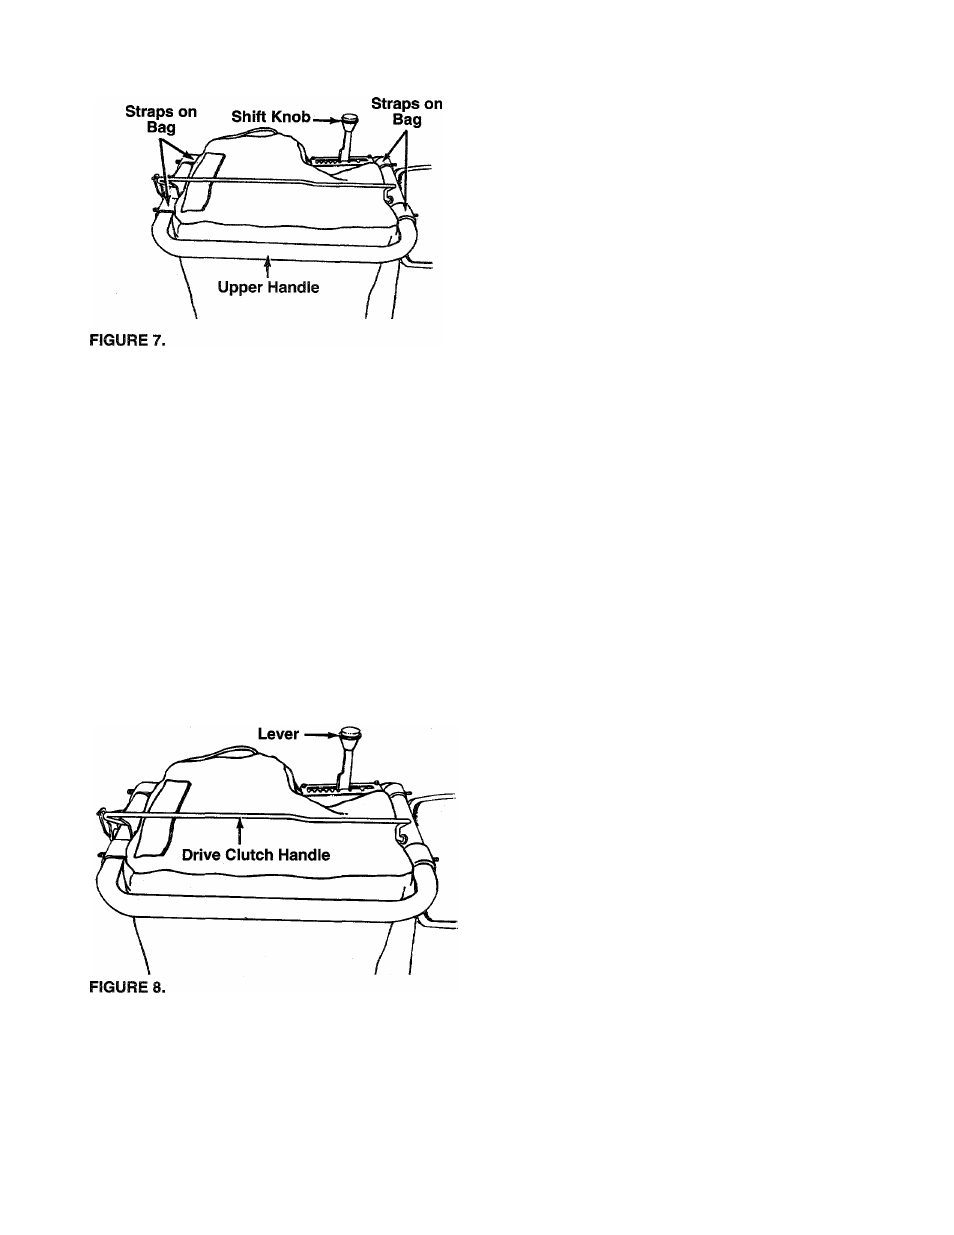
2. Place the four straps on the top of the bag over
upper handle, hooking them on studs. See figure
7. Be sure the bag goes under the drive dutch
handle.
3. Squeeze the clamp on the drawstring, and puli
the drawstring tight. Release the clamp.
INSTALLING THE SHIFT KNOB
Remove the cardboard protecting the threads. Thread
the shift knob onto the end of the shift lever.
OPERATION
CONTROLS
(See figure 8)
SHIFT LEVER
The shift lever may be moved into one of eight posi
tions. Run engine with throttle in the fast position. Use
the shift lever to determine ground speed.
Forward
—one of six speeds. Position number one (1)
is the slowest. Position number six (6) is the fastest.
Reverse
—two reverse (R) speeds. “R” (all the way to
the right) is the faster of the two.
DRIVE CLUTCH HANDLE
Squeezing the drive clutch handle against the upper
handle engages the wheel drive. Release the drive
clutch handle to stop the forward drive.
Shift
GAS AND OIL FILL-UP
Service the engine with gasoline and oil
as
instructed in the separate engine manual packed with
your chipper-vacuum.
Read instructions carefully.
NOTE:
Your chipper-vacuum is shipped without oii;
however, a smaii amount of oii may be present from
the factory. Do not overfiii.
A
WARNING: Never fill fuel tank indoors,
with engine running or while engine is
hot. Do not smoke when filling fuel tank.
TO START ENGINE
IMPORTANT:
If unit shows any sign of motion with
the clutch handle disengaged, shut engine off immedi
ately. Readjust as instructed in the “Clutch Cable
Adjustment” section of the Assembly Instructions.
A
WARNING: Be sure no one other than the
operator is standing near the chipper-
vacuum while starting or operating. Do
not operate this chipper-vacuum unless
the nozzle, discharge chute and bag have
been properly installed.
1. Attach spark plug wire to spark plug.
2. Make certain drive clutch handle is in the disen
gaged (released) position.
3. Move choke lever on engine to CHOKE position.
(A warm engine may not require choking.)
4. Move throttle control lever on engine to FAST
position.
5. Place one foot on the left rear wheel to prevent
the unit from skidding while starting.
6. Grasp starter handle and pull rope out slowly until
engine reaches start of compression cycle (rope
wiirpull slightly harder at this point). Let the rope
rewind slowly.
NOTE:
A
noise wiil be heard when finding the start of
the compression cycie. This noise is caused by the
fiaiis and fingers which are part of the shredding
mechanism faiiing into piace, and shouid be expect
ed. in addition, the fiaiis and fingers wili be noisy after
the engine is started, untii the impeiier reaches fuii
speed.