Ahaching the beam support/latch bracket, Attaching the engine and pump assembly, Attaching the fenders – MTD 242-632-000 User Manual
Page 7: Attaching the control handle
Attention! The text in this document has been recognized automatically. To view the original document, you can use the "Original mode".
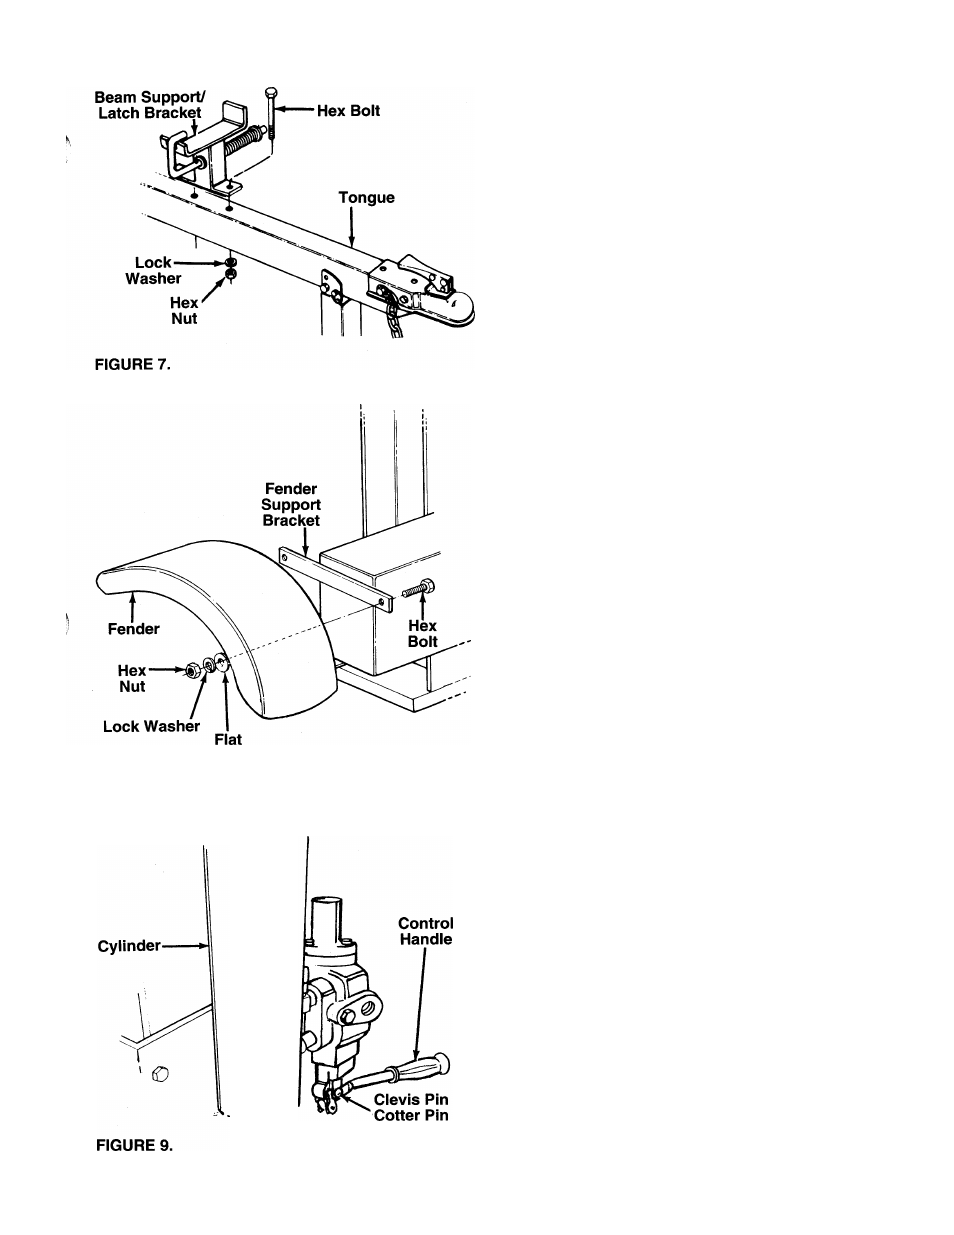
AHACHING THE BEAM SUPPORT/LATCH BRACKET
1.
Remove the two hex bolts, lock washers and hex
nuts from the tongue, using two 9/16" wrenches.
2. Place the beam support/latch bracket on the
-------- tongue as shown in figure 7. Secure with hex
bolts,
lock
washers
and
hex
nuts
just
removed.
Tighten securely.
ATTACHING THE ENGINE AND PUMP ASSEMBLY
1.
Using two 1/2" wrenches, remove the four hex
bolts,
lock
washers
and
hex
nuts
which
secure
the base of the engine to the bottom of the ship
ping carton.
2.
Place the engine and pump assembly in position
on the engine mounting bracket as shown in fig
ure
6.
Secure
with
hardware
just
removed.
Tighten securely.
ATTACHING THE FENDERS
(Model 632 Only)
1.
Using two 1/2" wrenches, remove the hex nuts,
lock washers, flat washers and hex bolts from the
fender support brackets.
2.
Place the fenders in position against the fender
support
brackets.
Insert
hex
bolts
through
holes
in support brackets and fenders. Secure with flat
washers, lock washers and hex nuts. See figure
------- 8. Tighten securely.
Washer
FIGURE 8.
ATTACHING THE CONTROL HANDLE
1.
The control handle is taped to the stripper half for
shipping purposes only. Remove the tape.
2.
The
bottom
of
the
control
handle
is
already
attached to the valve. Remove the cotter pin and
clevis pin which are attached to the valve. Place
the handle in position, and secure to the valve
—— using the cotter pin and clevis pin. See figure 9.