Tractor, Blade care, Blade removal (see fig. 16) – Poulan XC1182B User Manual
Page 16: To sharpen blade (see fig. 17), Maintenance
Attention! The text in this document has been recognized automatically. To view the original document, you can use the "Original mode".
MAINTENANCE
TRACTOR
Always observe safety rules when performing any mainte
nance.
TIRES
• Maintain proper air pressure in all tires (See ’’PRODUCT
SPECIFICATIONS” on page 3 of this manual).
• Keep tires free of gasoline, oil, or insect control chemicals
which can harm rubber.
• Avoid stumps, stones, deep ruts, sharp objects and other
hazards that may cause tire damage.
BLADE CARE
For
best results mower blades must be kept sharp. The
blades can be sharpened with a file or on a grinding wheel.
We suggest they be sharpened or replaced after every 25
hours of mowing. Check blades more often if mowing in
sandy conditions.
• Do not attempt to sharpen blades while they are on the
mower.
• Replace bent or damaged blades.
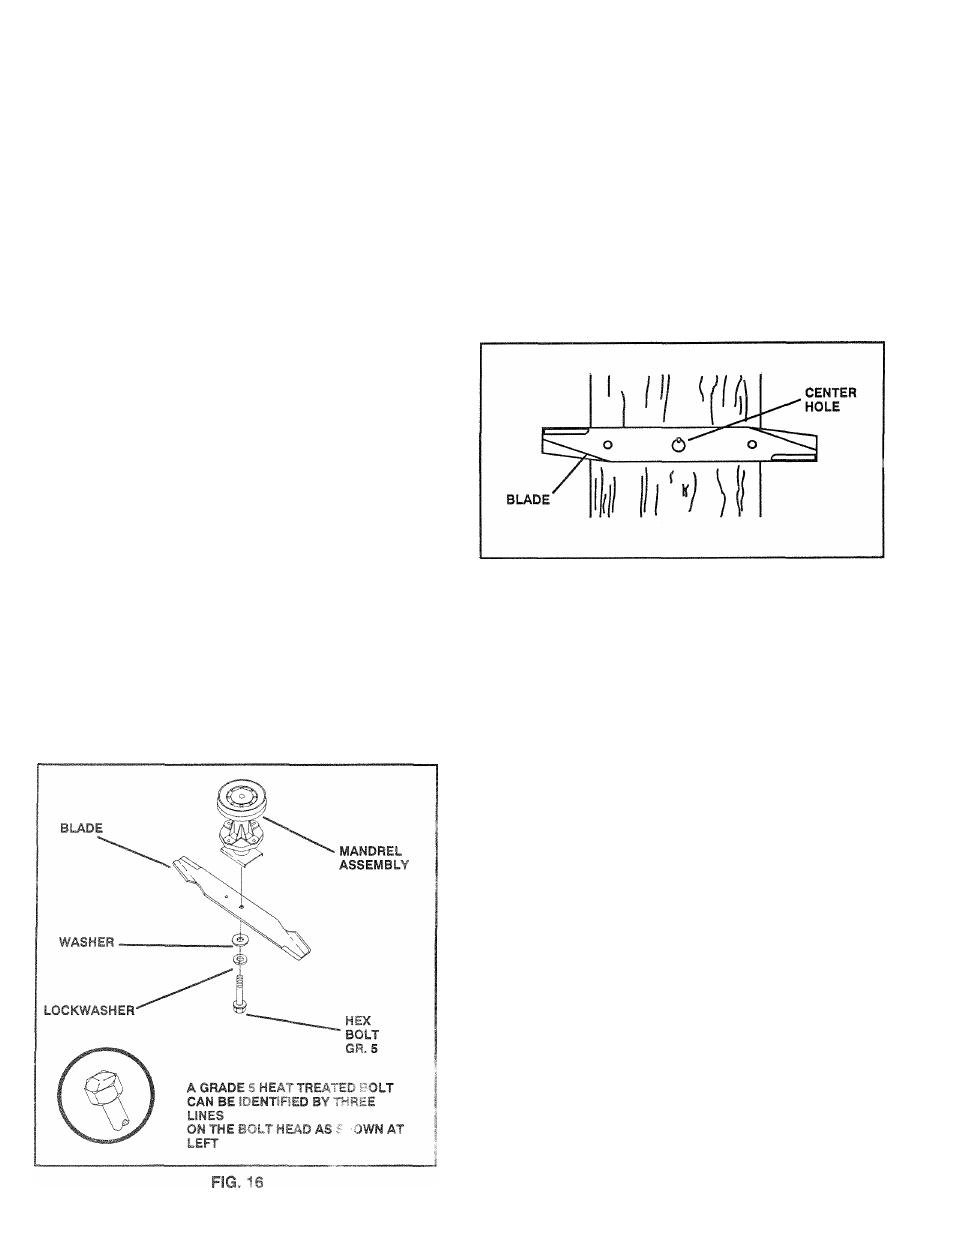
BLADE REMOVAL (See FIG. 16)
• Raise mower to highest position to allow access to
blades.
• Remove hex bolt, lockwasher and flat washer securing
blade.
• Install new or resharpened blade with trailing edge up to
wards deck as shown.
• Reassemble hex bolt, lockwasher and flat washer in exact
order as shown.
• Tighten
bolt
securely (30-35 Ft. Lbs.
torque).
IMPORTANT: BLADE BOLT IS GRADE 5 HEAT
TREATED.
TO SHARPEN BLADE (See FIG. 17)
Care should be taken to keep the blade balanced. An unbal
anced blade will cause excessive vibration and eventual
damage to mower and engine.
• The blade can be sharpened with a file or on a grinding
wheel. Do not attempt to sharpen while on the mower.
• To check blade balance, drive a nail into a beam or wall.
Leave about one inch of the straight nail exposed. Place
center hole of blade over the head of the nail. If blade is
balanced, it should remain in a horizontal position. If
either end of the blade moves downward, sharpen the
heavy end until the blade is balanced.
FIG. 17
4 e