caution – Troy-Bilt 31/2 HP User Manual
Page 37
Attention! The text in this document has been recognized automatically. To view the original document, you can use the "Original mode".
MAINTENANCE
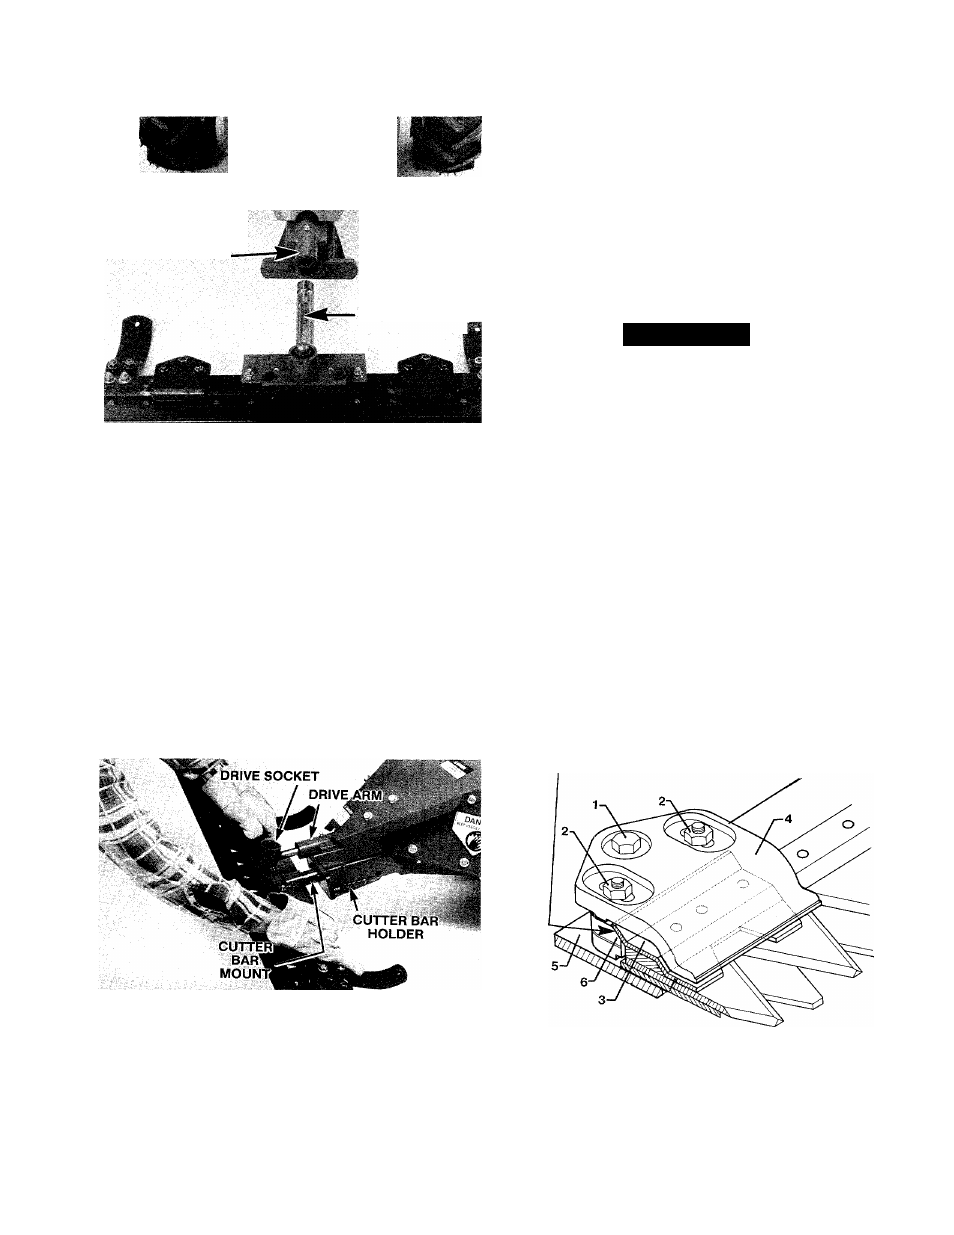
DRIVE ARM IS
ABOVE AND
PARALLEL TO CUTTER
BAR HOLDER
DRIVE SOCKET
SHAFT IS ABOVE
AND PARALLEL
TO CUTTER
BAR MOUNTING!
SHAFT
Photo 5-37: Positions for instaiiing cutter bar.
6. Slide the cutter bar sideways until the shaft on the
drive socket is above and parallel to the cutter bar
mounting shaft.
7. Lift the cutter bar assembly off the floor. Insert the
shaft on the end of the cutter bar mount into the hole
in the forward end of the cutter bar holder. Slowly
begin pushing the cutter bar assembly rearward. Align
the shaft on the drive socket with the hole in the
forward end of the drive arm and continue slowly
pushing the cutter bar assembly rearward. You may
find it helpful to wiggle the ends of the cutter bar
assembly up and down while you’re pushing the
shafts on the cutter bar assembly into their holes.
9. Try to pull the cutter bar assembly forward, off the
mower. If you can pull it off the mower, it wasn’t
pushed in far enough when you installed the crank
pin. You’ll have to remove the crank pin, push the
cutter bar assembly all the way in, and then reinstall
the crank pin.
Blade Guide Maintenance
 CAUTION
Before performing any maintenance on or near
the blade guides, shut the mower’s engine off,
disconnect the spark plug wire and prevent it from
touching the spark plug, and reinstall the plastic
blade protector on the front of the cutter bar blade.
Failure to do so could result in personal injury or
property damage.
Through normal usage, the blade guides will tend
to loosen or wear. You may notice that the blade
guides are loose when the cutter bar has a difficult
time cutting thinner vegetation such as lawn grass.
Also, when the cutter bar is oscillating, you may notice
that it makes more noise than usual.
Every 10 hours of mower operation you should
check the blade guides for adjustment. If they are out
of adjustment, perform the Blade Guide Adjustment
procedure.
BEVELED EDGE
Photo 5-38: instaiiing the cutter bar.
8. Make sure that you push the cutter bar all the way
to the rear. Then insert the longer “leg” of the crank
pin into the hole in the right-hand side of the frame.
Push the crank pin all the way through until its end
comes out of the hole in the left-hand side frame.
Rotate the “handle” of the crank pin counterclock
wise until it snaps under the clip.
Figure 5-39: Side view of the adjustable cutter bar blade
guide.
35