Step 6: add oil to the engine, Step 7: check tire air pressure, Step 8: installing the keyswitch – Troy-Bilt 31/2 HP User Manual
Page 12: Adding oil to the engine
Attention! The text in this document has been recognized automatically. To view the original document, you can use the "Original mode".
Step 6: Add Oil to the Engine
1. Push the mower to a level area.
2. Unscrew the dipstick from the engine. Wipe the
dipstick clean.
3. Insert a clean funnel into the oil fill tube as shown
in Photo 2-11.
4. Pour the oil into the engine. The engine will hold
approximately Vk pints. See Photo 2-11.
NOTE
Please refer to “Specifications” on the inside
rear cover of this Manual to determine the type
of oil to add to the engine.
5. Remove the funnel. Screw the dipstick back into
the oil fill tube. Unscrew the dipstick and check the
oil level. It should be up to the FULL mark on the
dipstick.
If it is not up to this level, re-insert the funnel into
the oil fill tube. Then slowly add more oil until the oil
level is correct. While you’re adding the oil, frequently
pause and check the oil level with the dipstick to
prevent overfilling.
EASY ASSEMBLY
Photo 2-11: Adding oil to the engine.
Step 7: Check Tire Air Pressure
Use an automotive-type tire pressure gauge to
check the air pressure in both tires. The tires may
have been over-inflated for shipping purposes. Make
sure that the air pressure in both tires is the same or
the mower could pull to one side. The correct tire
pressure is from 10 to 20 pounds per square inch (PSI).
If you have a standard start TRAIL BLAZER® Mower, you
have now finished assembling it. Before you begin opera
tion, review Section 1: Safety, and read Sections 3 and 4 to
make sure that you know how to properly and safely operate
your new mower.
If you have an electric start TRAIL BLAZER® Mower, you
will have a few additional assembly steps to complete to
assemble some of the electric starting system parts on the
mower. Please go on to these following steps.
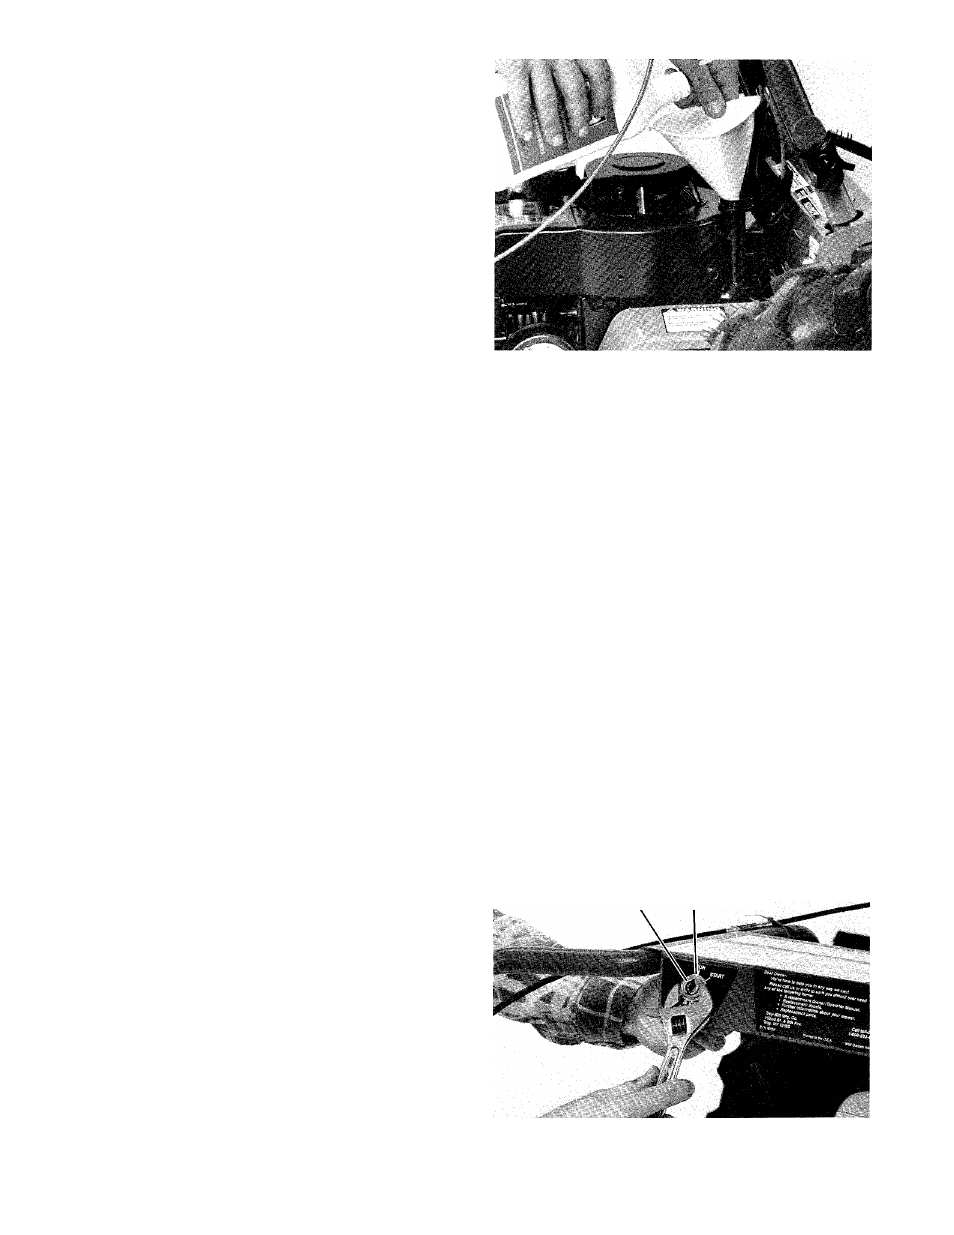
Step 8: Installing the Keyswitch
1. Unscrew the large nut off the keyswitch. Remove
the large toothed lockwasher from the keyswitch.
2. From underneath the mower’s control panel, insert
the threaded end of the keyswitch into the hole in the
rear of the control panel. (The hole for the keyswitch is
marked “ENGINE IGNITION’’.)
3. Place the large toothed lockwasher back onto the
keyswitch. Reinstall the nut on the keyswitch. Use a
13/16-inch wrench (or a large adjustable wrench) to
securely tighten the nut.
NUT LOCKWASHER
Photo 2-12: Installing the keyswitch.
10