Troy-Bilt 31/2 HP User Manual
Page 28
Attention! The text in this document has been recognized automatically. To view the original document, you can use the "Original mode".
MAINTENANCE
7. Place the shims (if any) and the wheel spacer onto
the right-hand end of the wheel shaft. Slide them
inward ail the way.
8
. Use the pair of pliers to snap the klip-ring into the
groove in the right-hand side of the wheel shaft.
Photo S-16: Installing the Cotter Pin.
V-
r'
iv.. -
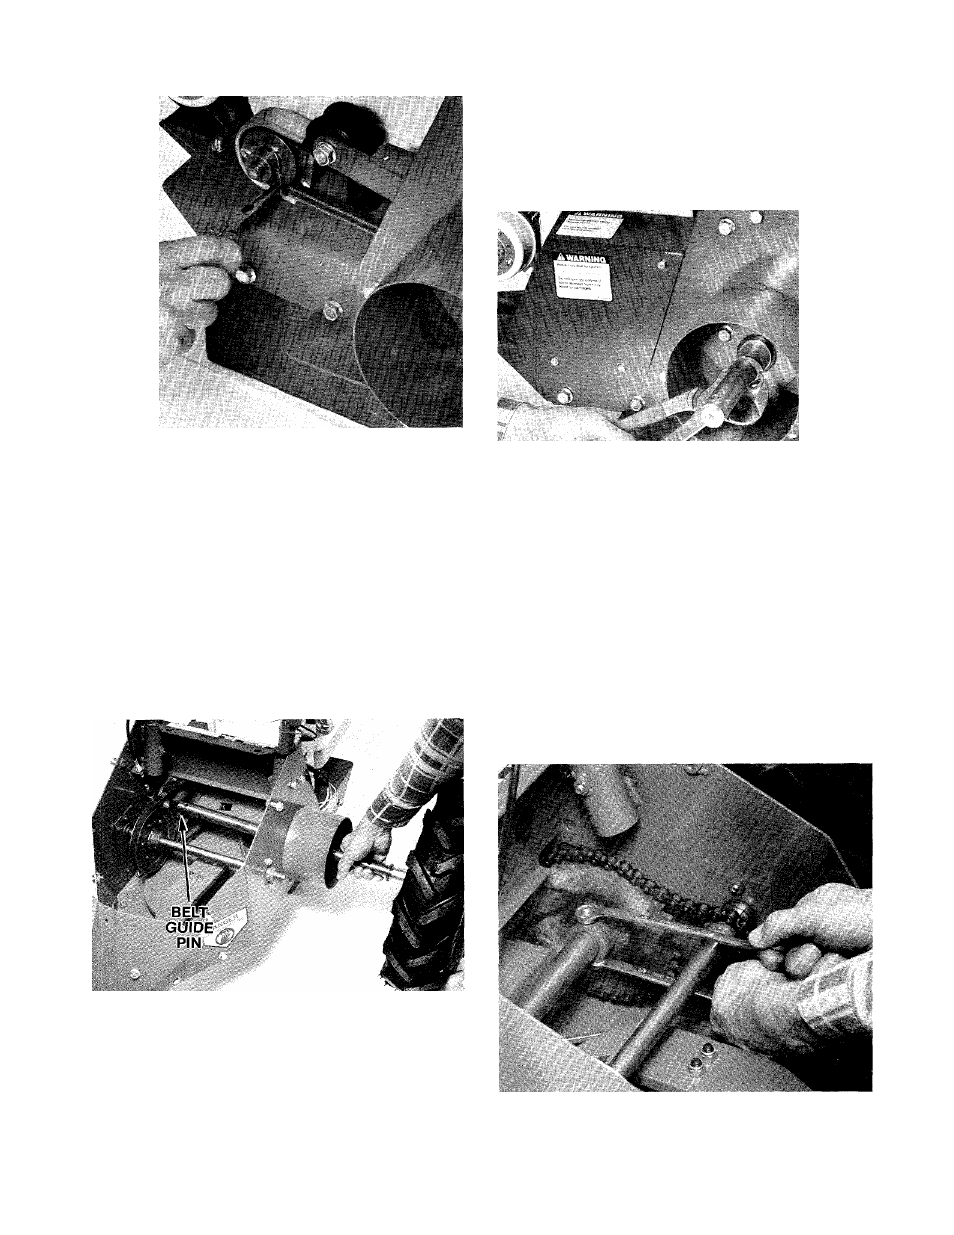
4. Inside the mower’s chassis, loop the forward end
of the wheel drive belt around the large pulley on the
right-hand side of the jackshaft. Make sure that the
wheel drive belt is above the belt guide pin. See
photo 5-17.
5. Then slide the wheei shaft to the right, through the
loop of the belt, into its respective hole in the right-
hand frame plate. Make sure that you push the wheel
shaft to the right, as far as it will go.
6
. Reinstall the spacer and shim(s) (if any) on the
right-hand end of the jackshaft. Slide the jackshaft to
the right into its bushing in the right-hand frame plate.
Photo 5-17: Reinserting the wheel shaft and jackshaft into
the right-hand frame plate.
Photo 5-18: Reinstalling the klip-ring on the axle shaft.
9. Reinstall the wheel on the right-hand side of the
wheei shaft.
10. Remove the wooden blocks from beneath the
mower’s chassis.
11. Align the holes in the hub of the large sprocket
with the hole through the left-hand side of the wheel
shaft. Insert the bolt through these holes and place
the nut on the end of the bolt. Use the two V
2
-inch
wrenches to very securely tighten the nut.
Photo 5-19: Reinstalling the sprocket on the jackshaft.
26