Cutter bar drive main adjustment, Warning – Troy-Bilt 31/2 HP User Manual
Page 35
Attention! The text in this document has been recognized automatically. To view the original document, you can use the "Original mode".
MAINTENANCE
4.
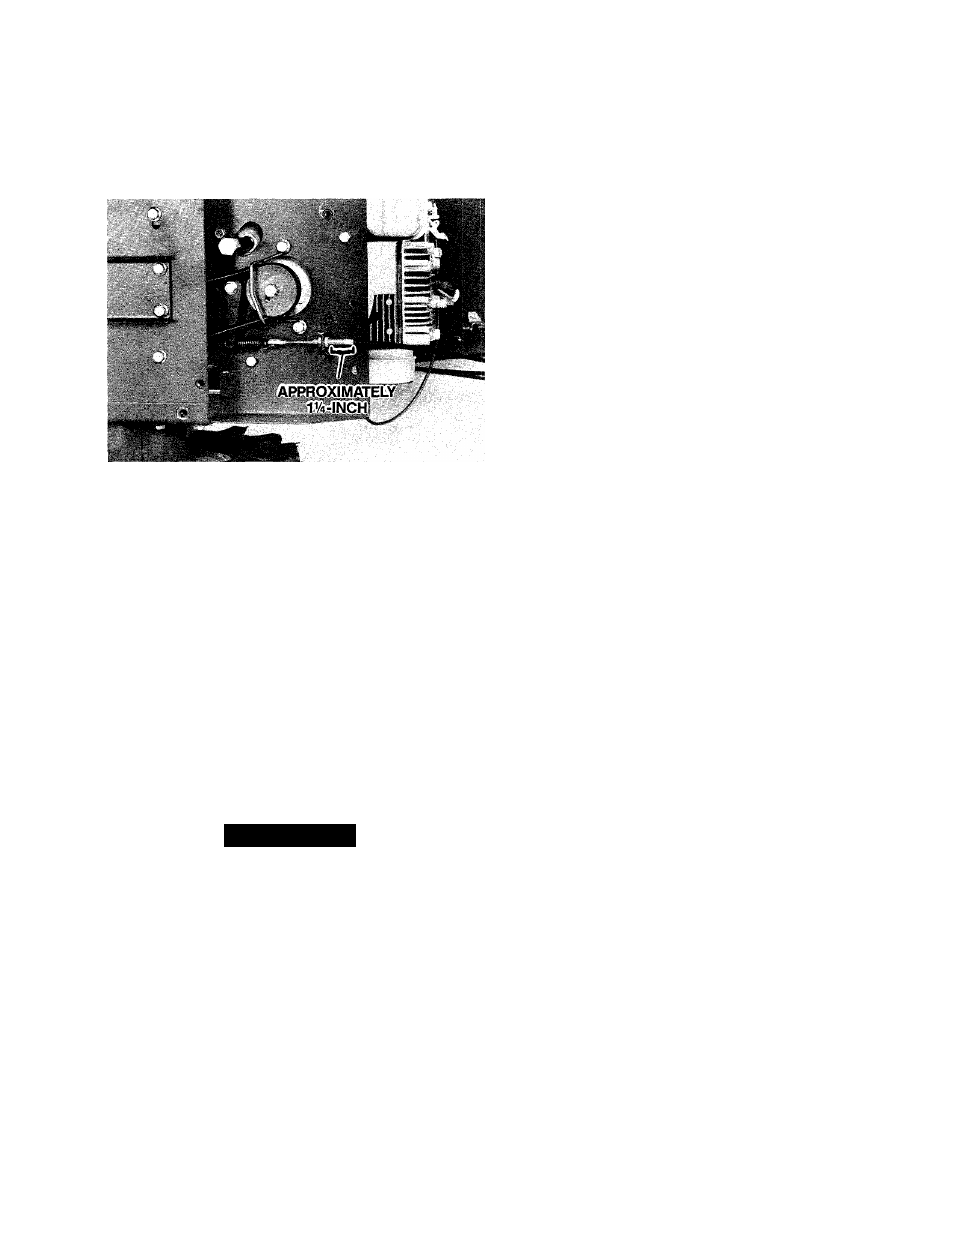
Turn the rear jam nut on the adjuster until you get
a dimension of approximately 1V4-inch between the
rear of the jam nut and the top of the adjuster as
shown in Photo 5-34.
Photo 5-34: Setting the Lower Adjuster.
5. Use a Vz-inch open-end wrench to hold the rear
jam nut in place while you tighten the forward jam nut
with another Vz-inch open-end wrench. Don’t over
tighten the jam nut or you could break the threaded
end of the control cable.
6. Perform the Cutter Bar Drive Check. If the mower
passes this check, you are finished. If the mower
doesn’t pass, go on to perform the Cutter Bar Drive
Main Adjustment.
7. Reinstall the cutter bar belt cover and cable
protector beneath the engine deck.
Cutter Bar Drive Main Adjustment
^WARNING
You are about to perform an operational check.
Be sure that:
• You remove the plastic blade protector before
starting the engine.
• No children or other bystanders are nearby.
• You start the engine and perform this check
outdoors.
• The mower is pointed in a safe direction.
Failure to follow these instructions could result in
personal injury or property damage.
3. If, during the Cutter Bar Drive Check, you found
that the cutter blade did not oscillate when you
engaged the Blade Drive Lever, there is not enough
tension on the cable. Increase it as follows:
a. Start the mower’s engine and allow it to warm
up.
b. Open the upper adjuster by turning the barrel
clockwise (as viewed from above) until the cutter
bar blade just begins to oscillate.
NOTE
If you’ve unscrewed the upper adjuster as far as
you can and the cutter bar still does not oscil
late when you engage the Blade Drive Lever, shut
the engine off and repeat the Cutter Bar Drive
Initial Setting. However this time increase the
dimension shown in Photo 5-34 as necessary to
take up the excess slack in the system.
c. Then turn the adjuster barrel counterclockwise
(as viewed from above) until the cutter bar blade
stops oscillating.
d. Shut the engine off.
e. Hold the barrel in place while you tighten the
jam nut.
f. Perform the Cutter Bar Drive Check to make sure
that the adjustment is correct.
4.
If, during the Cutter Bar Drive Check, you found
that the cutter bar oscillated before you engaged the
Blade Bar Drive Lever or that the cutter bar continued
to oscillate after you released the Blade Drive Lever,
there is too much tension on the cutter bar drive
cable. Reduce tension as follows:
a. Start the mower’s engine and allow it to warm
up.
b. Close the upper adjuster by turning the barrel
counterclockwise (as viewed from above) until the
cutter bar just stops oscillating.
c. Shut the engine off.
d. Hold the adjuster barrel in place dnd tighten the
jam nut.
e. Perform the Cutter Bar Drive Check to make
sure that the adjustment is correct.
1. Perform the Cutter Bar Drive Check.
2. Use two %-inch open-end wrenches to loosen the
jam nut on the cutter bar drive cable’s upper adjuster.
33