Jump starting, Adjustments, Neutral adjustment (speed control lever) – Ariens 009-1648 User Manual
Page 23: Caution
Attention! The text in this document has been recognized automatically. To view the original document, you can use the "Original mode".
Jump Starting
Jump starting, battery charging or replacement is
required when the starter motor will not crank the
engine.
To jump start engine:
1. Ensure battery is not frozen. If the fluid is frozen,
remove battery from unit and allow it to thaw before
charging.
2. The unit used for jump starting should have a 12
volt battery with at least 500 cold cranking amperes
and a negatively grounded system.
UNIT MOVEMENT can result in death or serious
injury. NEVER jump start unit directly to the starter
or starter solenoid. Unit can move forward or
backward and injure the person jump starting unit.
3. Connect the positive (+) jumper cable to the
positive terminal of the discharged battery.
4. Connect the other end of the same jumper cable to
the positive (+) terminal of the booster battery.
5. Connect one end of the second jumper cable to the
negative (-) terminal of the booster battery.
6. Make the final jumper cable connection to the
engine block or the furthest ground point away from
the discharged battery.
7. Follow Starting and Shut-Off steps in Operation
section.
8. Remove jumper cables in the reverse order of their
connection. Remove cable from: the ground point,
then the negative (-) terminal of the booster battery,
then the positive (+) terminal of the booster battery,
and finally the positive (+) terminal of the
discharged battery.
A
djustments
Ahens recommends that adjustments be made by the
Ariens dealer. Should the decision be made to make
the following adjustments on the unit yourself, Ariens
recommends calling the dealer for answers to any
questions that might arise.
Neutral Adjustment (Speed Control Lever)
1. Stop the engine. Remove the ignition key. Push the
PTO knob in the “OFF” position.
A
CAUTION
PREVENT personal injury! ALWAYS KNOW that
jack(s) or blocks used are stable, strong and will
support the weight of the unit.
3.
Place jack(s) under rear transaxles only. If jack(s)
are not available, place support blocks under both
transaxles at the rear of unit.
Raise the rear drive wheels off the floor. Remove
side shrouds. Place aside for replacement.
Start the engine and run it at part throttle.
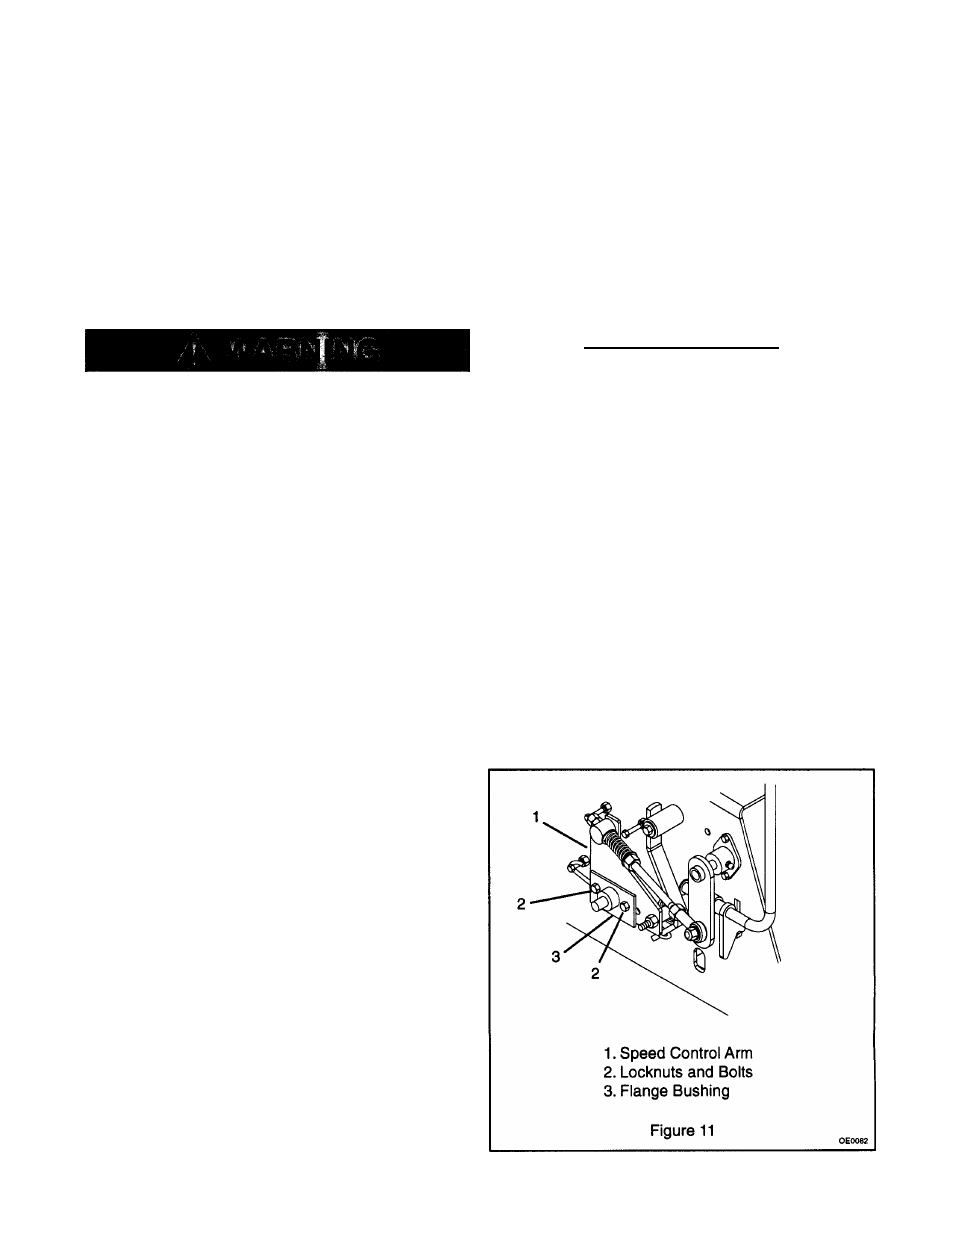
Loosen the two lock nuts holding the Speed
Control Arm (Figure 11).
Turn and loosen the connection to the Speed
Control Arm with the Flange Bushing untii the
wheel stops rotating.
Lock the Speed Control Arm in place by tightening
the two lock nuts.
8. Repeat procedure for other side of unit.
Ariens® EZRider™ Orig. 1/98
19