Roll hemming – SINGER WSL7234 User Manual
Page 19
Attention! The text in this document has been recognized automatically. To view the original document, you can use the "Original mode".
5. ROLL HEMMING
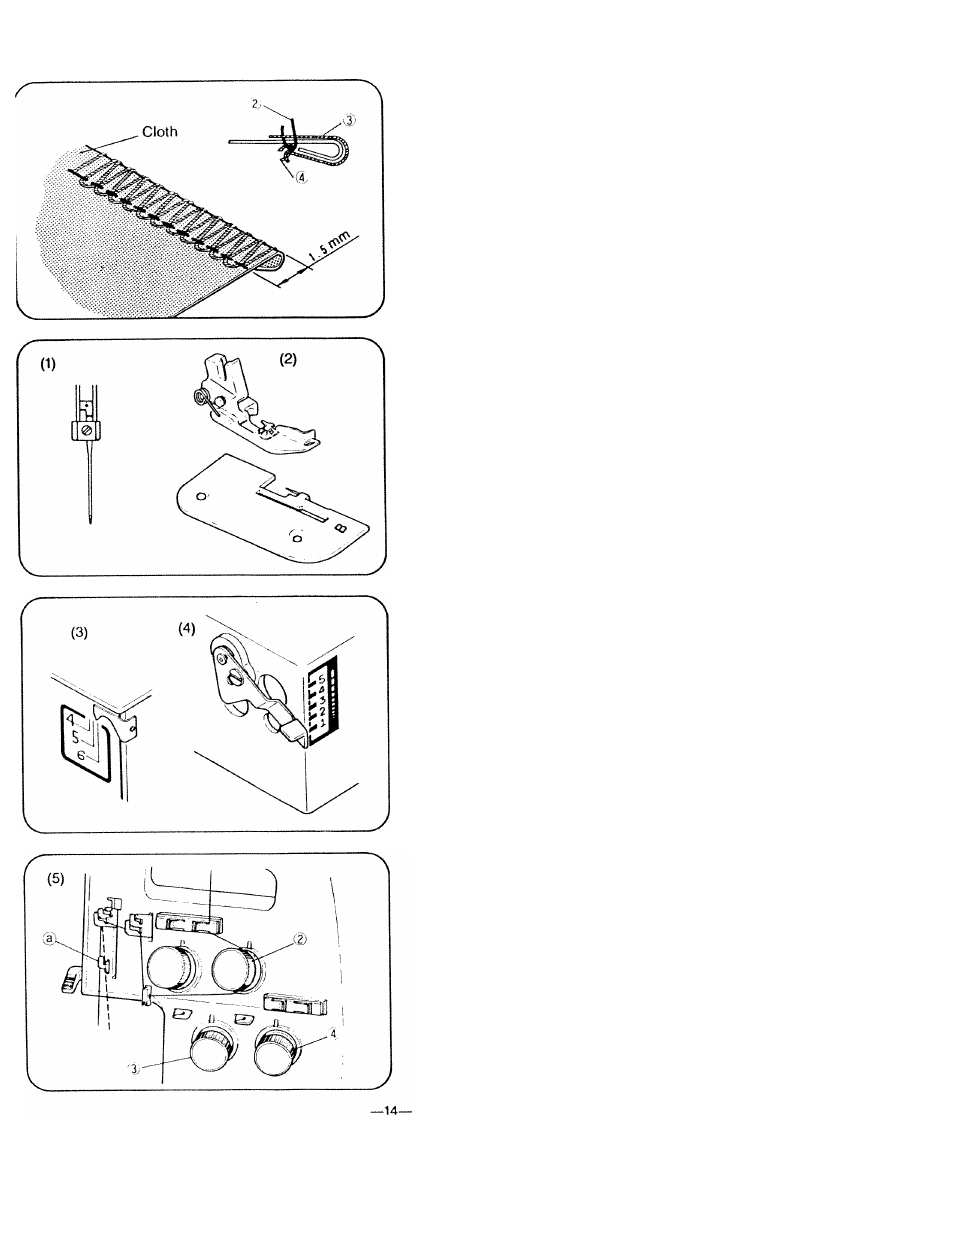
Roll hemming is achieved by adjusting the thread
tensions so that the fabric is overlocked, and
folded under to 1.5 mm in width.
It is ideal for use with thin materials.
(1) Remove the left needle. (Sew only with the
right needle)
(2) Change the presser foot and the needle plate
for roll hemming.
For roll hemming sewing, use the presser foot
marked “B” and the needle plate "B”. (The presser
foot "A” and the needle plate “A” are for normal
sewing).
(3) Set the bite width between 45and 5.5.
(4) Set the stitch length adjuster to 1.
(5) The standard thread tensions are as follows;
Dial®; Needle thread............................1 -4 tension.
Dial (3): Upper looper thread.............. 1 ~ 4 tension.
Dial®: Lower looper thread.................5~8tension
For roll hem sewing, pass the nedle thread to
the
left
side
(solid
line)
of
thread
guide @ illustrated. [For normal sewing, pass
it to the right side (dotted iine) of thread
guide @.]
At the begining of sewing, gently pull the end of
the thread chain.
For roll hem sewing, pull the material gently
towards the rear of the machine, and you’ll get
the neater stitches.