6. preparation for sewing and checking – SINGER WSL7234 User Manual
Page 11
Attention! The text in this document has been recognized automatically. To view the original document, you can use the "Original mode".
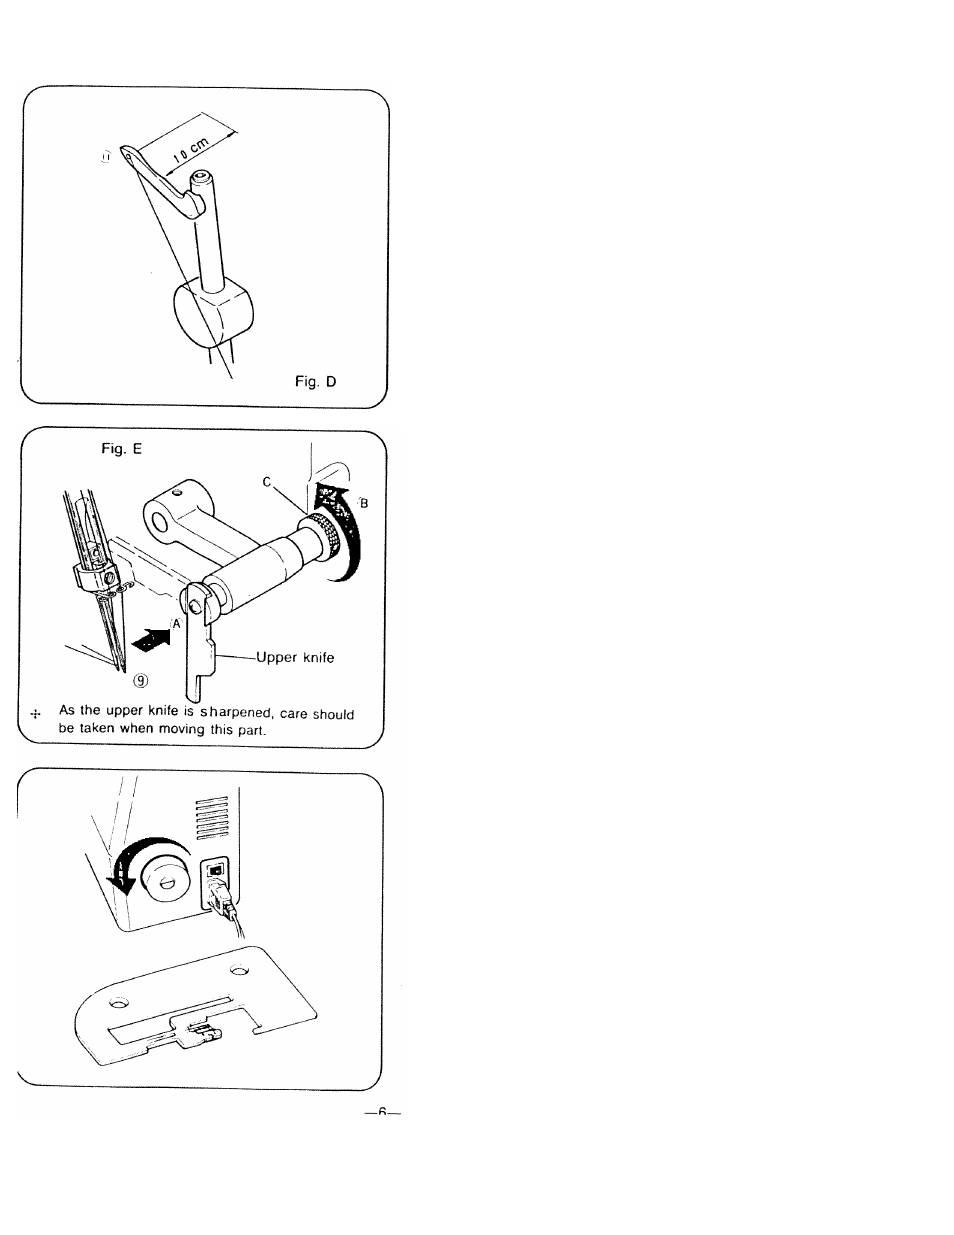
(2) Upper looper threading (B)
• Bring the upper looper to its lowest position by
turning handwheel toward you.
• Draw thread from spool and pass it, through
guide
®
of the thread stand and then, in order,
through guides ® ~ ® (Fig. A).
• Thread the hole of upper looper(TJjusing tweez
ers. Cut the thread leaving about 10cm (4") of
spare thread (Fig. D).
• Close the front cover.
(3) Right needle threading (C)
• For ease in threading, push the upper knife
holder screw from A, side with the forefinger of
your left hand * and grasp the right end of the
holder ijC and turn it in the direction of arrow
b
with your right hand. (Fig. E)
• Take the thread drawn from spool, and pass it
through thread guide ®~(D, then thread to
the right-hand needle’s eye® from front to
back.
Cut the thread leaving about 10cm (4") of spare
thread. (Fig. A)
(4) Left needle threading (D)
• Take the thread drawn from spool, and pass it
through thread guides
'Z)~^4),
©-is), and thread
the left-hand needle's eye f£) from front to back
(Fig A. E).
"
2-6. Preparation for Sewing and
Checking.
• Check that no thread slips off or snaps.
• Confirm that the upper knife moves against the
lower knife correctly by turning the handwheel
slowly towards you. If it is not correct, check if
there is any fabric or waste thread between
knives.
• Turn the handwheel towards you with your right
hand to check that the thread winds around the
stitch finger of the needle plate.
If the thread doesn’t wind around the stitch finger
of the needle plate, check if any threads are
threaded incorrectly.