Construction details, Zippers, Adjusting the zipper foot – SINGER 719 User Manual
Page 25: Corded seams
Attention! The text in this document has been recognized automatically. To view the original document, you can use the "Original mode".
construction details
ZIPPERS
At
the
notions
counter
in
your
Singer
Sewing
Center,
you
will
find
many
different
kinds
of
zippers,
one
of
v^hich
will
be
just
right
for
whatever
you
wish
to
sew.
How
the
zipper
is
inserted
will
depend
on
the
type
of
garment
and
the
location
of
the
zipper.
The
zipper
package
will
contain
easy-to-follow
instruc
tions,
And,
if
you
use
the
zipper
foot,
you
v/ill
find
it
easy
to
form
an
even
line
of
stitching
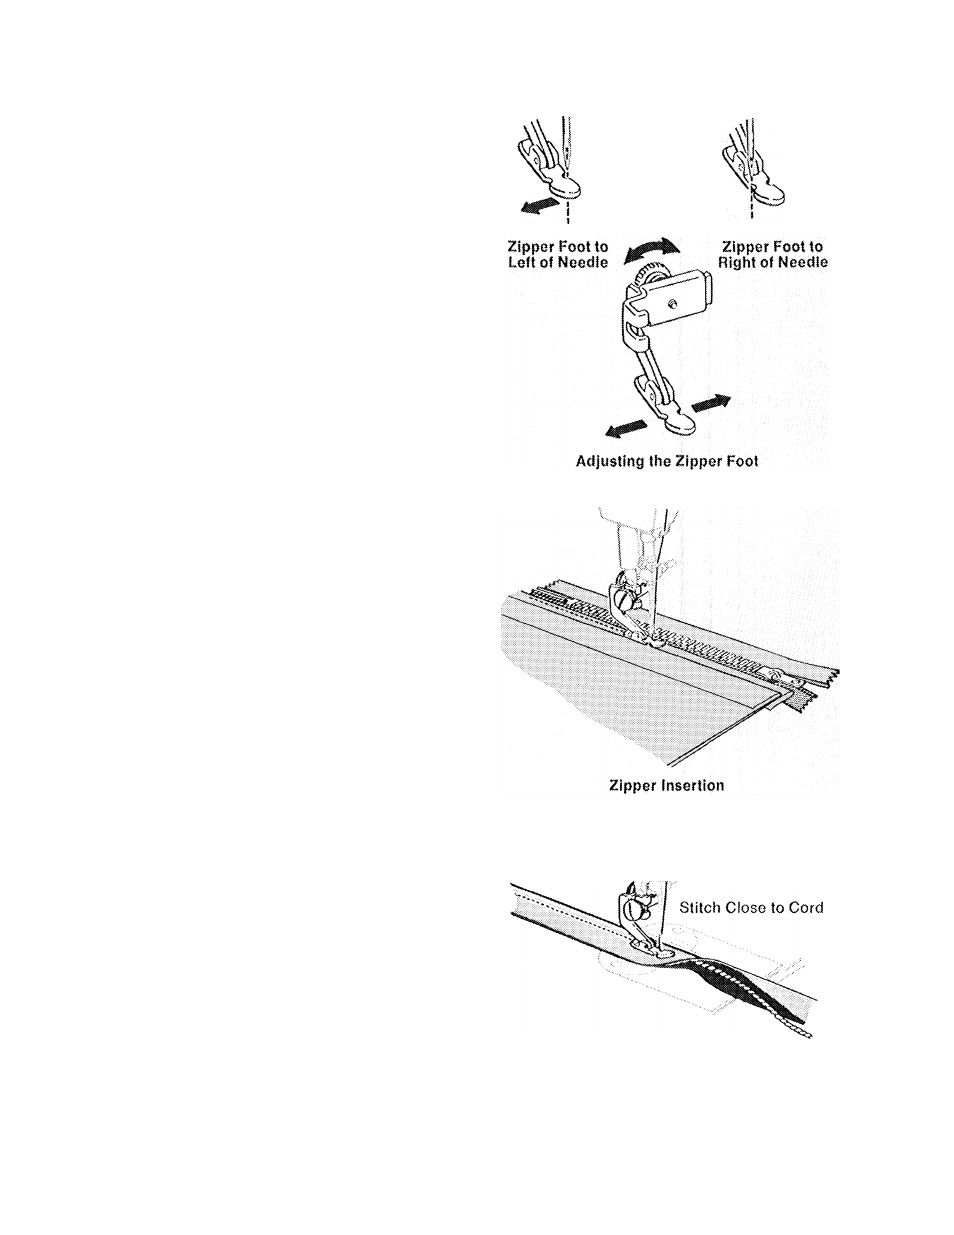
close to the zipper.
• Stitch Control: 10 to 15
• Throat Plate
• Zipper Foot
Adjusting the Zipper Foot
When the zipper is to the
right
of the needle:
1.
Loosen
the
thumb
screw
at
the
back
of
the
foot,
and
slide
the
foot
to
the
left
of
the
needle.
2.
Check
the
position
of
the
foot
by
turning
the
hand
wheel
to
lower
the
needle
into
the
side
notch
of
the
foot,
making
sure
it
clears
the fool.
3.
Lock
the
foot
into
position
by
tightening
the
thumb screw.
4.
Lower
presser
bar.
Make
sure
the
needle
clears the foot on all sides of the notch.
When
the
zipper
is
to
the
left
of
the
needle,
adjust
the
foot
to
the
right
of
the
needle
in
the
same way.
CORDED SEAMS
The
corded
seam
Is
a
professional
treatment
for
slipcovers,
children’s
clothes,
blouses,
and
lingerie.
To
make
a
corded
seam,
make
the
welting
first
(or
buy
it
ready-made
at
a
notions
counter),
then
stitch
it
into
the
seam.
For
both
steps,
use
the
zipper
foot
so
that
you
can
place the stitching close to the cord.
Making the Welting
23